In this tutorial you'll learn how to implement Blips music packs using nothing more than the Godot game engine.
You'll be able to initiate and stop tracks, as well as enable and disable its layers. If you prefer to have a more granular control over these and other audio tasks we recommend the use of a middleware tool such as FMOD. If you decide to use FMOD check out our tutorial on how to implement music packs in FMOD (doesn't cover integration with Godot).
The implementation detailed here is quite simple. It mostly consists of setting up some Godot's AudioStreamPlayers and using a script to control them. This script will control both the playback of the track (start and stop) and the enabling and disabling of the track's individual layers. The latter will be done by controlling each layer's volume: When the layer is enabled, it will play at full volume, when it's disabled it will still be playing but with its volume set to an inaudible range (muted). By using the layer's volume to control its enabled/disabled state, we will also be able to make the transition between states smoother by applying fades, as enabling and disabling layers abruptly would sound jarring in most situations.
Below are the steps I took to create a Godot project that makes full use of a Blips music pack "vertical layers" system. You can find the complete project on our GitHub account.
I wrote the script in GDScript, as such you won't need to use the Godot Mono version for C# language support or use C++. Since I prefer statically typed languages, the code will be written with type annotations (an optional feature of GDScript).
If you don't have a Blips music pack yet to follow along, make sure to check out our free music packs!
The Godot version used to write this tutorial was the 3.5. If you end up having a compatibility problem with newer versions let us know so we can update this tutorial or release a new one!
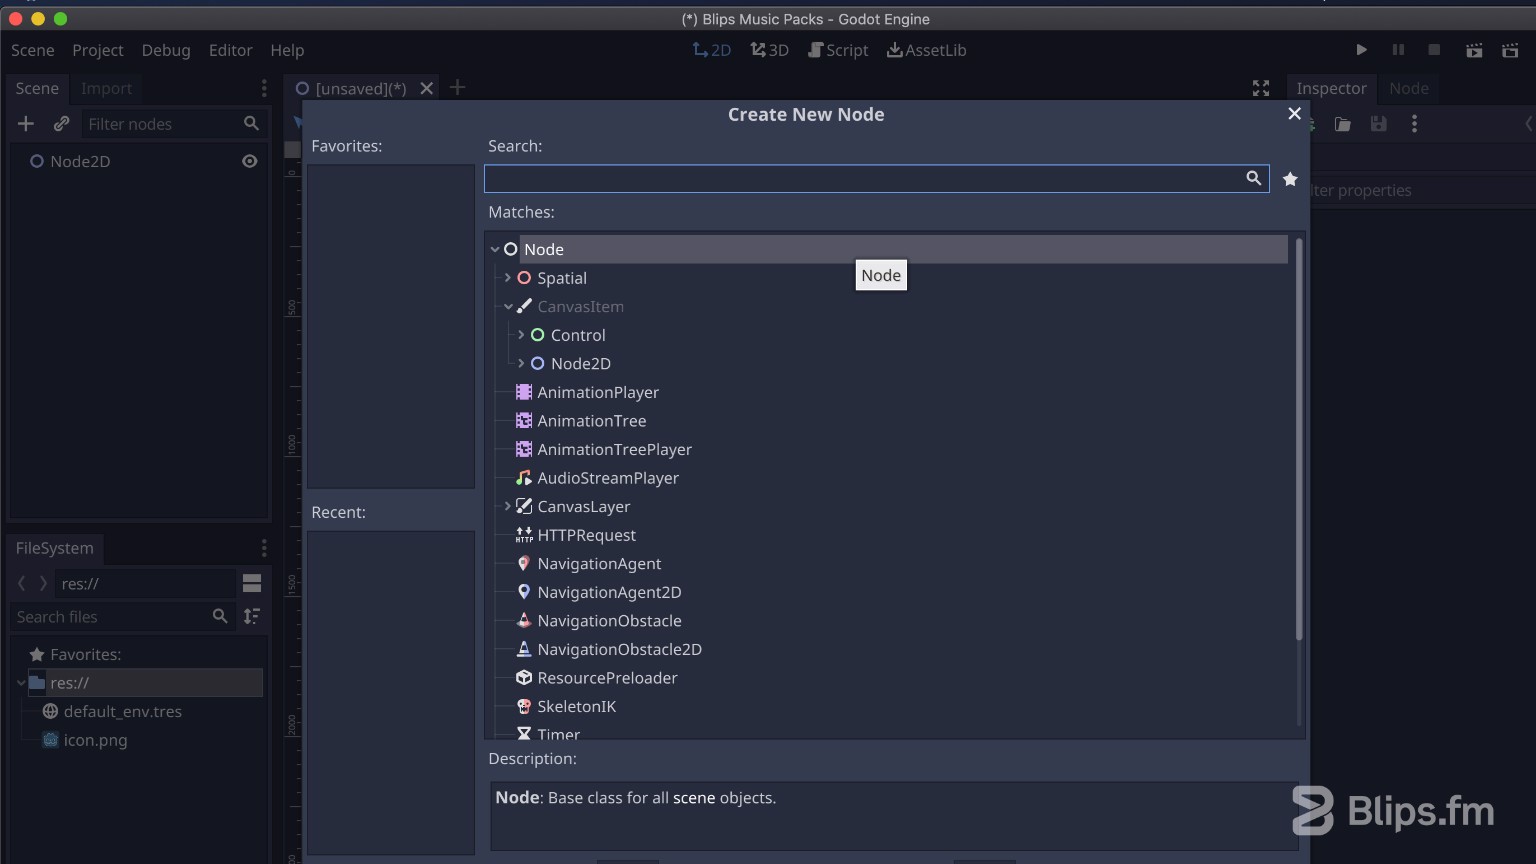
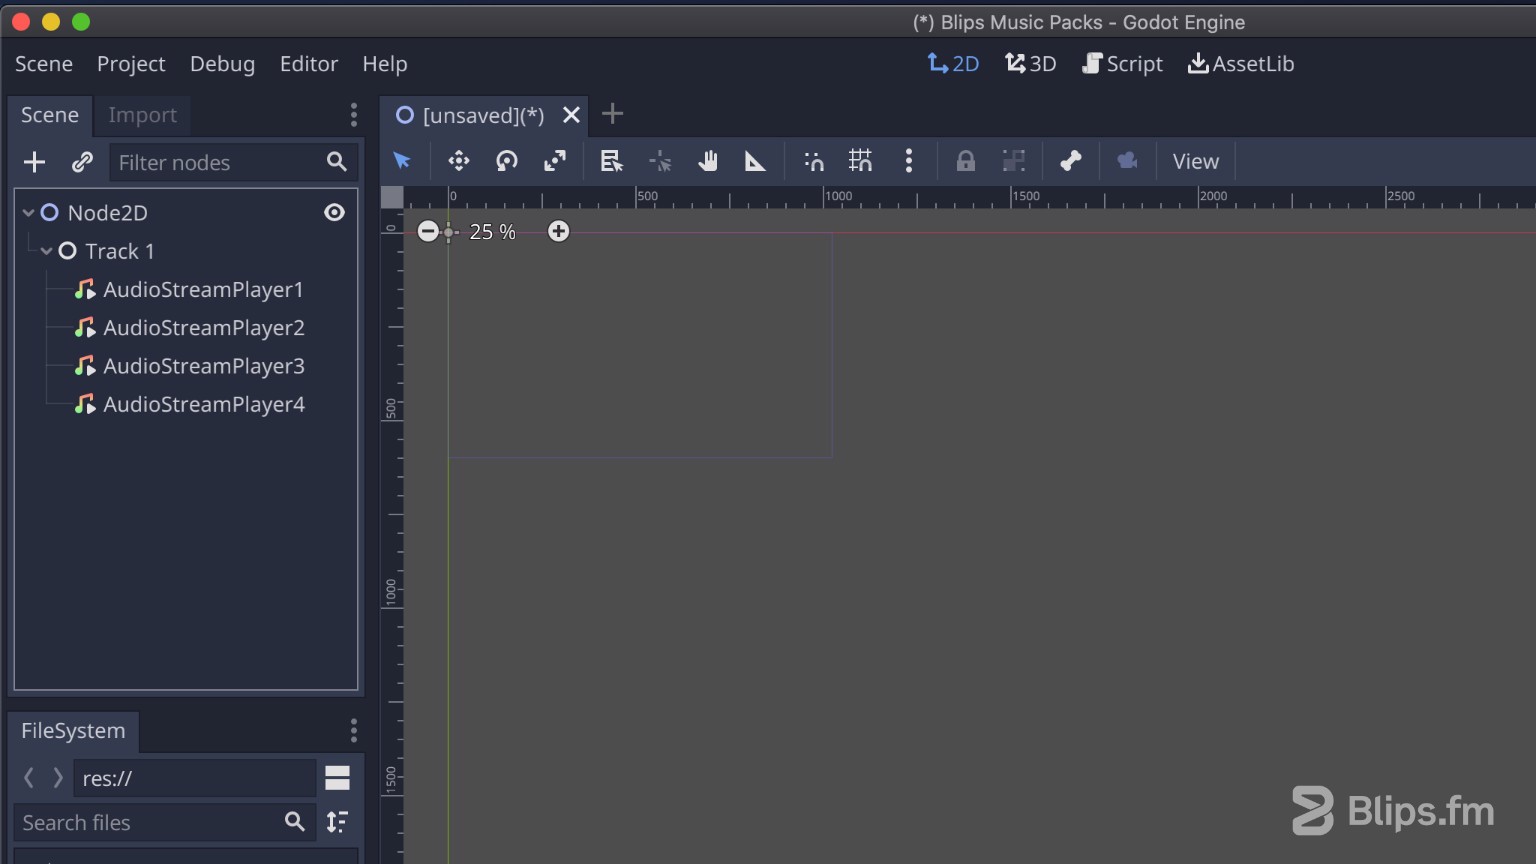
- If you're starting with a blank project you can choose either a 2D or 3D scene as the root node, then create a new node by pressing the “add button” (plus icon) on the scene tab. Select the base node. This node will be used to group our AudioStreamPlayer nodes. Give a name to this node by double-clicking it. I'll name it Track 1 as this is what this node will control.
- As children of this node, add as many AudioStreamPlayer nodes as the number of layers of a track (these nodes will only represent one full game music track). I'll use a Pack M in this example, the Blips Pack M has two tracks with four layers each, as such I will add four AudioStreamPlayer nodes. To have a more organized view give these nodes a number corresponding to the layer number after the default name.

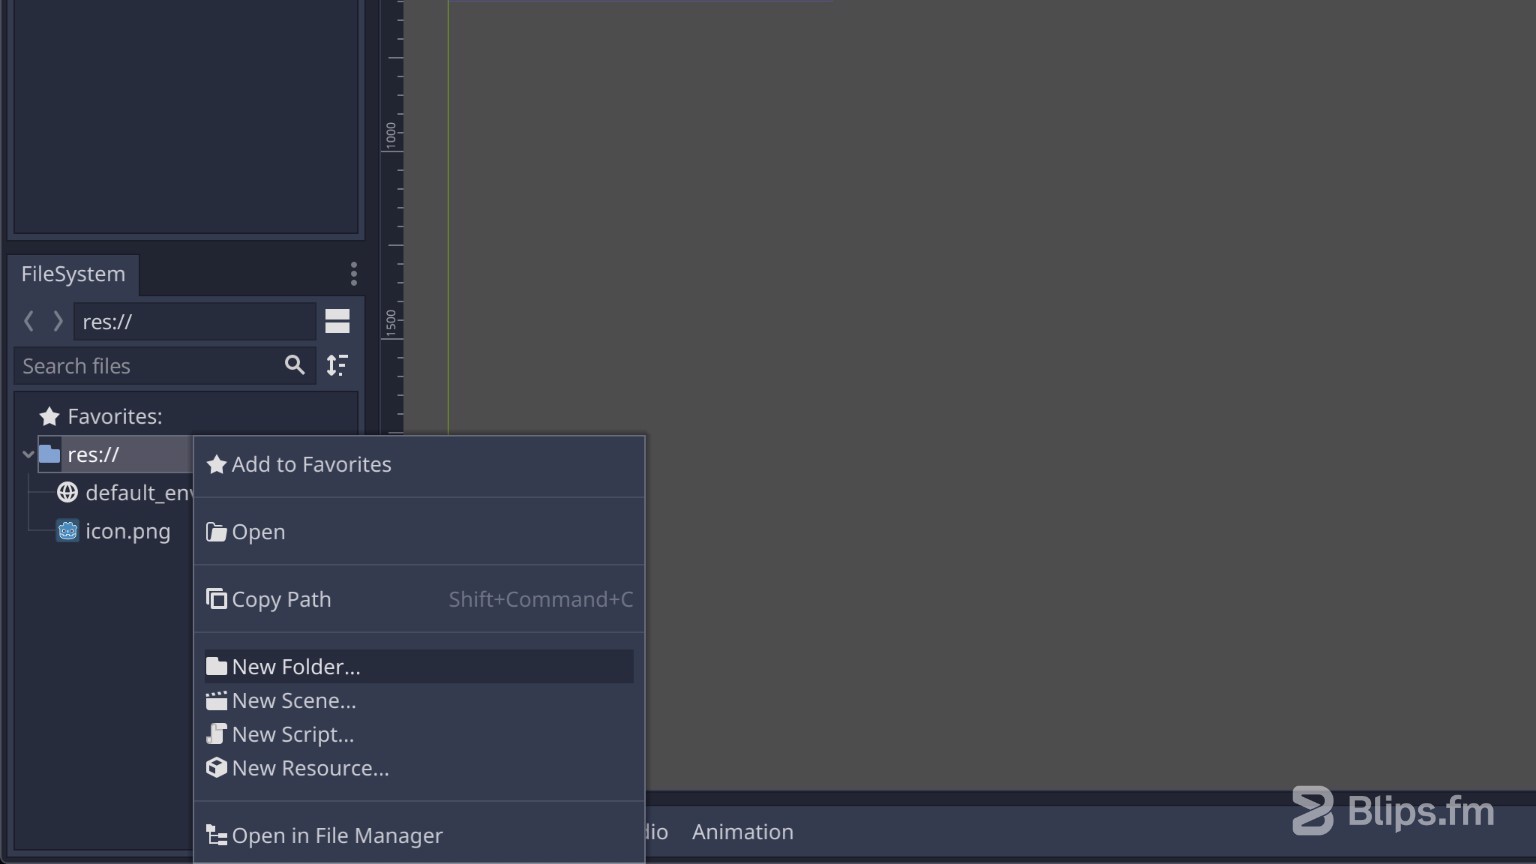
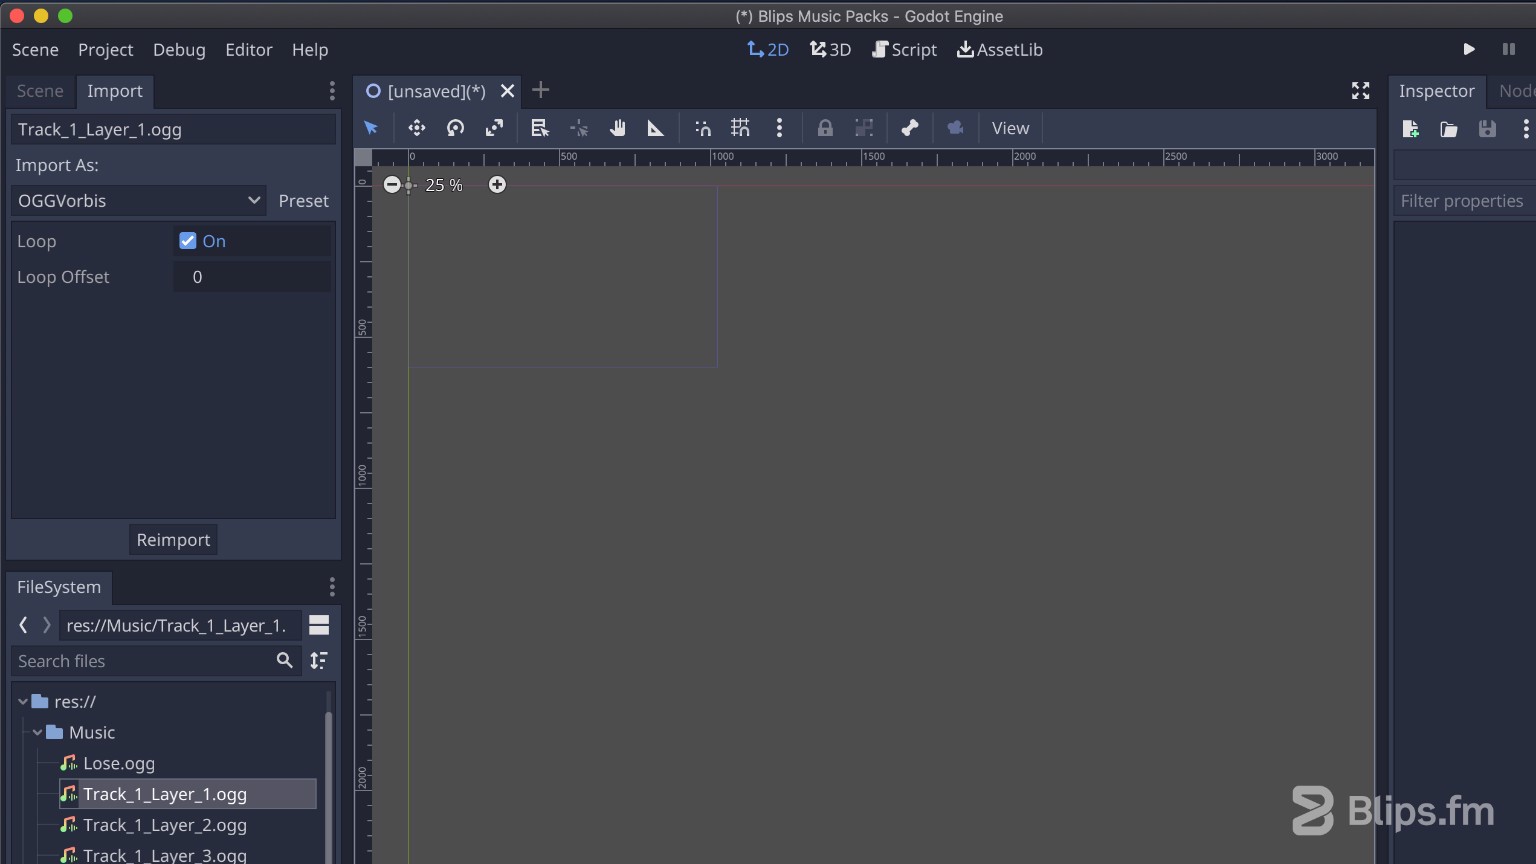
- Add the audio tracks to your project using the Godot's file browser. Again to have a more organized project you can create a folder to hold them. To do this, right-click the “res://” folder and click “New Folder” I'll name this folder “Music” but you can name it “Audio” or whatever you like. From your file browser you can drag and drop the audio files into this folder. We recommend the use of OGG files as they work great for looping music, have a small size, and present good quality.
- Make sure that each audio file has looping enabled by first selecting it and then going to the “Import” tab.
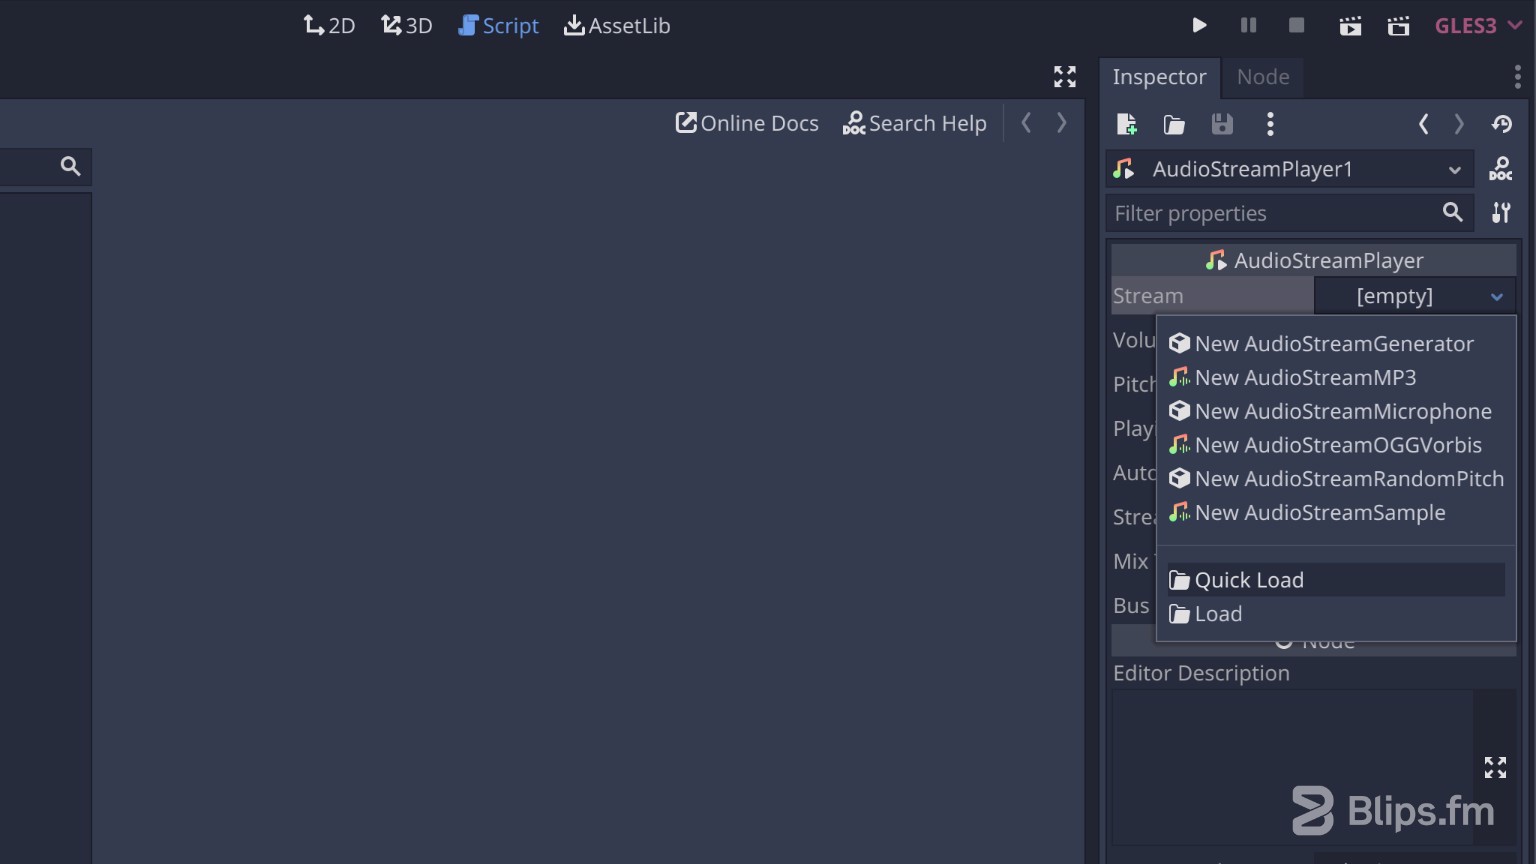
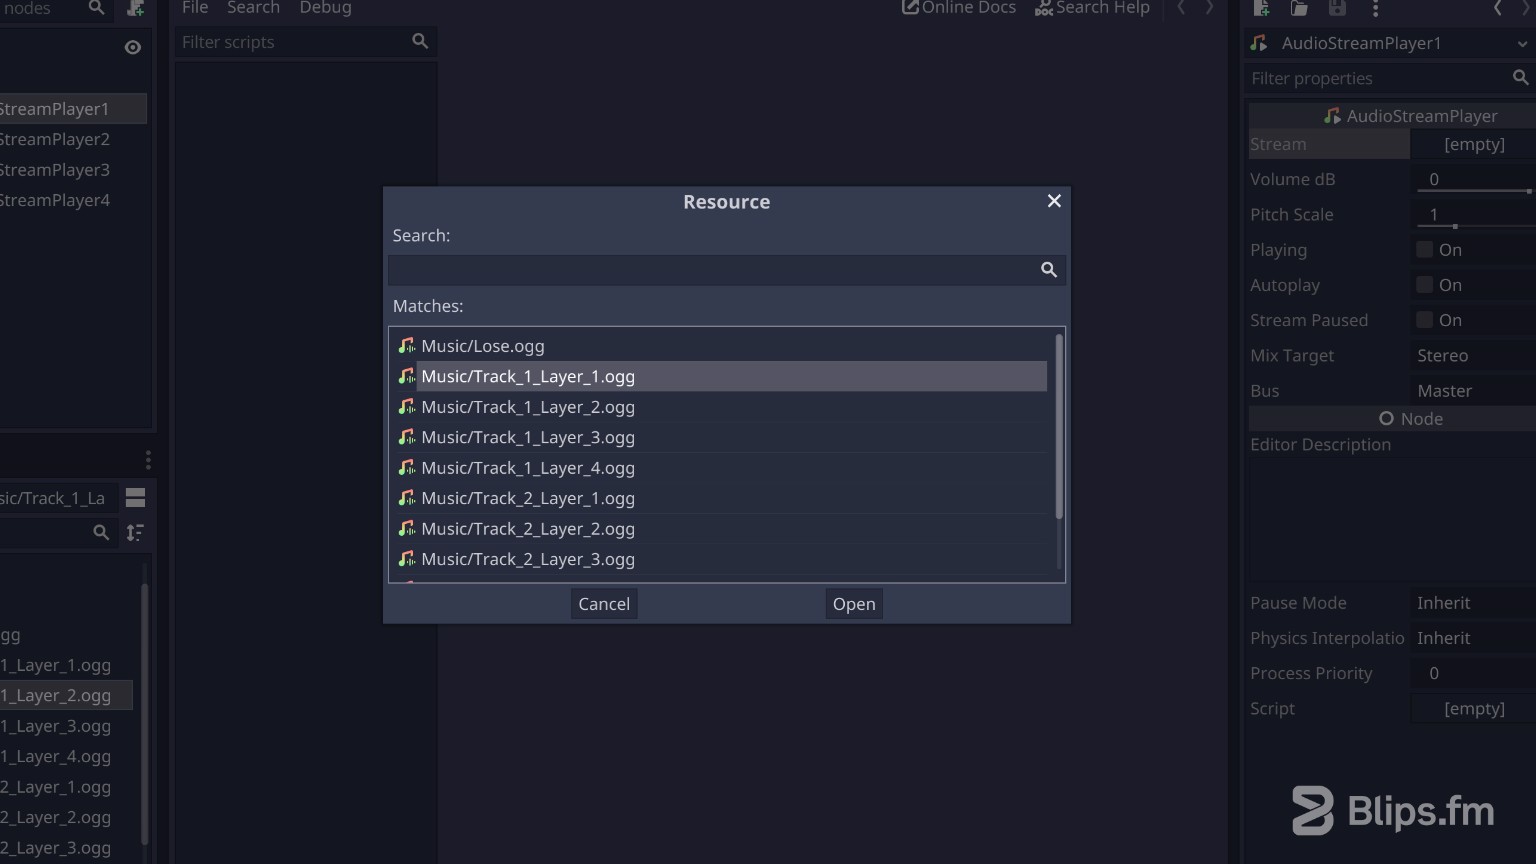
- Select the first "AudioStreamPlayer". On the inspector panel click the field "Stream" and select "Quick Load". A new window will appear with a list of files matching the AudioStreamPlayer accepted stream formats (the ogg files in our case). The first AudioStreamPlayer represents the first layer of our track. Assign the layer 1 of the track to the "AudioStreamPlayer1", layer 2 to "AudioStreamPlayer2" and so on...
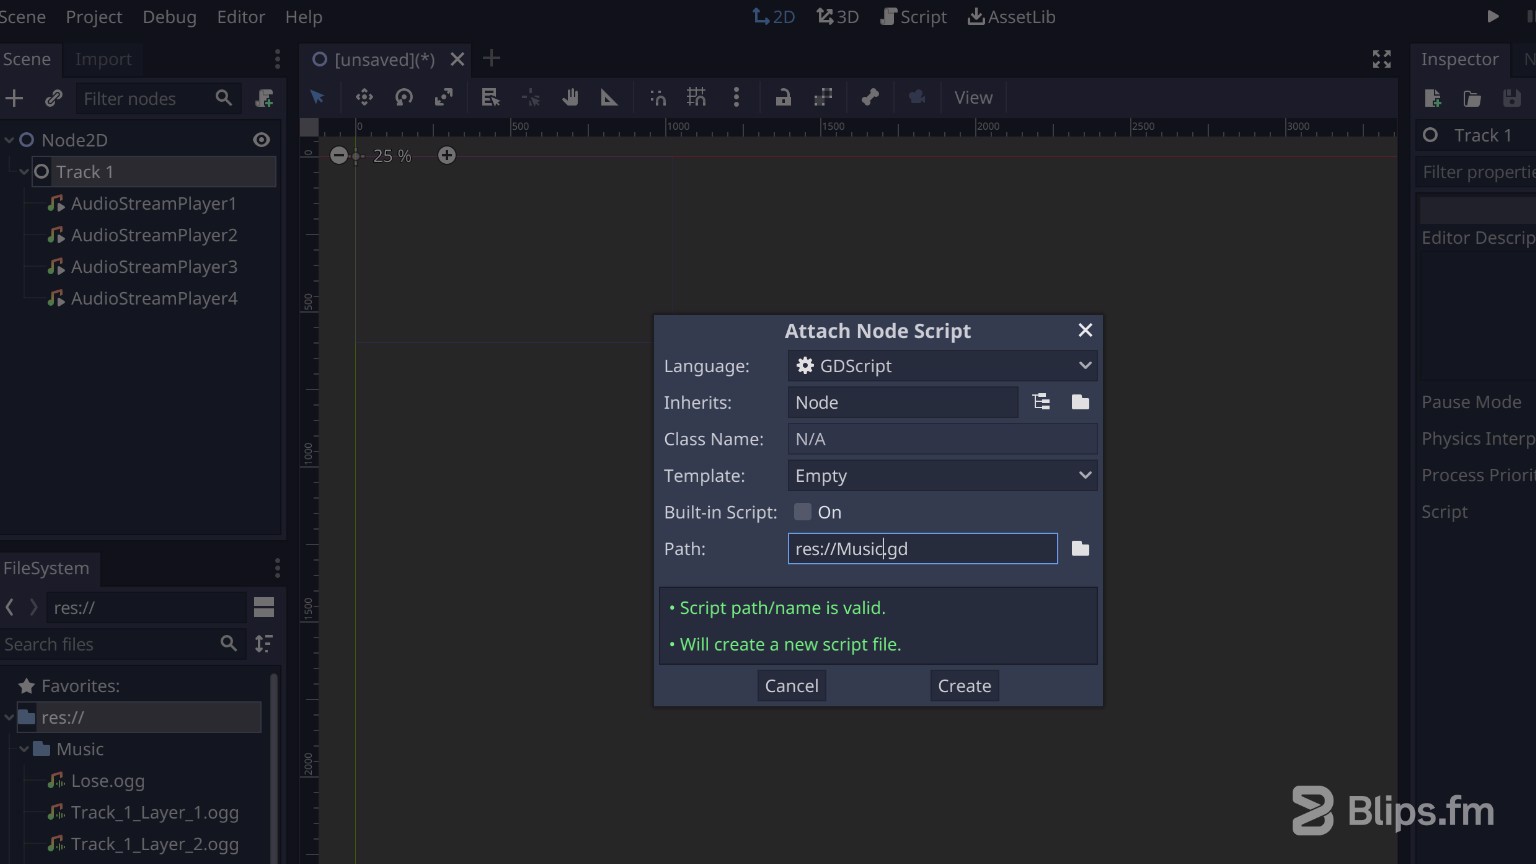
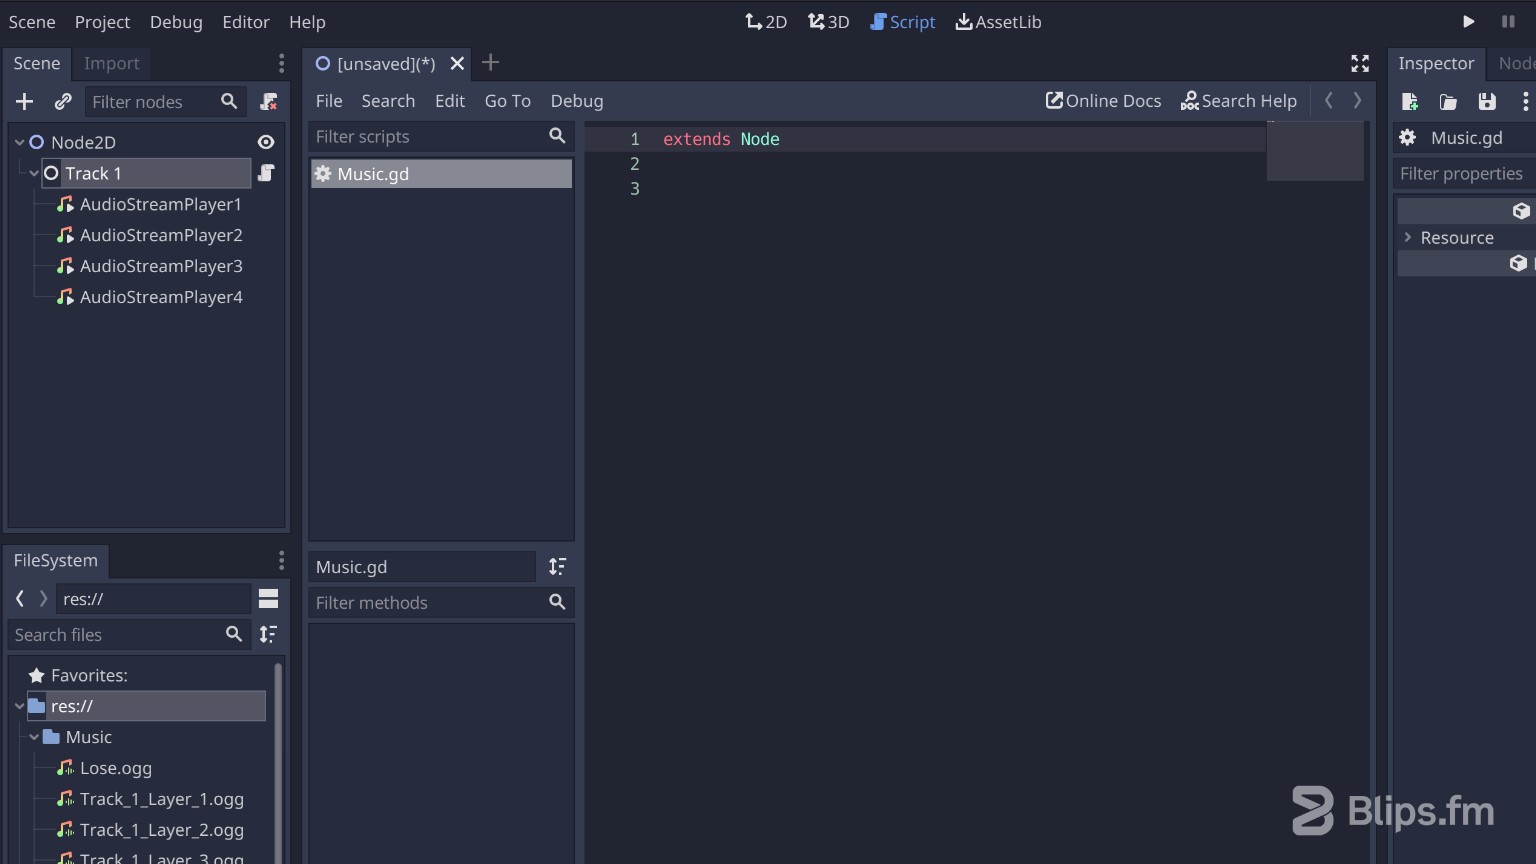
- Right-click the parent node (named here as "Track 1") and select “Attach Script”. Create a new script by selecting the empty template. I will give the name "Music" to the script.
Note: Because GDScript is an idented language make sure to correct indentation levels if you're copy/pasting these code snippets.
- Since audio layers will share common functionality I think it's a good idea to create a Layer class for them. The common functionality includes playing and stopping the audio as well as handling fade-ins and fade-outs.
Let's start by defining an inner class:
class Layer:
-
Let's add some fields to this class. One of the fields will hold the AudioStreamPlayer instance, other will hold the state of our layer. Two more fields will also be needed: an
enumfor declaration of the possible states and a field that will hold a reference to our scene tree. We'll use coroutines to handle our fades, coroutines are a great tool to execute code during a specific period of time and we'll need access to the scene tree to use them the way we intend. Generally we don't need to hold a reference to our SceneTree in a field as we just need to call theget_tree()method, we'll do it here because we won't have access to it since this class won't be instanced by Godot as a scene node:
enum LayerState {UNMUTED, FADING, MUTED}
var layerState
var audioStreamPlayer: AudioStreamPlayer
var sceneTree: SceneTree
- We'll need a constructor to set the class fields and default values:
func _init(audioStreamPlayer: AudioStreamPlayer, sceneTree: SceneTree):
	self.audioStreamPlayer = audioStreamPlayer
	self.sceneTree = sceneTree
	layerState = LayerState.MUTED
	audioStreamPlayer.volume_db = -80
-80dB is the lowest value we can set. This will essentially make the layer inaudible (Muted).
- We'll now write our fade-in fade-out coroutines:
func fadeIn() -> void:
	if layerState == LayerState.FADING:
		return
	layerState = LayerState.FADING
	while audioStreamPlayer.volume_db < 0:
		print("fading in ", audioStreamPlayer.volume_db)
		audioStreamPlayer.volume_db += 1
		yield(sceneTree.create_timer(fadeTime/80), "timeout")
	layerState = LayerState.UNMUTED
	print("unmuted")

func fadeOut() -> void:
	if layerState == LayerState.FADING:
		return
	layerState = LayerState.FADING
	while audioStreamPlayer.volume_db > -80:
		print("fading out ", audioStreamPlayer.volume_db)
		audioStreamPlayer.volume_db -= 1
		yield(sceneTree.create_timer(fadeTime/80), "timeout")
	layerState = LayerState.MUTED
	print("muted")
You'll notice a guard clause in both of these methods, this is for preventing starting a layer fade when one is already occurring. I've added some “print” method calls so you can have some visual feedback on the output window whenever layers are being muted/unmuted. You can of course remove these print statements. You'll also notice that our fadeTime variable doesn't exist. This is a constant that sets the fade time in seconds. Add this constant to the outer class:
const fadeTime: float = 1.0
- To have a smooth layer stop we'll need to initiate a fade-out and wait for it to finish. We'll issue the stop command to the AudioStreamPlayer when the layer becomes muted. To create this behaviour we will add another coroutine method that we'll name “fadeAndStop”:
func fadeAndStop() -> void:
	fadeOut()
	while layerState == LayerState.FADING:
		yield(sceneTree, "idle_frame");
	if layerState == LayerState.MUTED:
		audioStreamPlayer.stop();
- Now we'll need our start method. Our start method will make use of a boolean parameter. This parameter will be used to indicate if the layer should be unmuted after we set it to play. This can be useful if we want to start the track using a selection of layers instead of starting with all of them set to enabled or disabled:
func play(startUnmuted: bool) -> void:
	if layerState == LayerState.FADING:
		return;
	audioStreamPlayer.play()
	if startUnmuted:
		fadeIn()
- Besides playing and stopping our track's layers we'll also need to enable or disable individual layers, effectively “toggling” between states. Let's add a simple “toggleState” method:
func toggleState() -> void:
	if layerState == LayerState.MUTED:
		fadeIn();
	if layerState == LayerState.UNMUTED:
		fadeOut();
This is all the code we need for our Layer class. Let's now work on the outer class.
We'll save the references to our layers in a Dictionary, this dictionary will take the layer number as the key and the layer instance as its value:
const layers: Dictionary = {}
Using Godot's _ready method we'll create the instances of our Layer class and add them to the Dictionary:
func _ready():
	var audioStreamPlayers = get_children()
	var i: int = 0
	for player in audioStreamPlayers:
		if player.get_class() == "AudioStreamPlayer":
			i += 1
			layers[i] = Layer.new(player, get_tree())
This method will attribute layer numbers starting from 1. In my case with four layers the keys of the dictionary will be 1, 2, 3, and 4. The “if” check on this method is there to make it possible to add children to our node that are not audio stream players. This will be useful to test our code with some user interface nodes. We'll cover that on the following steps. When instantiating our layer class, the constructor will receive the “AudioStreamPlayer” instance as well as the reference to the SceneTree.
Let's now create our “global” start and stop methods, these methods will control all of our layer instances:
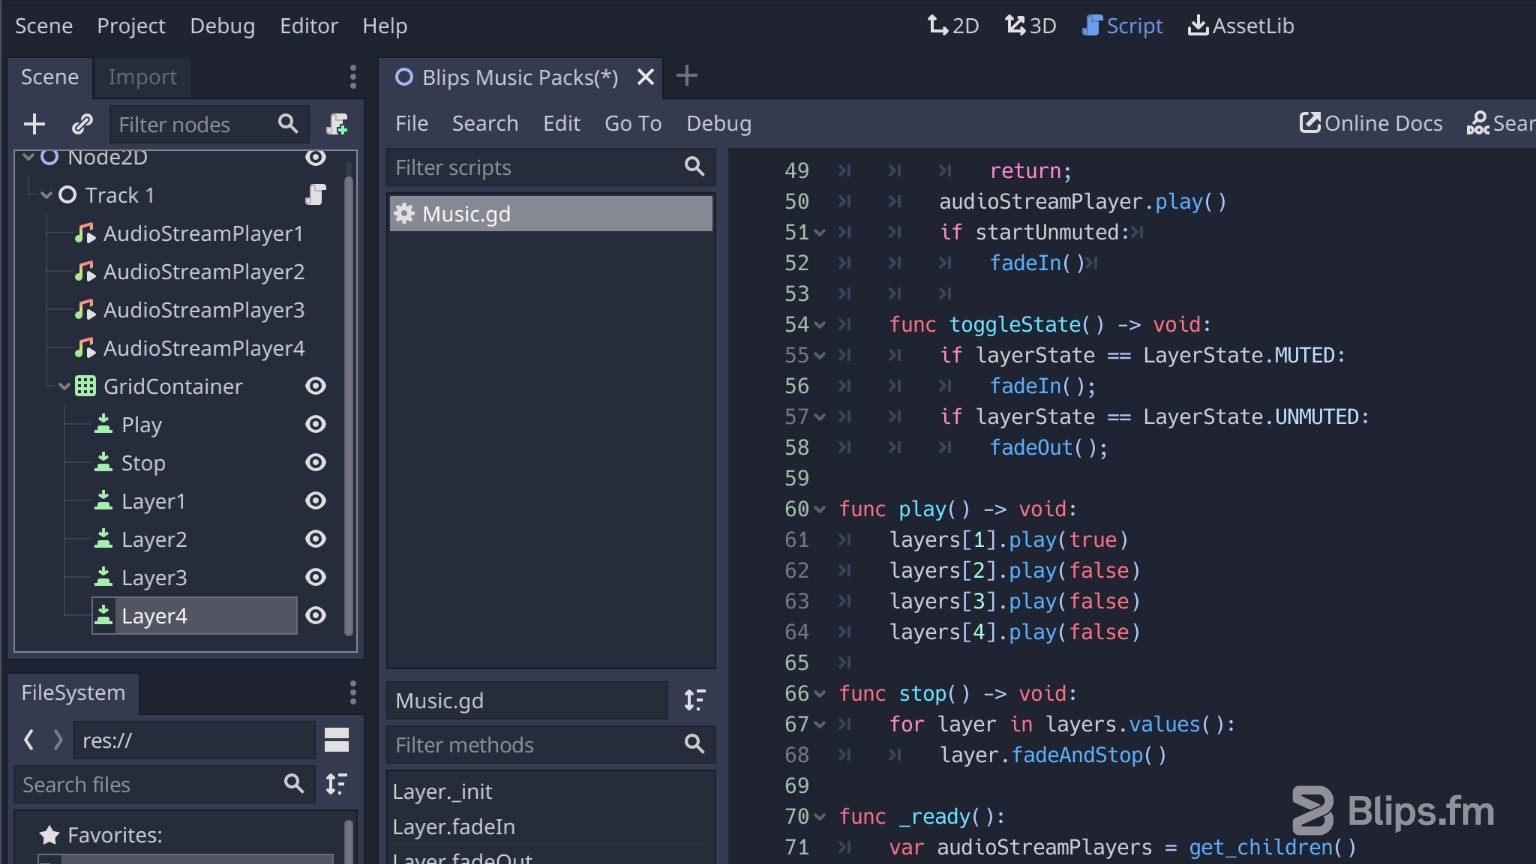
func play() -> void:
	layers[1].play(true)
	layers[2].play(false)
	layers[3].play(false)
	layers[4].play(false)

func stop() -> void:
	for layer in layers.values():
		layer.fadeAndStop()
Calling the “Play” method will start the playback of all our layers but only the 1st one will sound, as it's the only one with the “startUnmuted” argument set to true. The “Stop” method will simply issue the stop command to all the layers.
That's it! This is all we need. Next we'll check out an easy way to test our code.
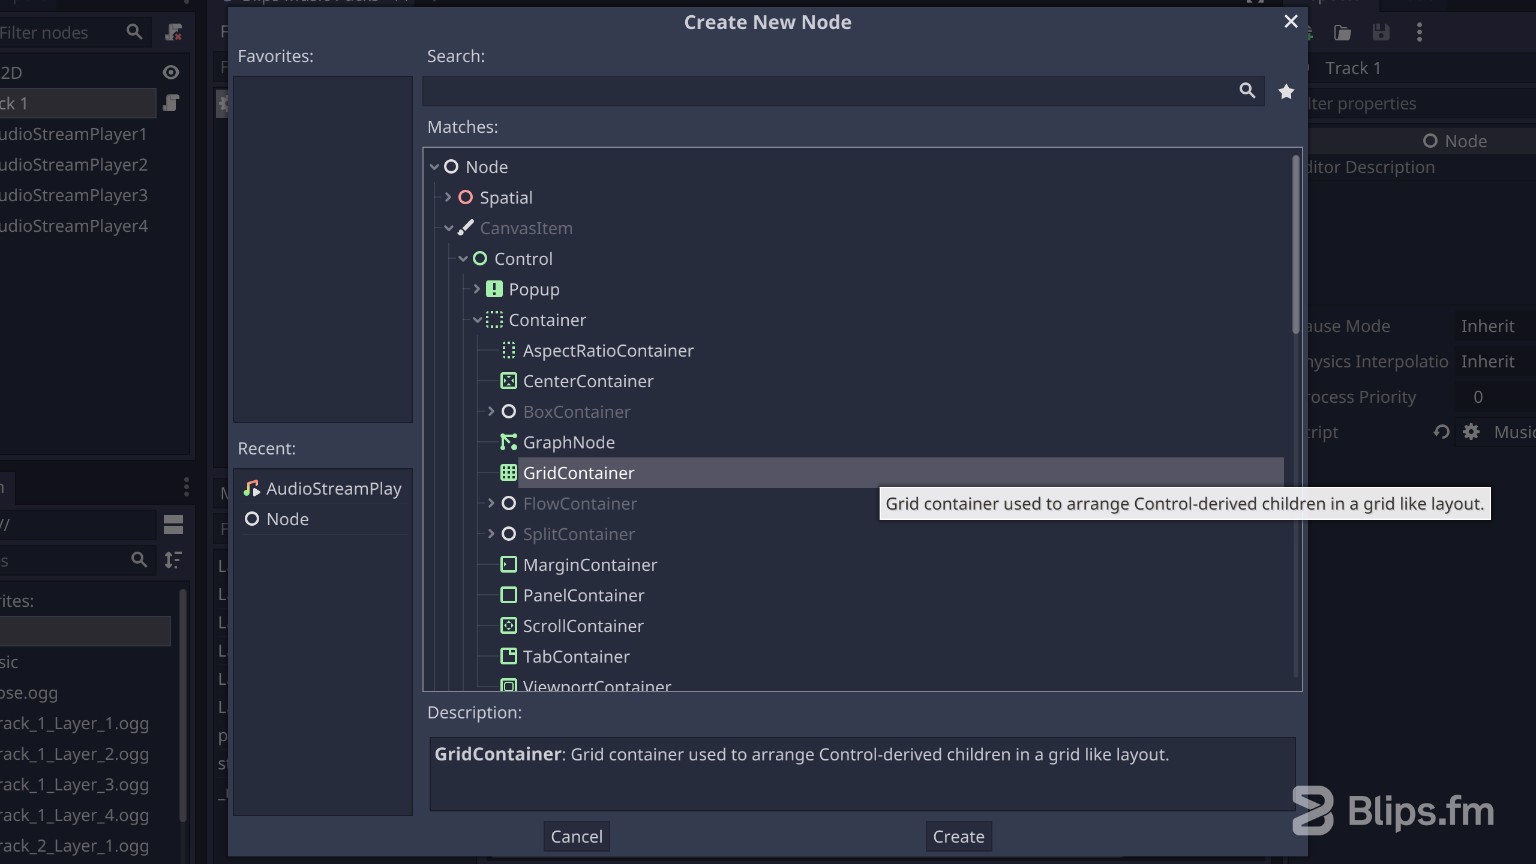
- To test our code we'll create a simple user interface with some buttons to control the playback. For this, add a “GridContainer” as a child to our main node ("Track 1"). You’ll find it under CanvasItem/Control/Container. You can also search for it directly by typing “GridContainer” on the search field.
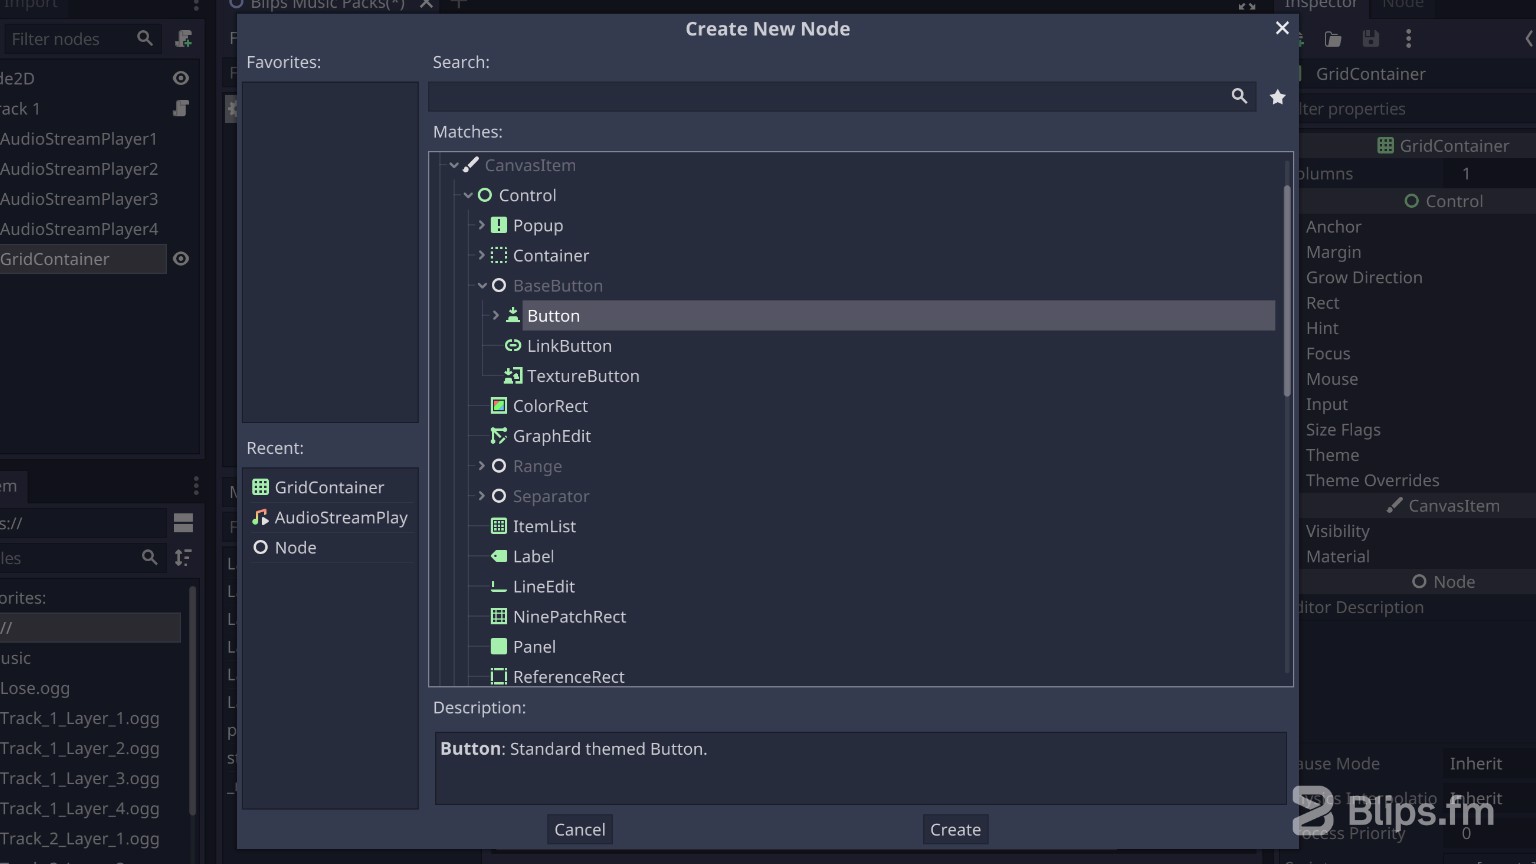
- Now we'll need some buttons. Add a button to “Play” our track, other to “Stop” it, and a button for each layer to toggle their state. Add these buttons as children to the “GridContainer”. You'll find these buttons under CanvasItem/Control/BaseButton.
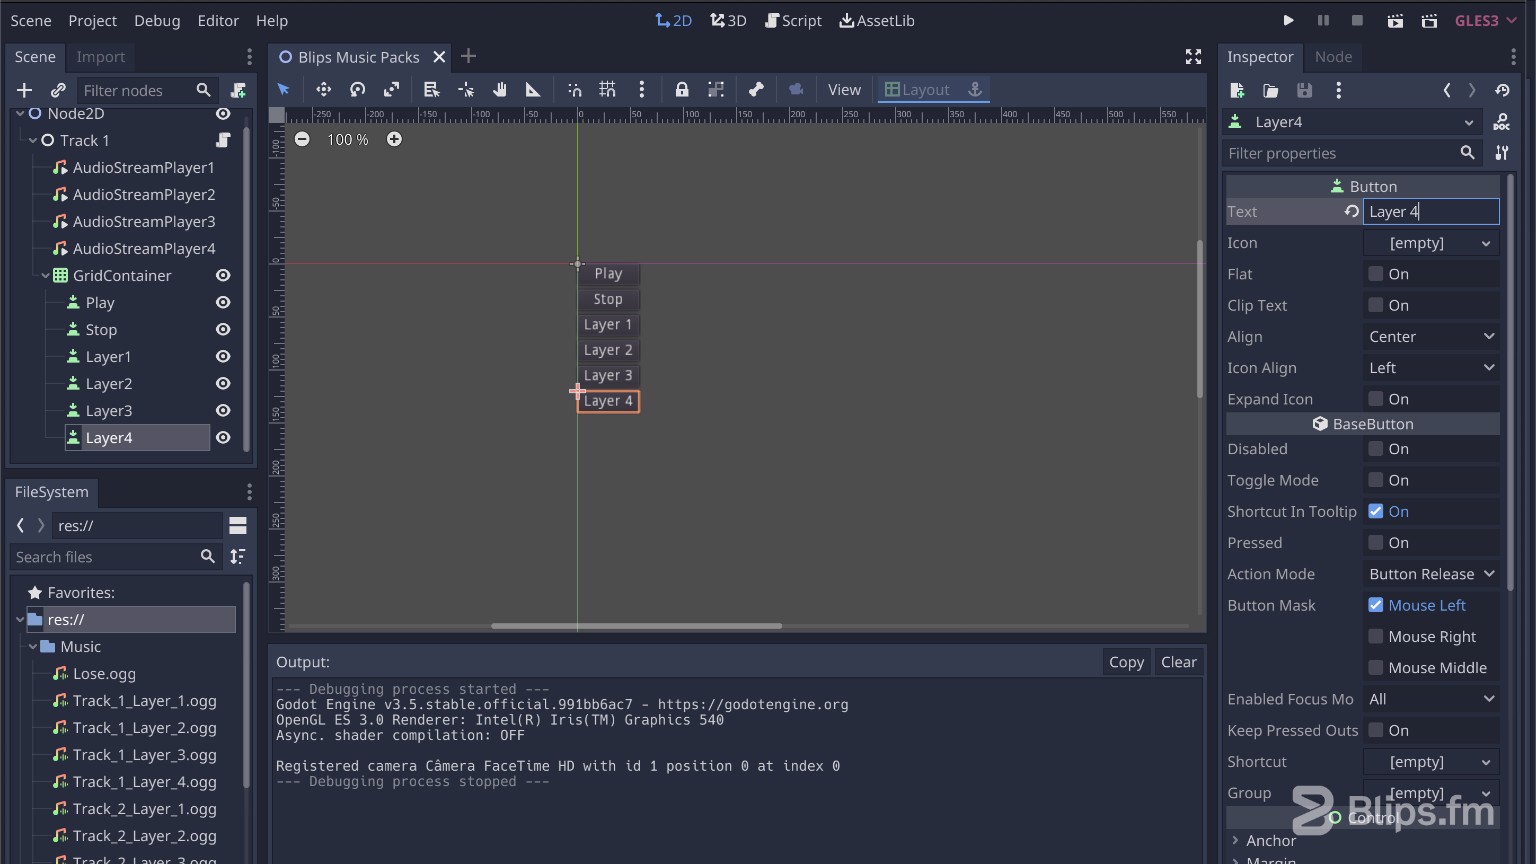
- Switch to the 2D Scene at the top of the window, select each button in your scene and give it a name in the inspector under “Text”. The Button will expand with this text label. Also make sure to give proper names to the buttons in the scene to keep everything tidy. Doing this is specially useful when using signals as it is common practice to use the node's name in the signal method. We'll be using signals next to connect these buttons to our script.
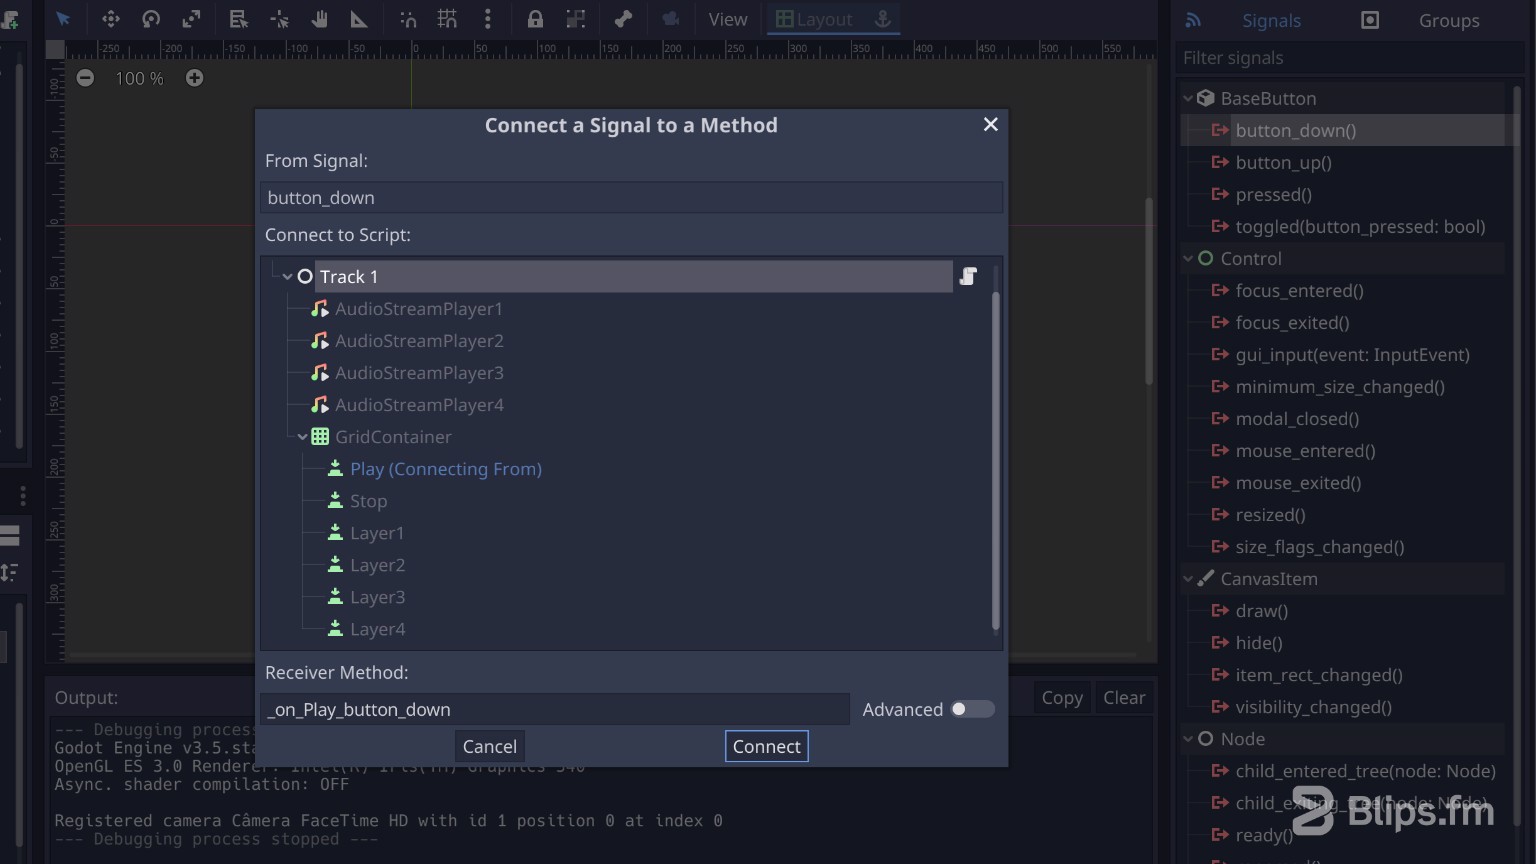
- Select a button in the scene tab and go to the node tab, next to the inspector. Under the “BaseButton” signals select “button_down()” and click “Connect”. You don't need to make changes in this connection window. Just connect it to the main node where our script resides ("Track 1"). A new signal method will be added to our script. Repeat this process for all other buttons.
Go back to the script. Now we'll just need to trigger our own methods within those signal methods, here's what it should look like:
func _on_Play_button_down():
	play()

func _on_Stop_button_down():
	stop()

func _on_Layer1_button_down():
	layers[1].toggleState()

func _on_Layer2_button_down():
	layers[2].toggleState()

func _on_Layer3_button_down():
	layers[3].toggleState()

func _on_Layer4_button_down():
	layers[4].toggleState()
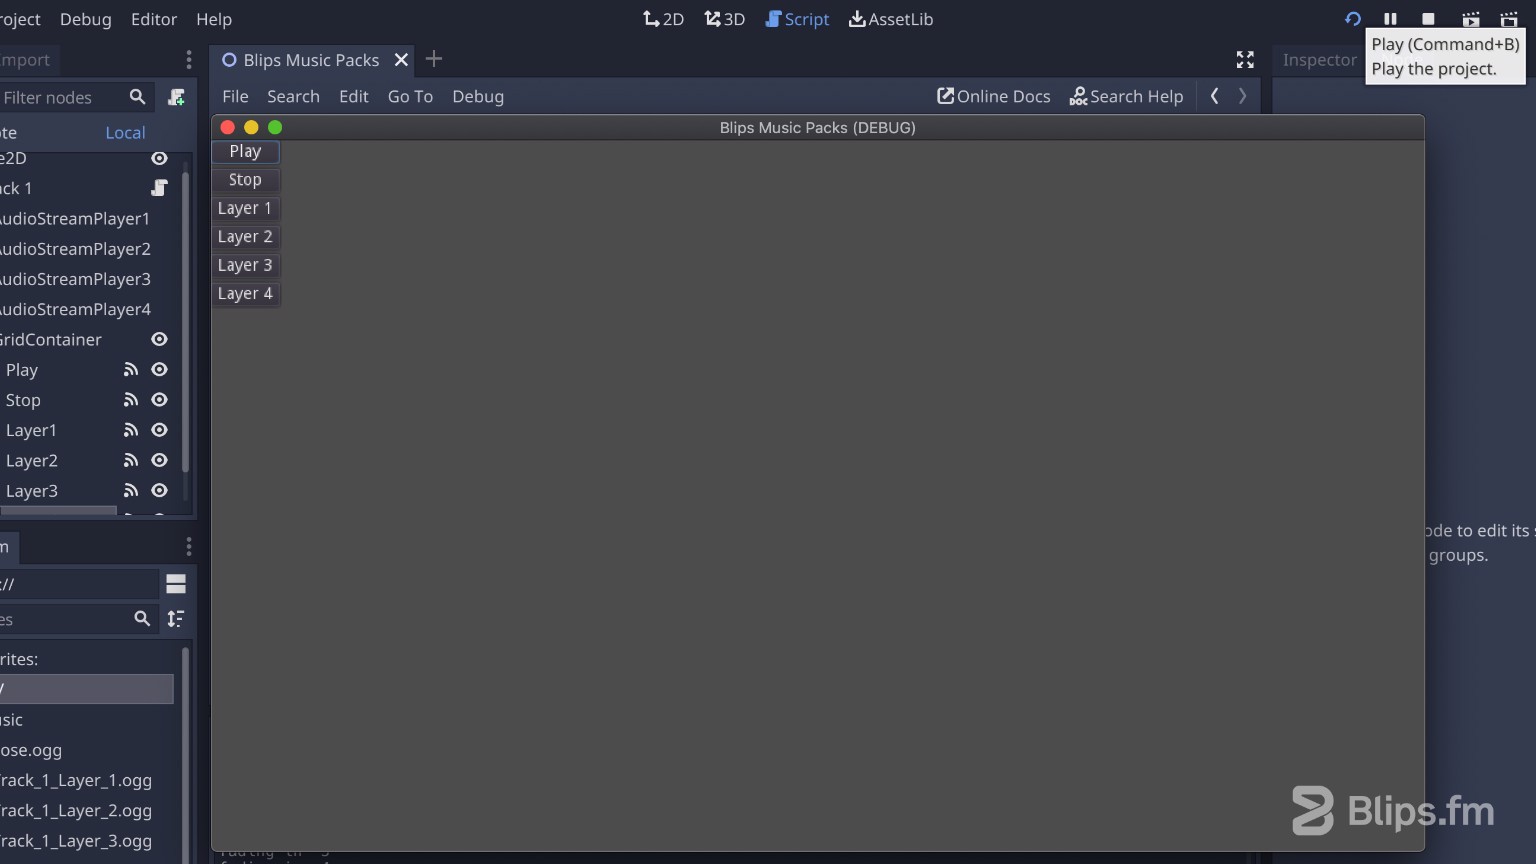
- Save the scene if you didn't do it before and launch the game. If all goes well you'll be presented with the the UI buttons and you'll then be able to click them to test all of our script's functionality.
Now that everything is working you're free to edit this project and/or script to tailor it to your project needs. You'll be able to control the script's methods through signals just like we did here or by referencing this node in one of the many ways possible within Godot. Keep in mind that this node controls only one track. When using a music pack with more tracks, the simplest way (but probably not the most efficient) to control them is to add other nodes following the same structure and with a copy of this script added to them. Then you'll have to address each of these nodes individually to control them.
If you have any question or problem while following this tutorial feel free to leave a comment below and we'll try to help however we can! Feel free to share your own techniques if you have them as well, as we would love to hear them!