In this tutorial you'll learn how to implement our adaptive music packs equipped with nothing more than the Unity game engine. You'll be able to initiate and stop tracks, as well as enable and disable their layers. If you prefer to have more control over these and other audio tasks we recommend the use of a middleware tool such as FMOD. If you decide to use FMOD check out our tutorial on how to implement music packs in FMOD covering Unity integration.
The implementation detailed below is quite simple. It mostly consists of adding a script to your existing project. This script will control the playback of the track (start and stop). The enabling and disabling of layers will be done by controlling the layer's volume: When the layer is enabled, it will play at full volume, when it is disabled it will still be playing but with its volume set to zero (muted). By using the layer's volume to control its enabled/disabled state we will also be able to make the transition between states smoother by applying volume fades, as enabling and disabling layers abruptly would sound jarring in most situations.
If you don't have a Blips music pack yet to follow along, make sure to check out our free music packs!
The Unity version used to write this tutorial was the 2021.3.15f1. If you end up having a compatibility problem with newer versions let us know so we can update this tutorial or release a new one!
Let's go over the implementation step by step:
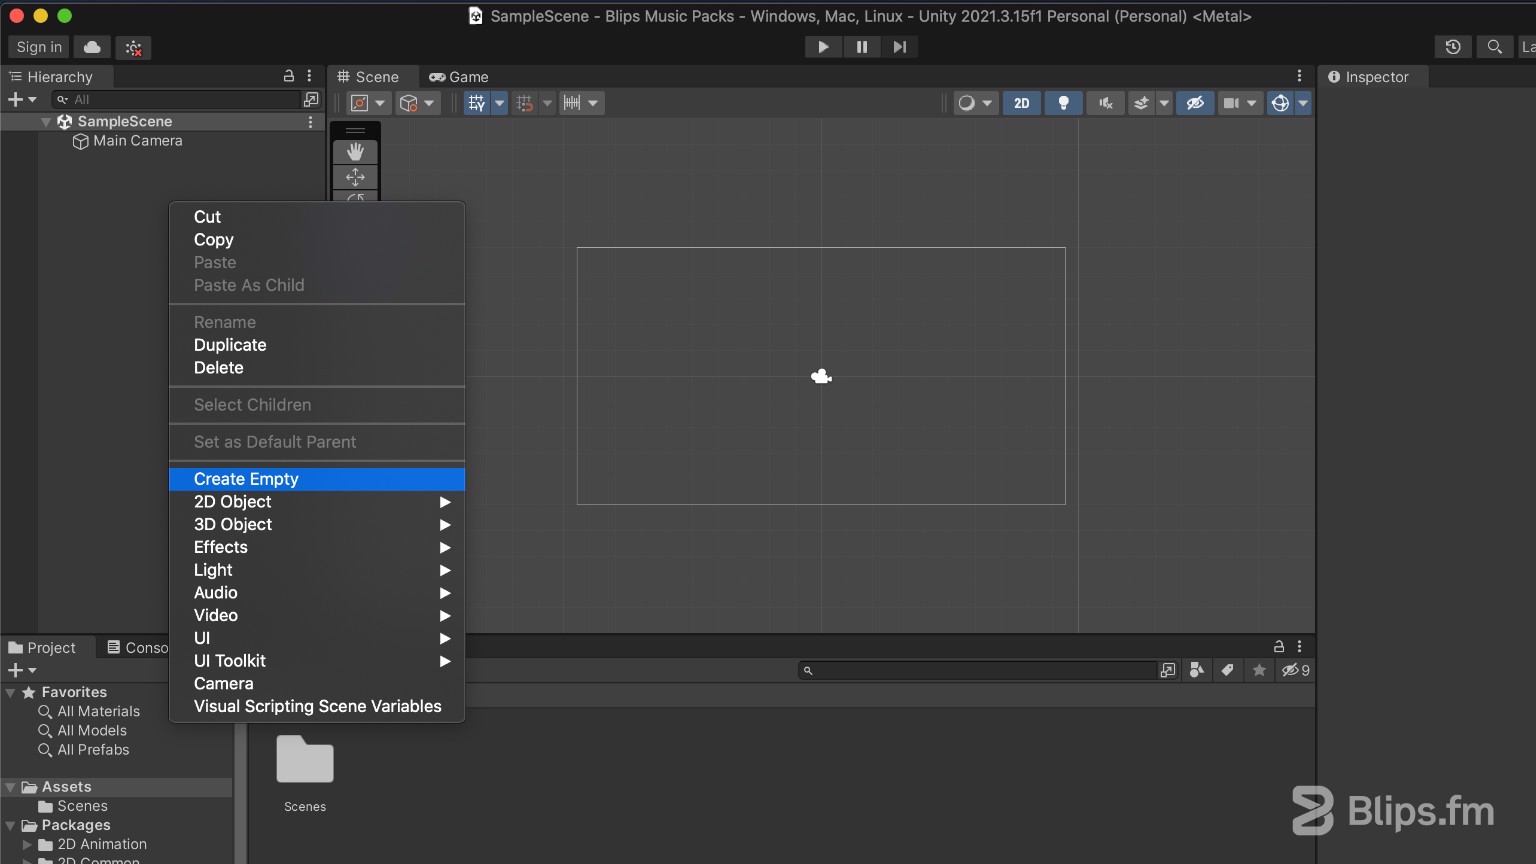
- In your Unity project “Hierarchy” right-click to create an empty object. We'll use this new game object to hold all the layers of a Blips music track as well as a C# script that will contain our code. You can name this object whatever you like, I'll use “FirstTrack” for the purposes of this tutorial.
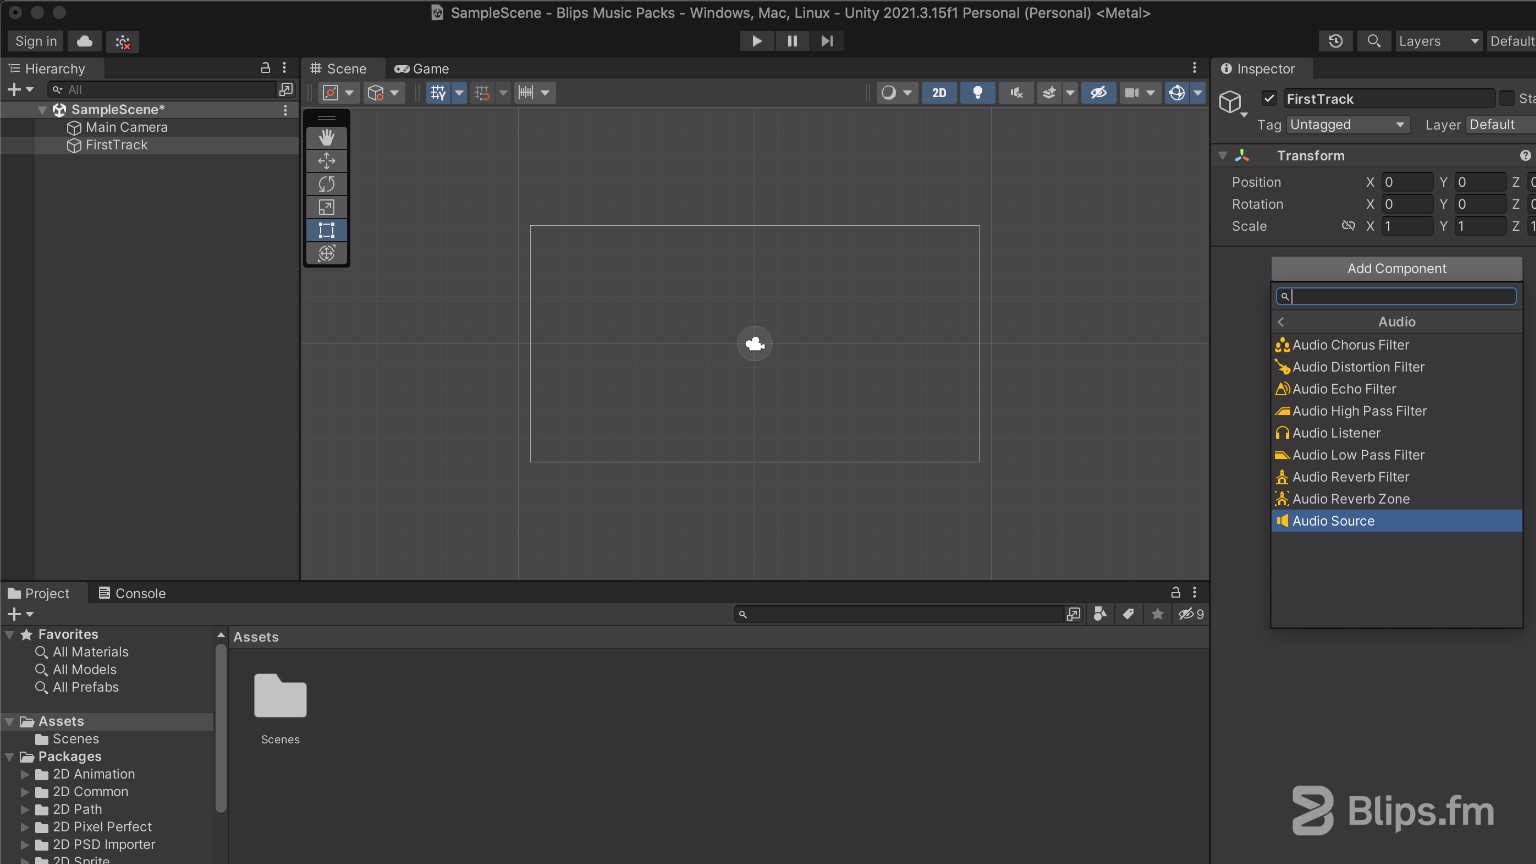
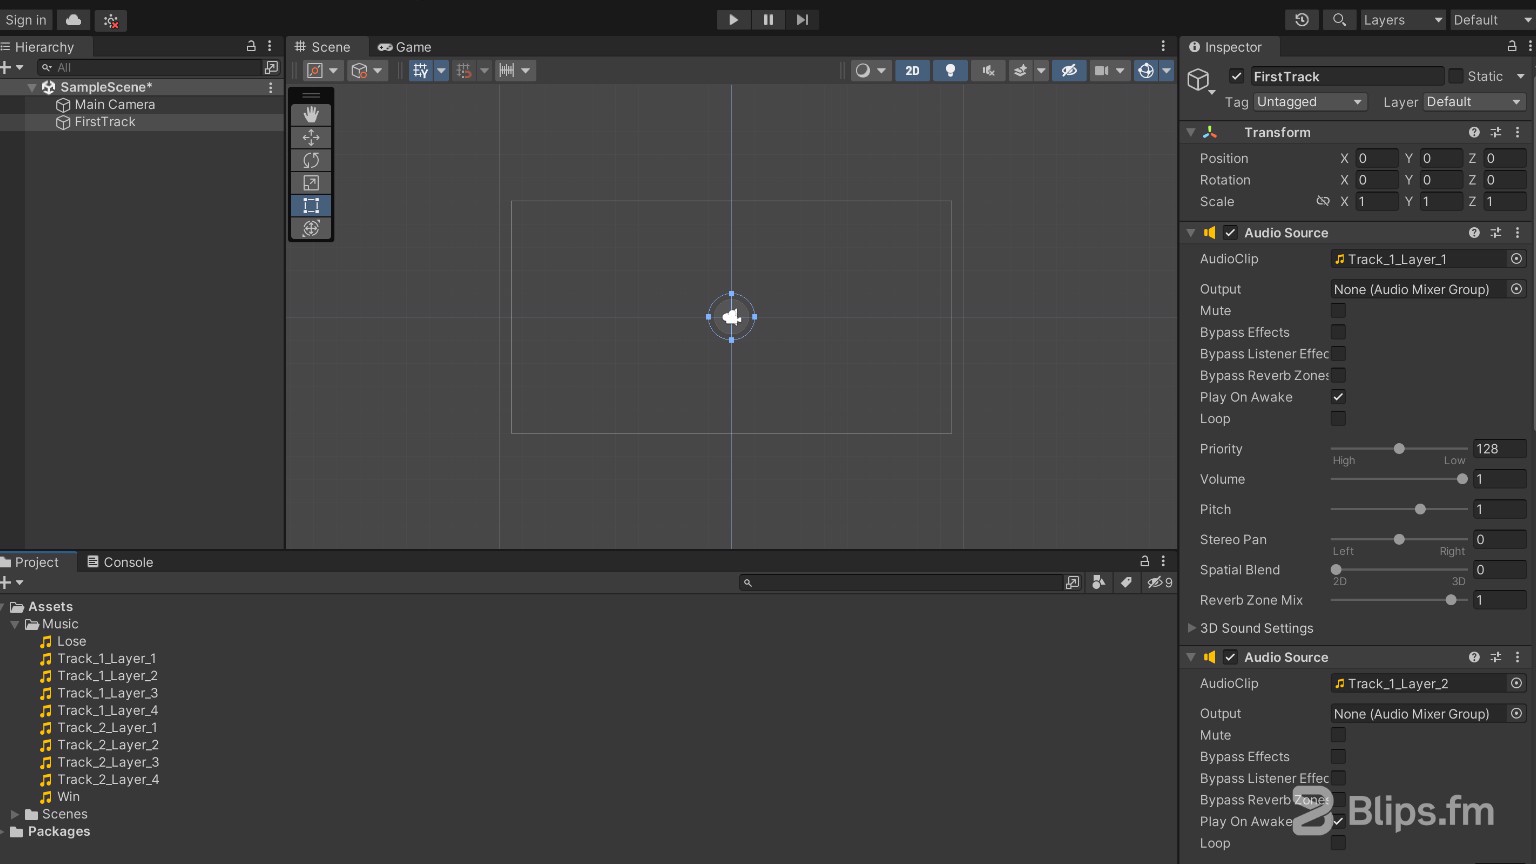
- With this new game object selected go to the inspector and click “Add Component”. From the drop-down menu select "Audio" > “Audio Source.” Depending on the pack you own you'll need to add as many Audio Source Components as the number of layers that make up one track. Our tracks are built from three, four, or five layers. I'll use Pack M as an example which has four layers, as such I'll be adding four Audio Source Components to this game object.

- Locate your downloaded audio files. Using the “Project” browser, create a new folder within your project's assets directory. I'll name this folder “Music”, but you can name it whatever you like. Drag the files to this folder from the downloaded location.
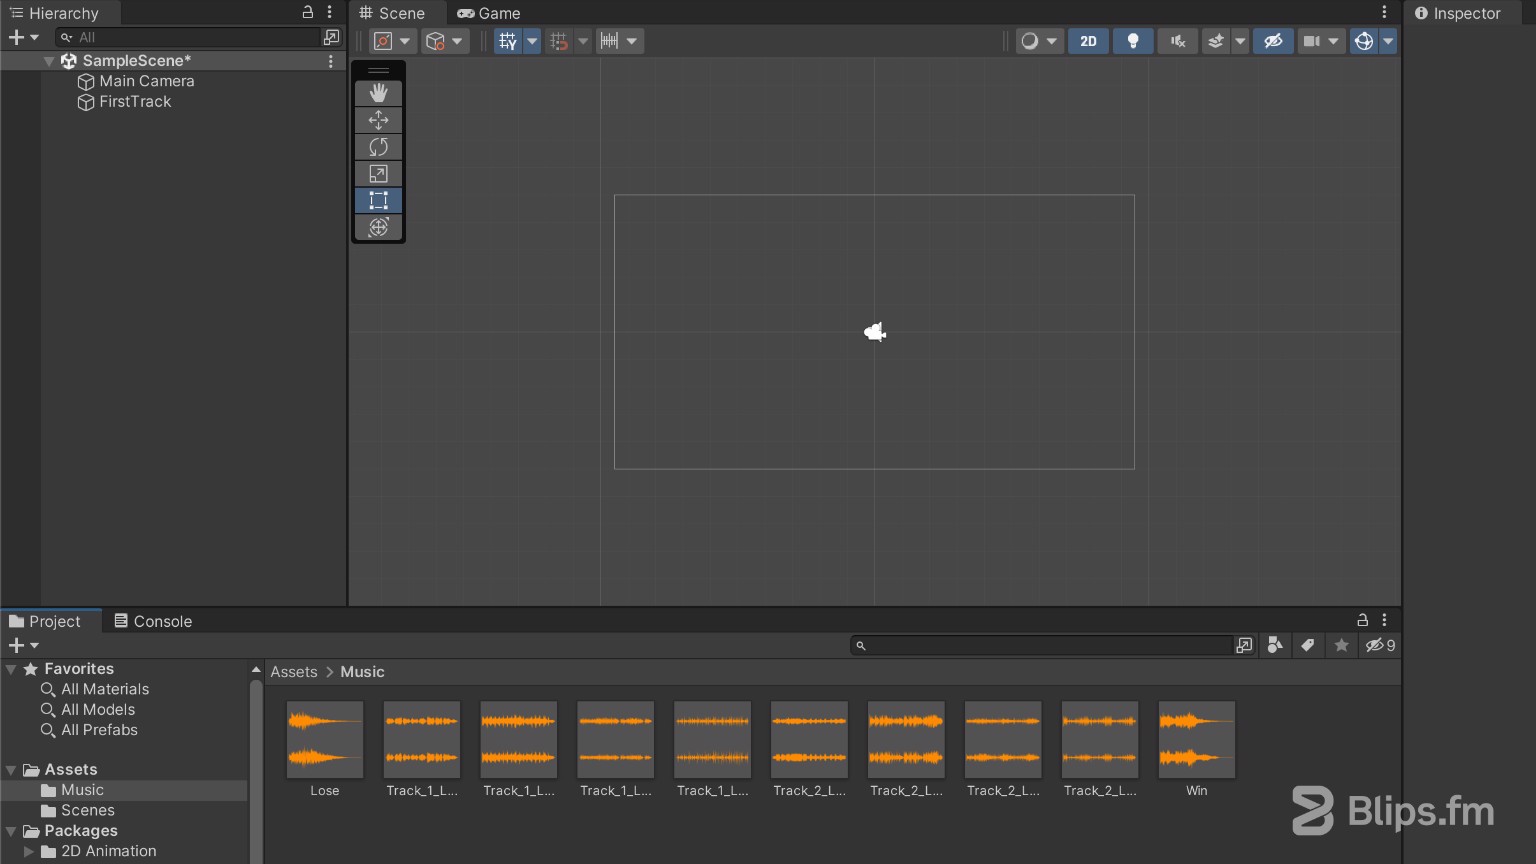
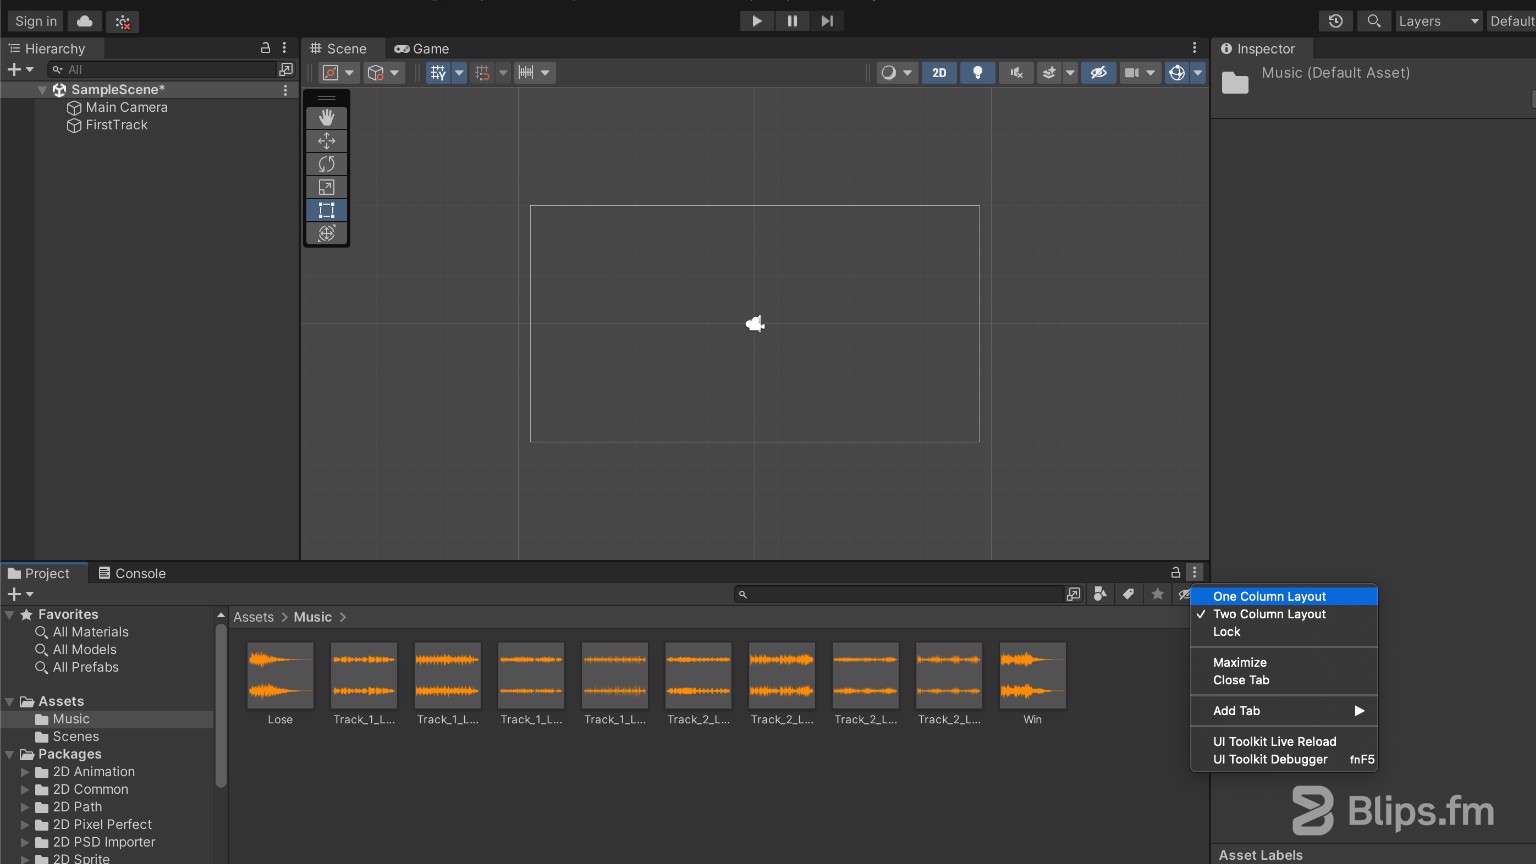
- To make it easier to see the full track names, switch the Unity's browser view from the two column layout to one column layout. You can do this by clicking the "three dots" at the top right of the browser's window.
- Select the "FirstTrack" game object, make sure that all the audio sources we added are expanded in the "Inspector" (settings visible) and drag the layers pertaining to the same track in ascending order from the browser to the "AudioClip" field of each "Audio Source" component.
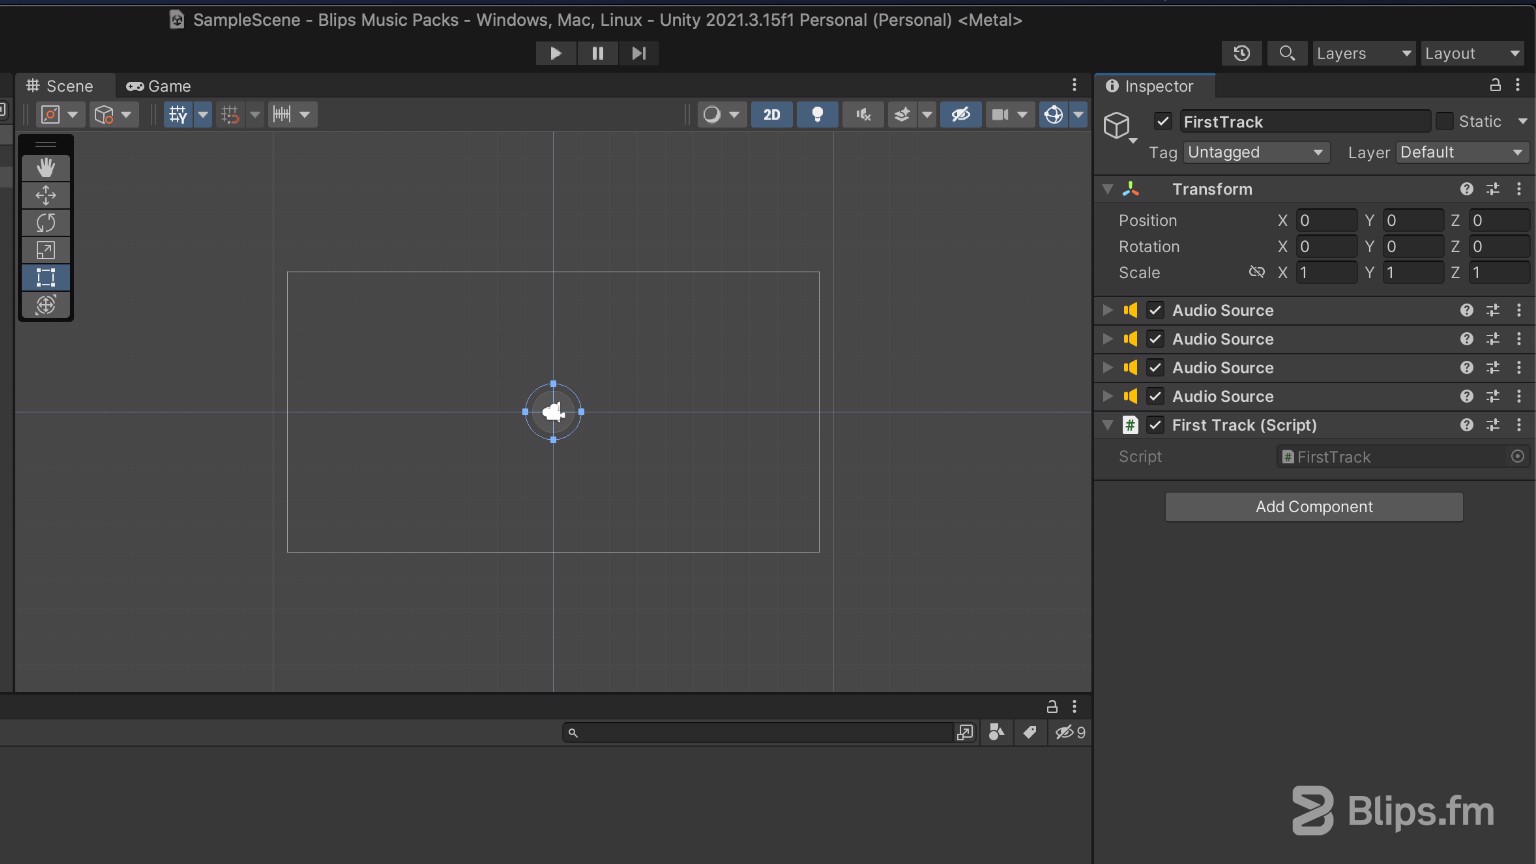
That's it. Now it is just a matter of adding a script that will control these audio components. You can download the script we'll create below from our GitHub repository. Drag the downloaded script file to your preferred location within your project's assets folder, then drag it to the game object we've created in the “Hierarchy.”
Below are the steps I took to create this script. You can follow along to either manually assemble it yourself or to better understand how I got to the final result:
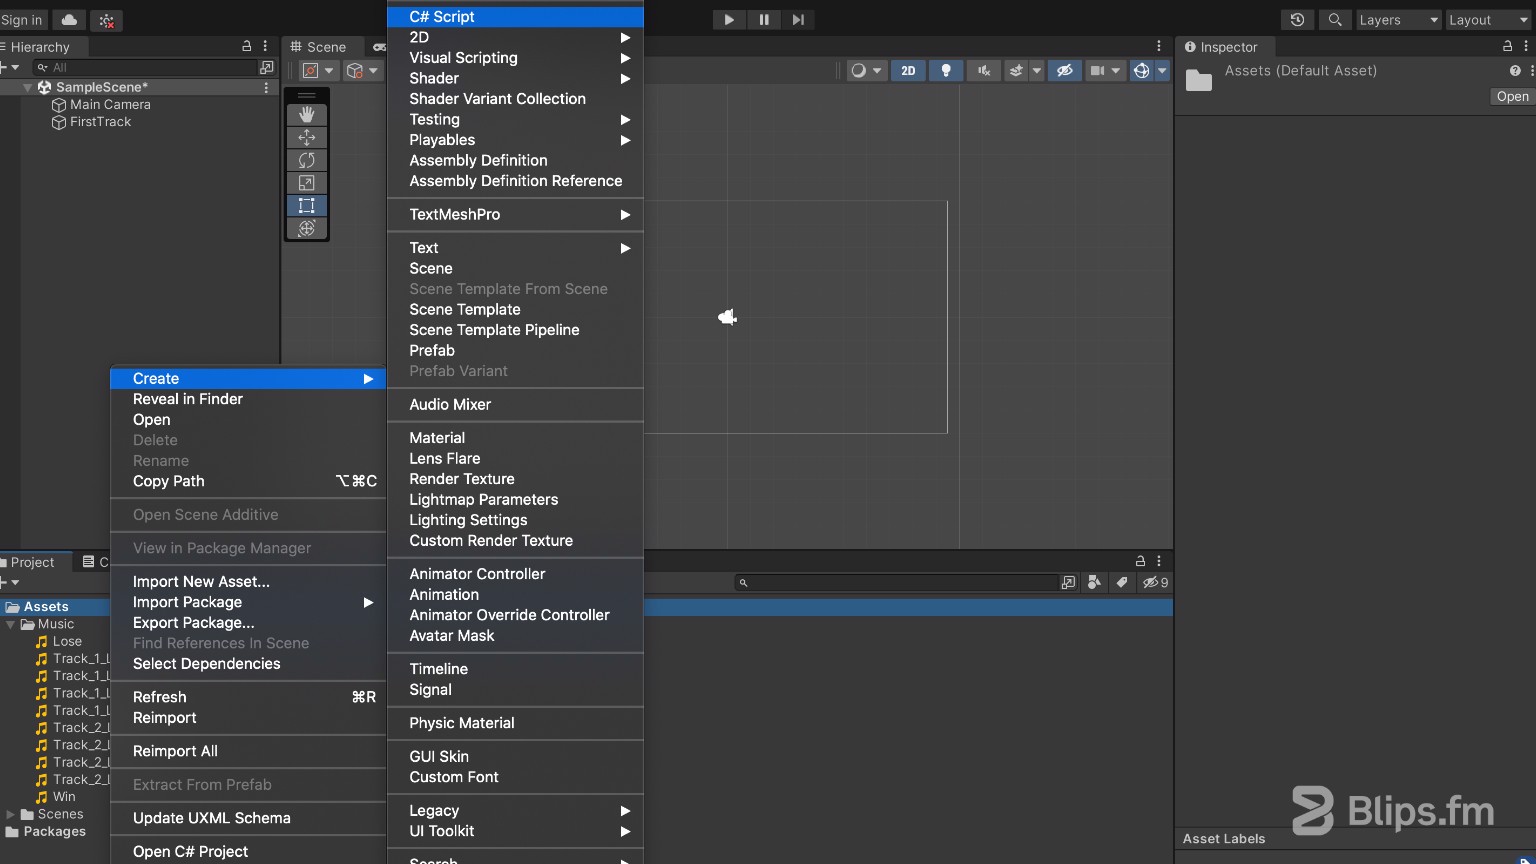
- Create a new C# script in your preferred assets location using the Unity's browser. Right-click the folder where it will be placed and select "Create" > "C# Script." Just like the game object that will hold it, I'll name it “FirstTrack.” Drag this newly created script from the browser to the “FirstTrack” game object in the “Hierarchy.”
- With the “FirstTrack” game object selected, go to the inspector panel and double-click the script's name. You can also double-click the script in the browser. This will open the C# script in your predefined code editor.
- Let's write some code. Since each layer will share common methods and properties we'll need control over, we'll create a nested class to hold them all. Inside our script's "FirstTrack" class create a new class with the name “Layer”:
public class Layer
{

}
In the Layer Class we'll be adding two fields, one will hold the “AudioSource” component instance and the other will be our defined layer state:
readonly AudioSource audioSource;
LayerState layerState;
Our LayerState type is not defined yet, this will simple be a enum with values for the possible layer states (muted, unmuted, and fading):
enum LayerState
{
    UNMUTED,
    FADING,
    MUTED
}
We'll be using Coroutines in this class. Coroutines are a great way to execute code on a timeframe and we'll be using them to fade-in/out our layers.
To avoid making our Layer "helper" class a “MonoBehaviour” component we'll create a callback to “StartCoroutine” which is a “MonoBehaviour” method. For this we will add two additional class fields: a delegate that will define our callback and a callback field:
public delegate Coroutine Callback(IEnumerator coroutine);
readonly Callback startCoroutine;
- We'll define a constructor for our class that will take the “AudioSource” component instance and the callback method. We'll also define our initial layer state:
public Layer(AudioSource audioSource, Callback startCoroutine)
{
    this.audioSource = audioSource;
    this.audioSource.volume = 0;
    this.startCoroutine = startCoroutine;
    layerState = LayerState.MUTED;
}
- In this step we'll be adding our layer fading code, these are coroutines for both for the fade-in phase (when enabling a layer) and the fade-out (when disabling a layer):
IEnumerator FadeIn()
{
    if (layerState == LayerState.FADING)
        yield break;

    layerState = LayerState.FADING;

    while (audioSource.volume < 1)
    {
        audioSource.volume += 0.01f;
        yield return new WaitForSeconds(fadeTime/100);
    }

    layerState = LayerState.UNMUTED;
}

IEnumerator FadeOut()
{
    if (layerState == LayerState.FADING)
        yield break;

    layerState = LayerState.FADING;

    while (audioSource.volume > 0)
    {
        audioSource.volume -= 0.01f;
        yield return new WaitForSeconds(fadeTime/100);
    }

    layerState = LayerState.MUTED;
}
You'll notice a guard clause in both of these methods. This is for preventing starting a layer fade when one is already occurring. You'll also notice that our fadeTime variable doesn't exist. This is a constant that sets the fade time in seconds. Add this constant to the class:
const float fadeTime = 1;
- To have a smooth layer stop, we'll need to initiate a fade-out and wait for it to finish. We'll issue the stop command when the layer becomes muted. To create this behaviour, we will add another coroutine method that we'll name “FadeAndStop”:
IEnumerator FadeAndStop()
{
    startCoroutine(FadeOut());

    while (layerState == LayerState.FADING)
        yield return null;

    if (layerState == LayerState.MUTED)
        audioSource.Stop();
}
- We'll create two methods that will start the “FadeIn” and “FadeOut” coroutines, we'll call them “Mute” and “Unmute”:
void Mute()
{
    startCoroutine(FadeOut());
}

void Unmute()
{
    startCoroutine(FadeIn());
}
- Now we'll need our start and stop methods. Our stop method will have the very simple task of initiating the “FadeAndStop” coroutine. Our start method will make use of a boolean parameter. This parameter will be used to indicate if the layer should be unmuted after we set it to play. This can be useful if we want to start the track using a selection of layers instead of starting with all of them in an enabled or disabled state:
public void Play(bool startUnmuted)
{
    if (layerState == LayerState.FADING)
        return;

    audioSource.Play();

    if (startUnmuted)
        Unmute();
}

public void Stop()
{
    startCoroutine(FadeAndStop());
}
- Besides playing and stopping our track's layers we'll also need to enable or disable individual layers, effectively “toggling” between states. Let's add a simple "ToggleState" method:
public void ToggleState()
{
    if (layerState == LayerState.MUTED)
        Unmute();

    if (layerState == LayerState.UNMUTED)
        Mute();
}
This is all the code we need for our Layer class. Let's now return to our outer class and give it some attention.
- We'll save the references to our layers in a
Dictionary. This dictionary will take the layer number as the key and the layer instance as its value:
public readonly Dictionary<int, Layer> layers =
    new Dictionary<int, Layer>();
- Using the Unity’s engine
Awakemethod we'll create the instances of our Layer class and add them to the Dictionary. By doing this on the awake method, we'll make our layers ready to receive commands from theStartandUpdatemethods:
void Awake()
{
    var audioSources = gameObject.GetComponents<AudioSource>();

    for (int i = 0; i < audioSources.Length; i++)
    {
        layers.Add(i + 1, new Layer(audioSources[i], StartCoroutine));
    }
}
Each layer instance will receive the “AudioSource” component instance as well as the “StartCoroutine” callback.
- Let's now create our “global” start and stop methods, these methods will control all of our layer instances:
public void Play()
{
    layers[1].Play(true);
    layers[2].Play(false);
    layers[3].Play(false);
    layers[4].Play(false);
}

public void Stop()
{
    foreach (var layer in layers)
    {
        layer.Value.Stop();
    }
}
Calling the “Play” method will start the playback of all our layers but only the first one will sound, as it's the only one with the “startUnmuted” argument set to true. The “Stop” method will simply issue the stop command to all the layers.
- To easily test our code, we'll tie our script functionality to the keyboard keys. We'll need to do that on the Unity’s update method:
void Update()
{
    if (Input.GetKeyDown("p"))
        Play();

    if (Input.GetKeyDown("s"))
        Stop();

    if (Input.GetKeyDown("1"))
        layers[1].ToggleState();

    if (Input.GetKeyDown("2"))
        layers[2].ToggleState();

    if (Input.GetKeyDown("3"))
        layers[3].ToggleState();

    if (Input.GetKeyDown("4"))
        layers[4].ToggleState();
}
Save the script and press “play” on the Unity's editor to start the game. You'll now be able to start playback by pressing the “p” key, stop by pressing “s” and enable/disable individual layers by pressing the corresponding key number (1 to 4 in this example). These are the only methods you'll need to call in your own project. The “Play” method will need to be adapted depending on the number of layers your track has. You may also set which layers should be audible when calling this method.
This wraps our tutorial!
To use more than one multi-layered track you'll need to create more game objects with the same code (notice that the script's name and the outer class name will need to be different for each track). You'll be able to reference these “music game objects” and call the methods like you normally would within your code.
If you have any question or problem while following this tutorial feel free to leave a comment below and we'll try to help however we can! Feel free to share your own techniques if you have them as well, as we would love to hear them!