In part one of this tutorial, you've learned to make use of a vertical layered track by controlling the individual layers which will allow to freely exploit all the possible combinations. Now you'll learn how to switch between tracks seamlessly.
In part one we've created a single event for the music. This event could be renamed to represent the only track it contains at the moment, then additional events built in the same way could be added to host more tracks. This would mean that every track would "live" in their own event which is all good and well, but it makes switching tracks a bit more difficult as you would have to signal from your game's code to stop the current event and initiate another. You would need to send two signals each time you wanted to change tracks, besides it would be more difficult to make the transition smooth, unless you used ADHSR volume envelopes, but you still wouldn't be able to sync to musical tempo, which probably wouldn't sound as good as it could. Anyway, you don't need to understand all these details. The bottom line is that there is a better and easier way to accomplish this goal using the horizontal sequencing technique.
Follow the steps below to implement seamless track switching using this technique in FMOD:
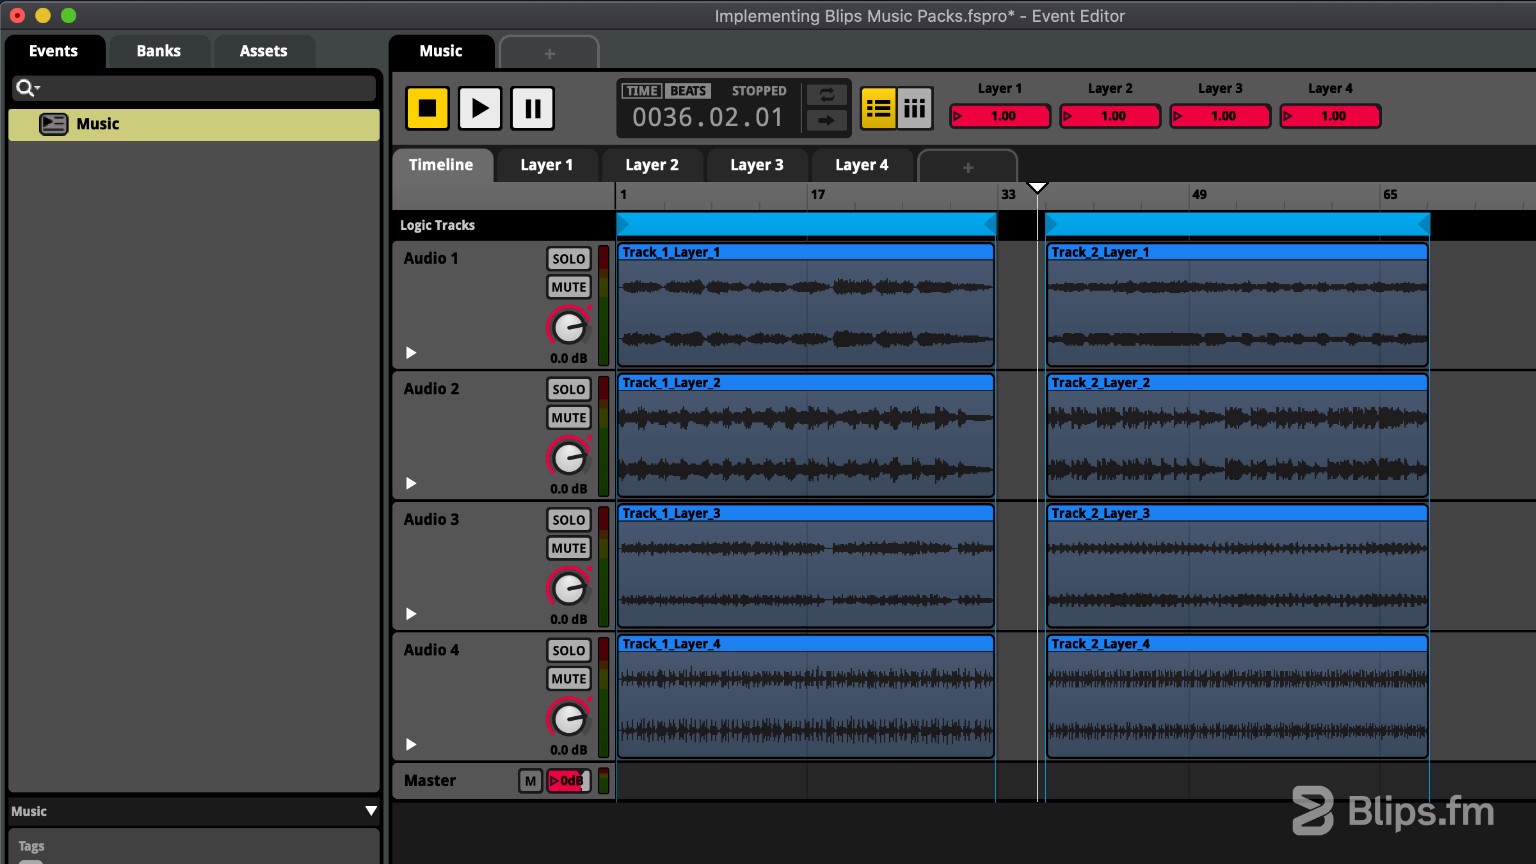
- Open the "Audio bin" and drag the layers of the next track to the same audio tracks. They should be placed a little after the existing layers on the timeline. Again, match “Layer 1” to “Audio 1”, “Layer 2” to “Audio 2” and so on. To make it easier to see all the tracks you can adjust the zoom level by compressing or expanding the zoom region. Make sure that all layers align to the same start position.
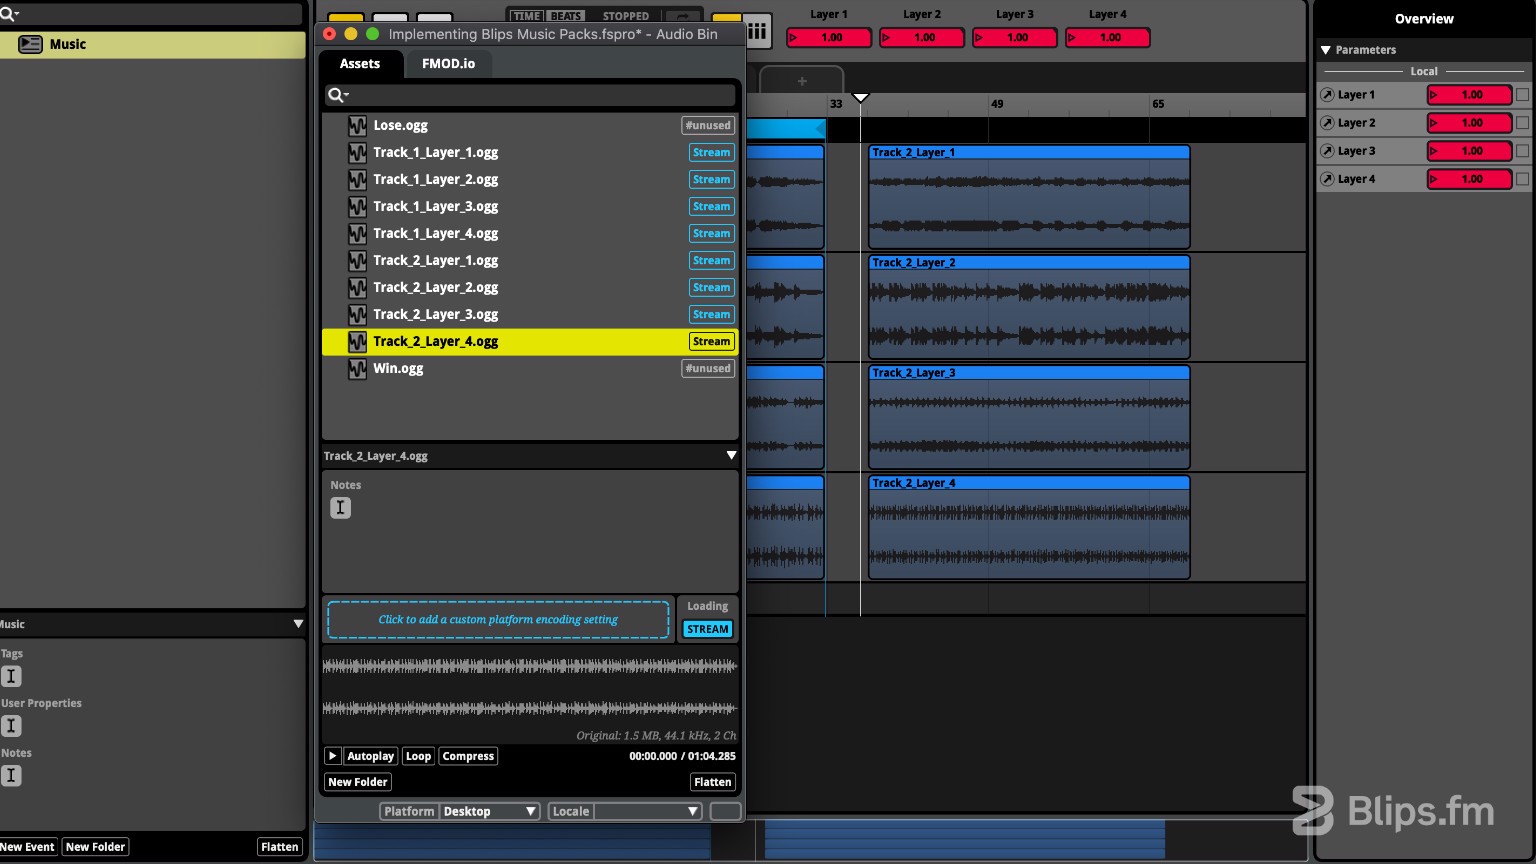
- Just like we did before, create a loop region for the new track by right-clicking on the “Logic Tracks” black bar and select “Add Loop Region.” Adjust the loop handles to wrap the track's beginning and end.
To create a more musical transition, we'll need to set the track's BPM. To get this information, visit your Blips.fm account and on the left side menu click “Downloads.”
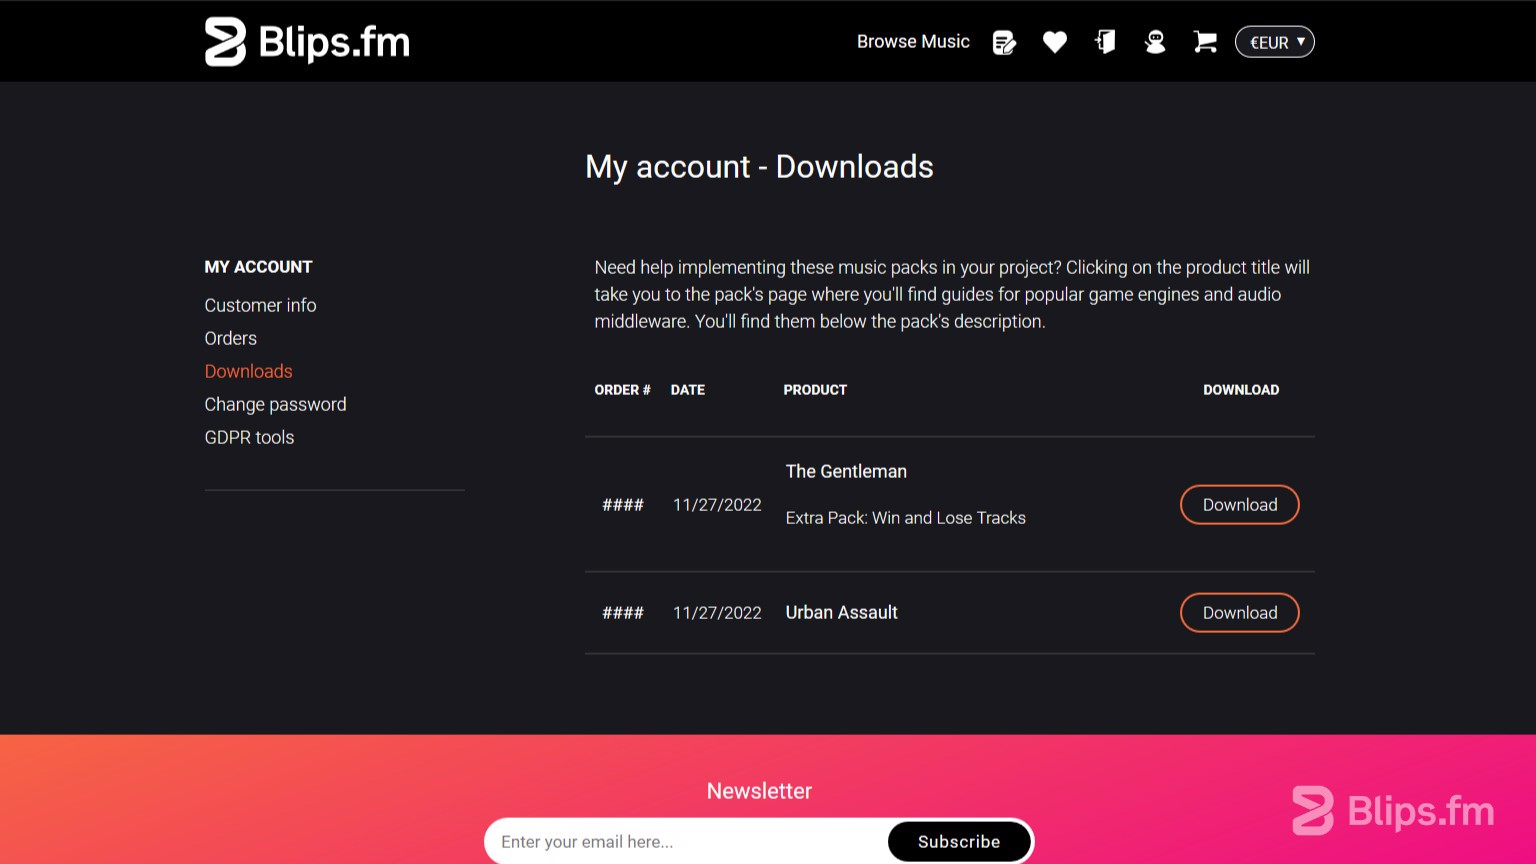
On the downloads page you'll be able to click the pack's name, and by doing this you'll be taken to the product page, where you can find each track's BPM under the “Information” tab.
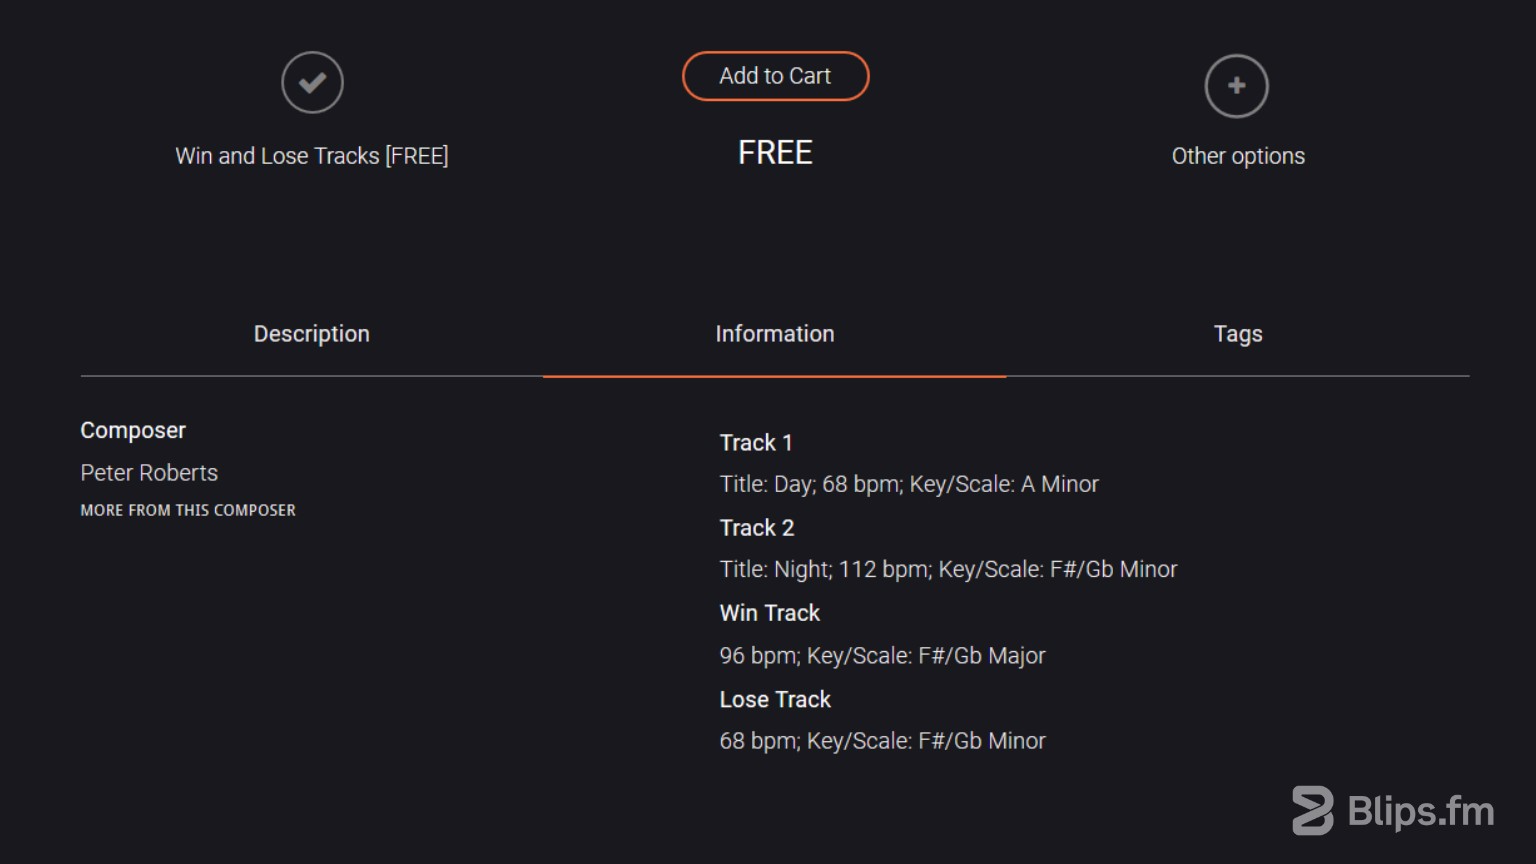
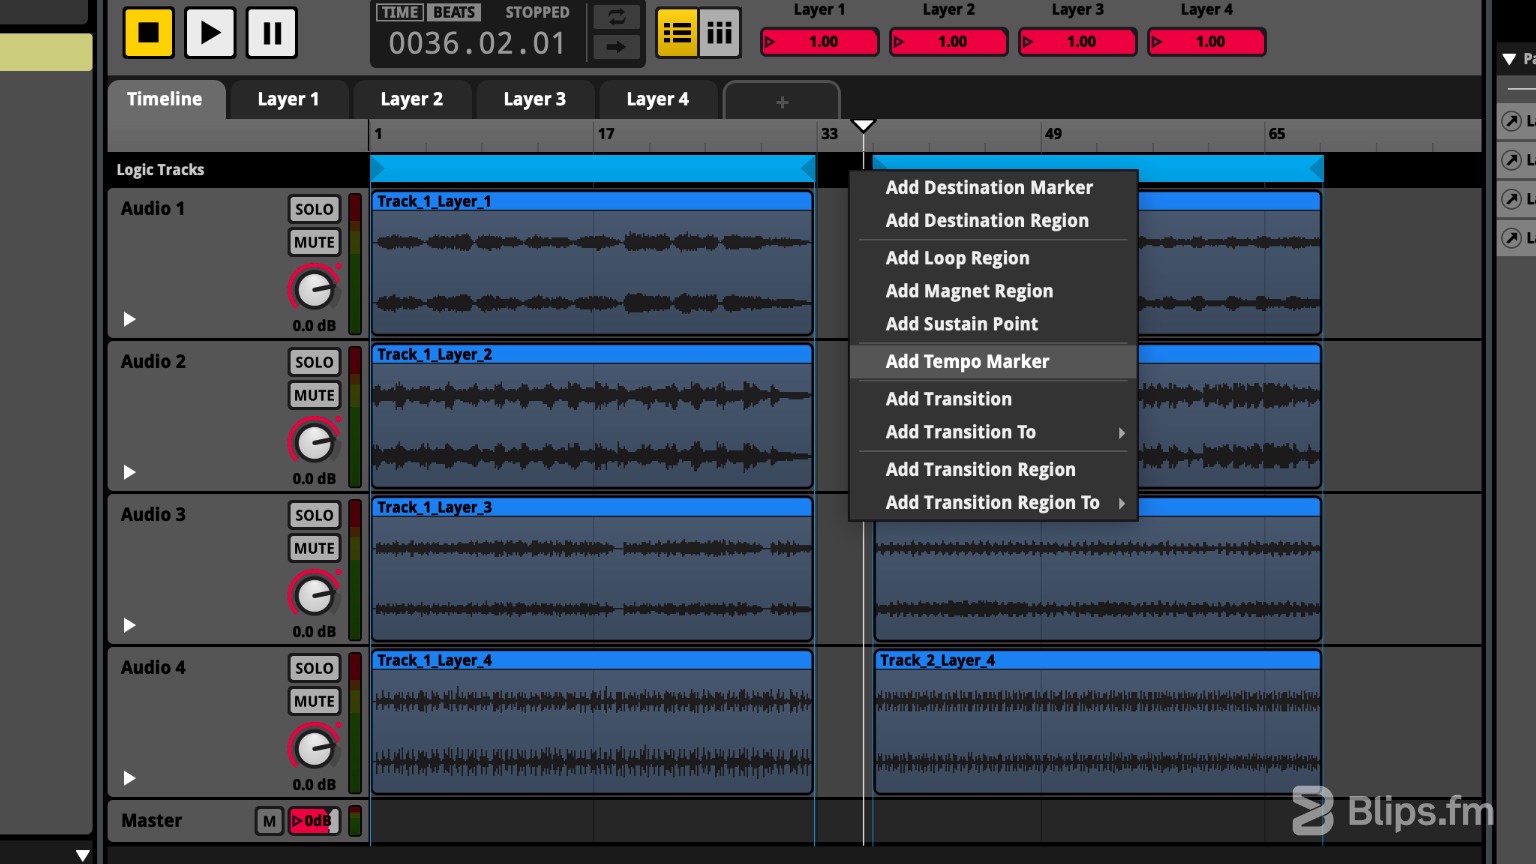
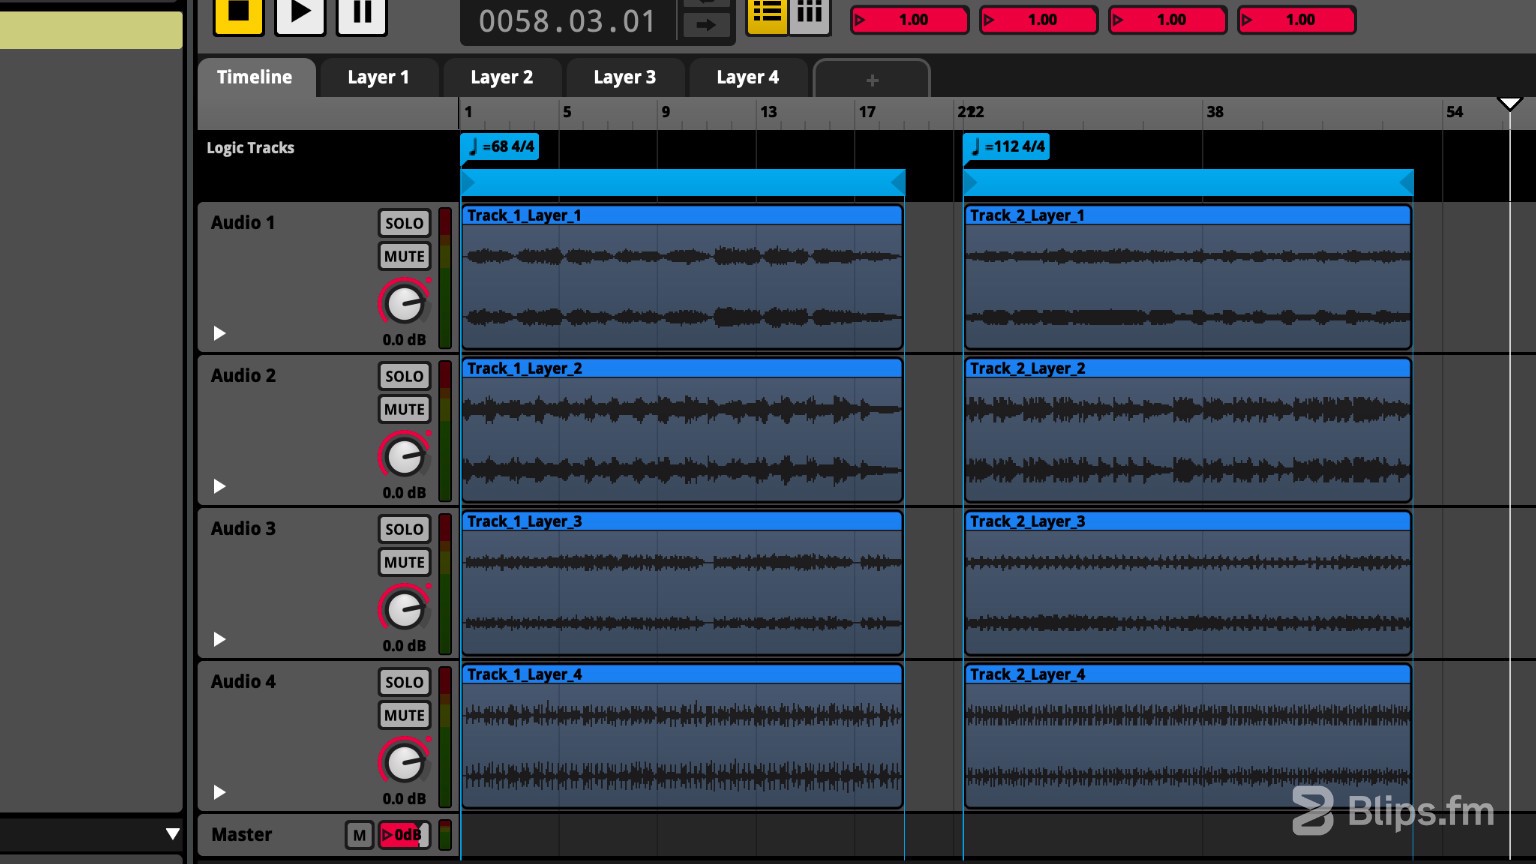
- With the BPM values we can now create a tempo marker on FMOD, by right-clicking on the “Logic Tracks” black bar and selecting “Add Tempo Marker.” If there's not enough space, the tempo marker may appear behind the loop regions. You may need to move things around temporarily to correctly place the markers and regions. You will also need to drag vertically to create vertical space above the current loop regions. Create a tempo marker for each track and place them at the track's beginning. Set the correct BPM for each one by double clicking and writing the new value (on the left of the marker before the 4/4).
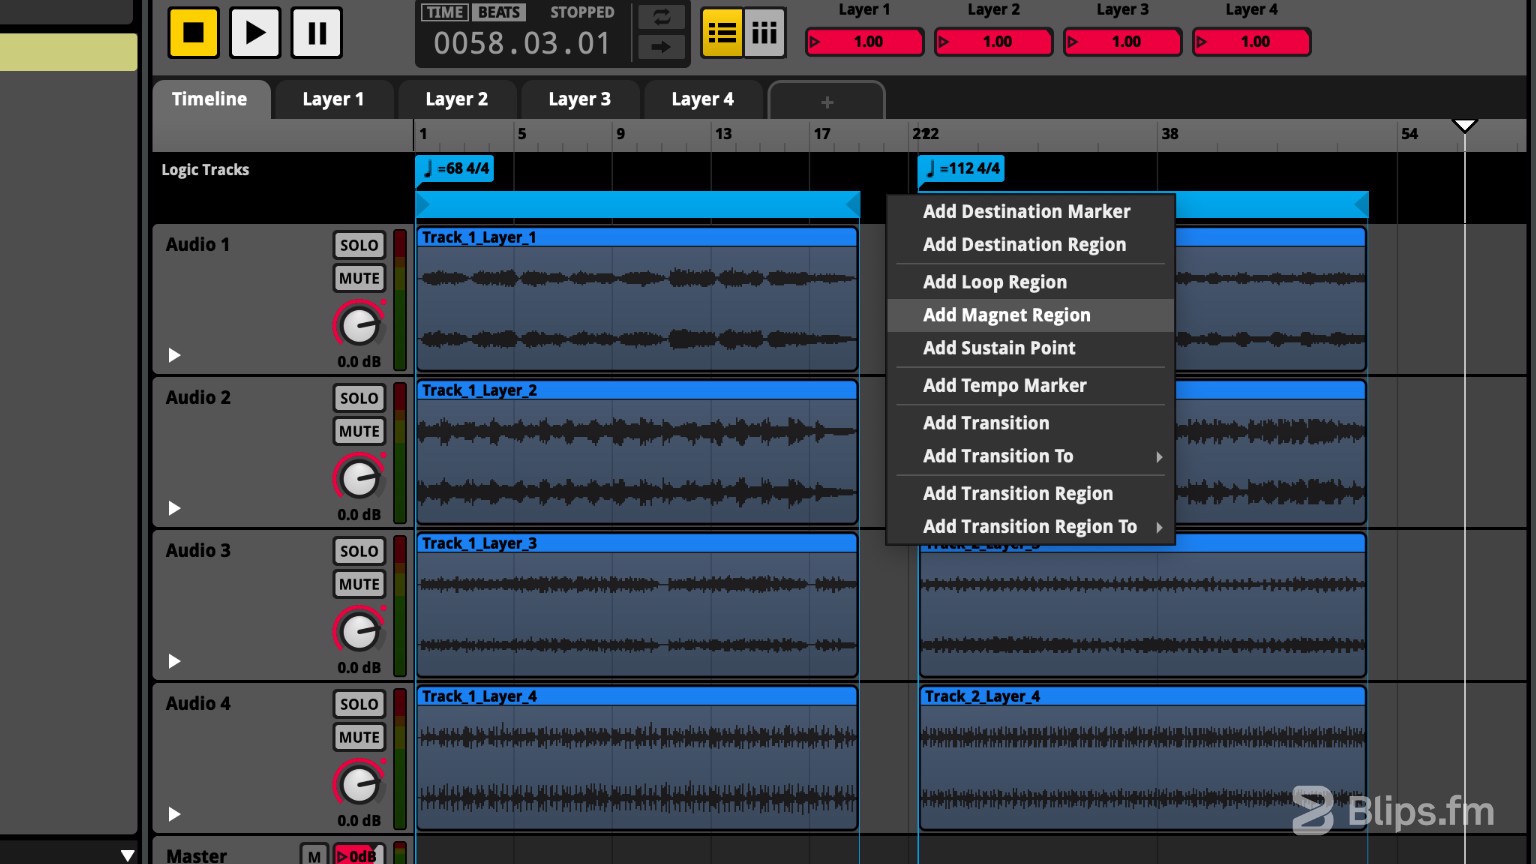
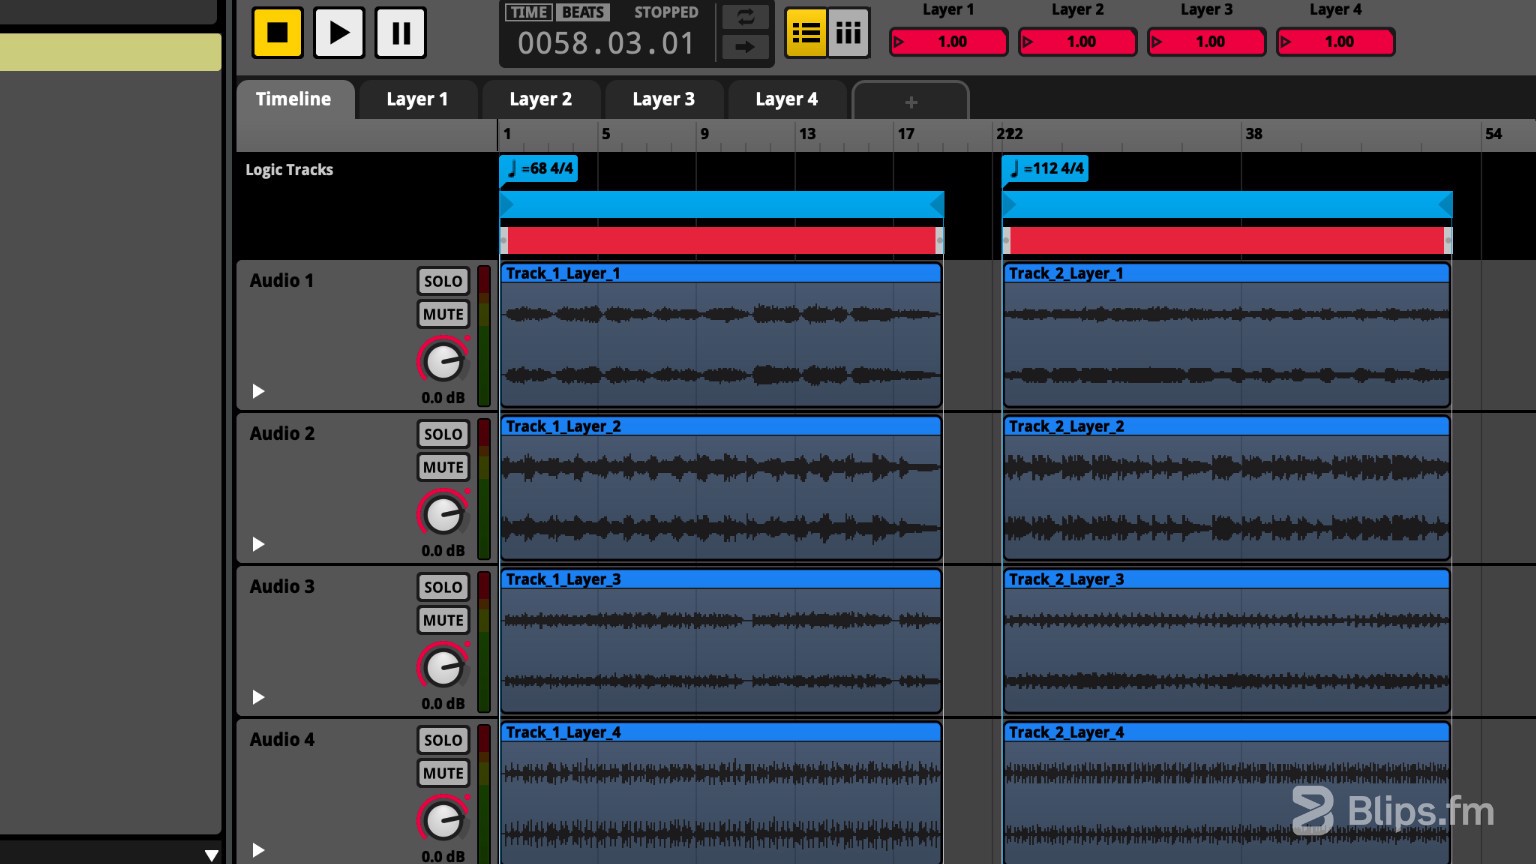
- We'll now need to create transition regions that will allow us to “jump” between tracks. Create a transition region by right-clicking on the “Logic Tracks” black bar and selecting “Add Magnet Region.” A red bar will appear, place it around the first track boundaries just like the loop region. This time I'm placing it below the loop region as I like to keep the markers floating on top. The stacking order is not important, though, you can vertically place it wherever you like.
- Create additional magnet regions for the remaining tracks and place them around each track's boundaries.
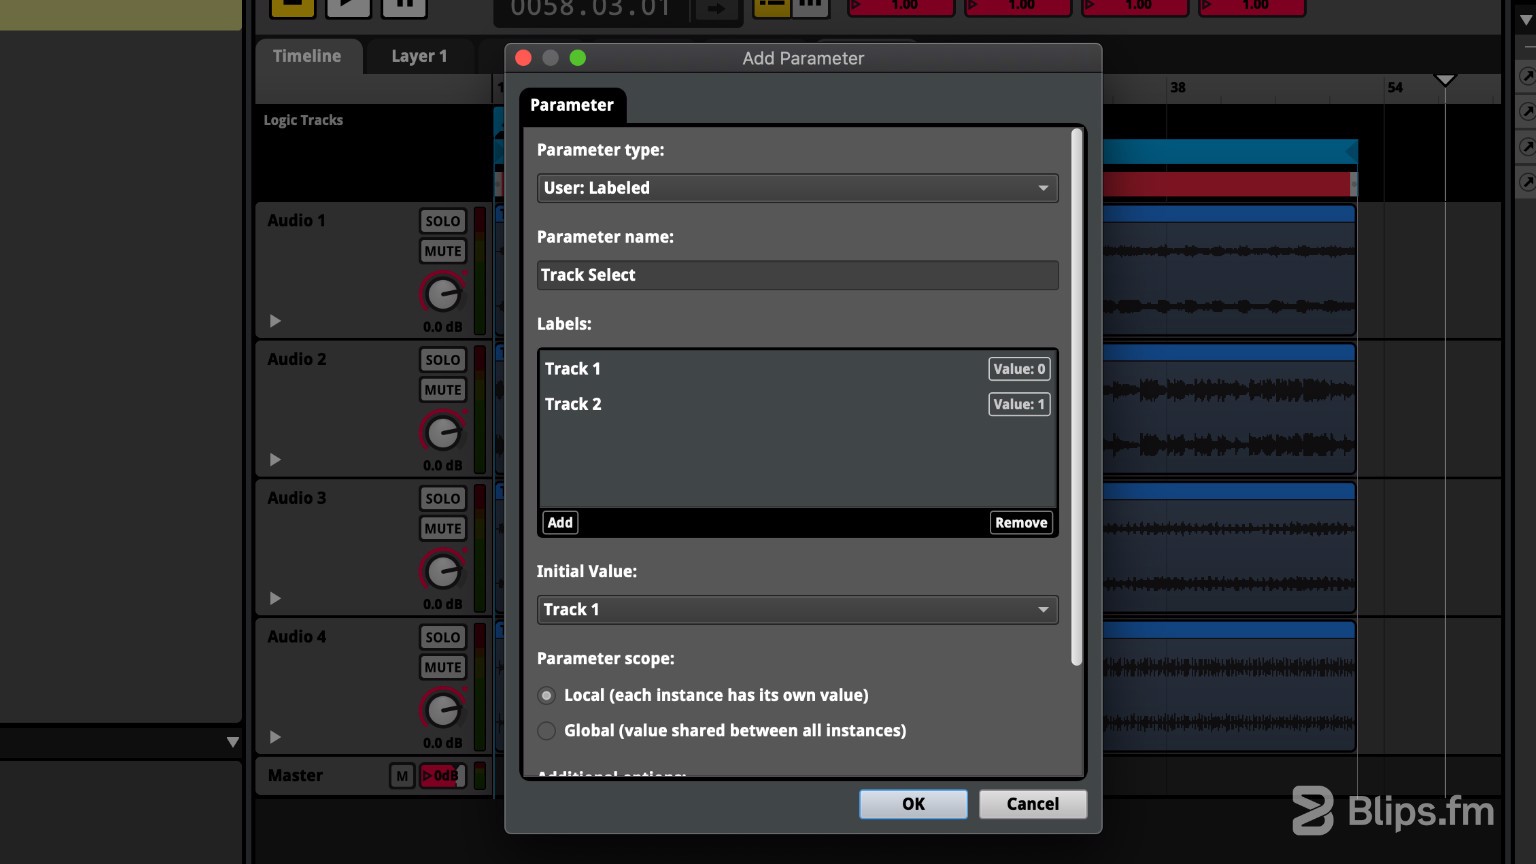
- We'll need to create a new parameter to control the track selection. Just like we did on the first part of the article to create the layer parameters, we'll click the “plus” button next to the “Timeline” tab. Mouse hover to “Add Parameter Sheet.” we won't create or select a folder now as we won't have more parameters related to this one. Simply click “New Parameter.”

- Under “Parameter Type” select “User:Labeled” then we'll name this parameter “Track Select.” Below you'll find a small window named “Labels”, with some labels already present, depending on the number of the tracks in our pack we'll name these labels “Track 1”, “Track 2” and so on. Remove the remaining labels if you don't have more tracks to label. Leave the other options as is and click “OK.” The new parameter will appear next to the others we've added before.
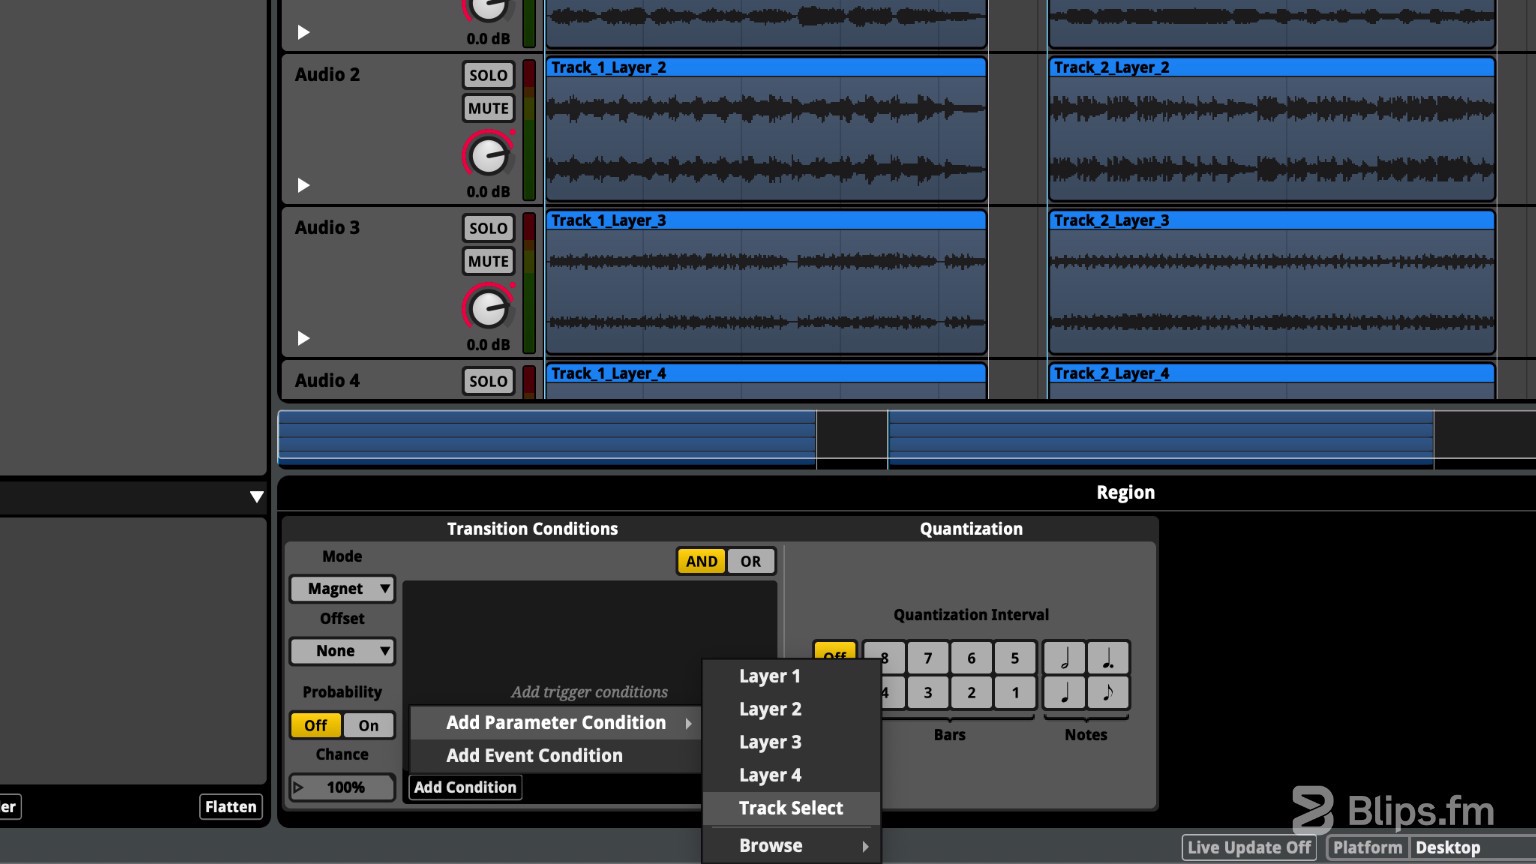
Switch to the timeline tab and click the first magnet region (red bar). On the “Deck” below, you'll see a box with “Transition Conditions” and “Quantization.” If the "Deck" isn't visible press the "D" key. Click the button “Add Condition” under “Add trigger conditions”, then "Add Parameter Condition" and click “Track Select.” A new box with the parameter “Track Select” will appear.
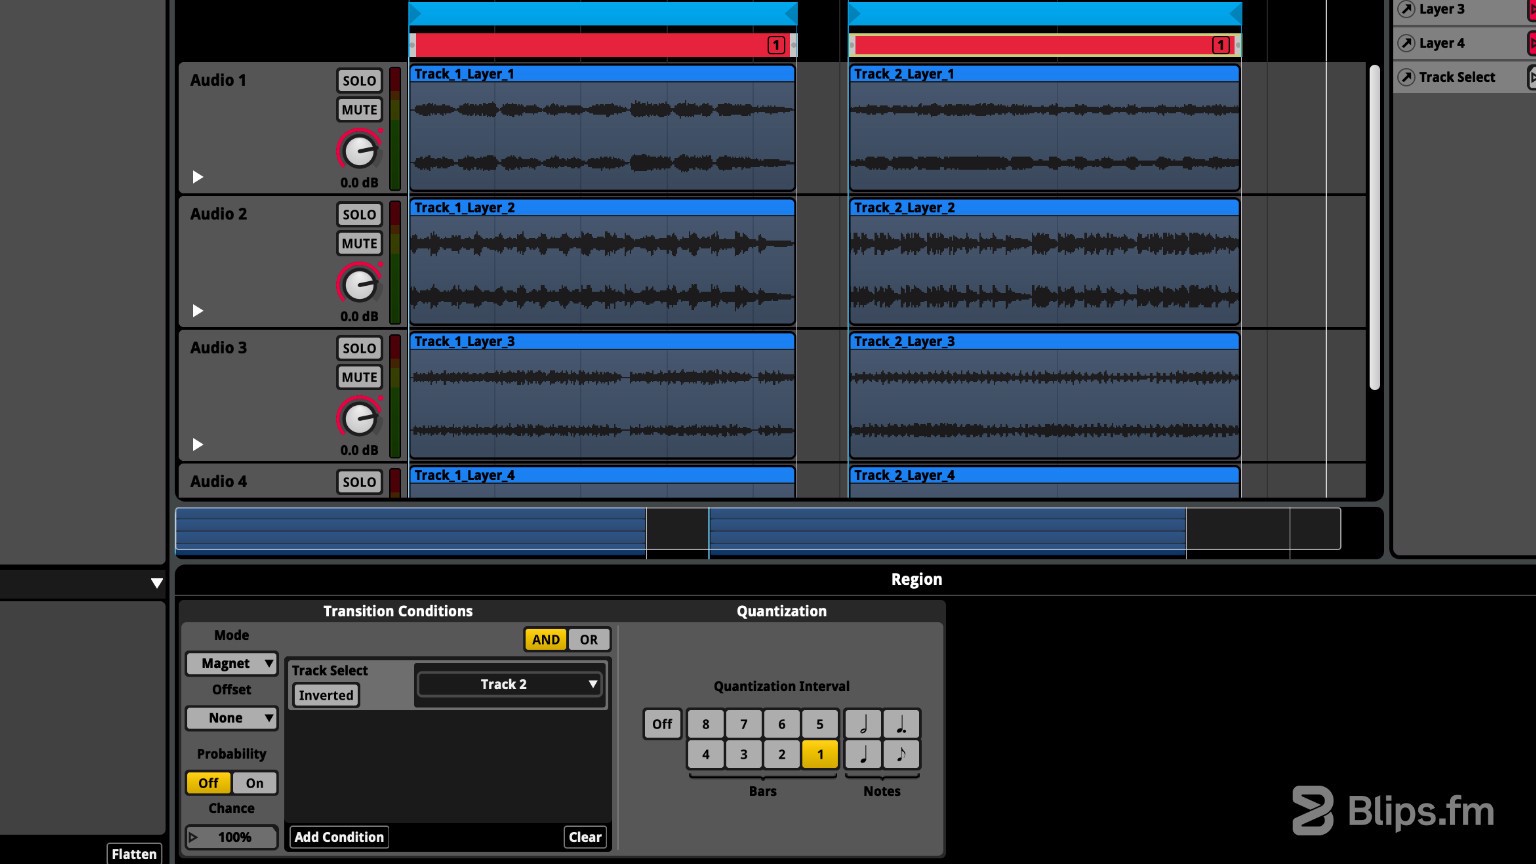
- On the dropdown menu select the track that this magnet region refers to. Select a "Quantization interval" of 1 (Bars). Do this step to the other magnet regions.
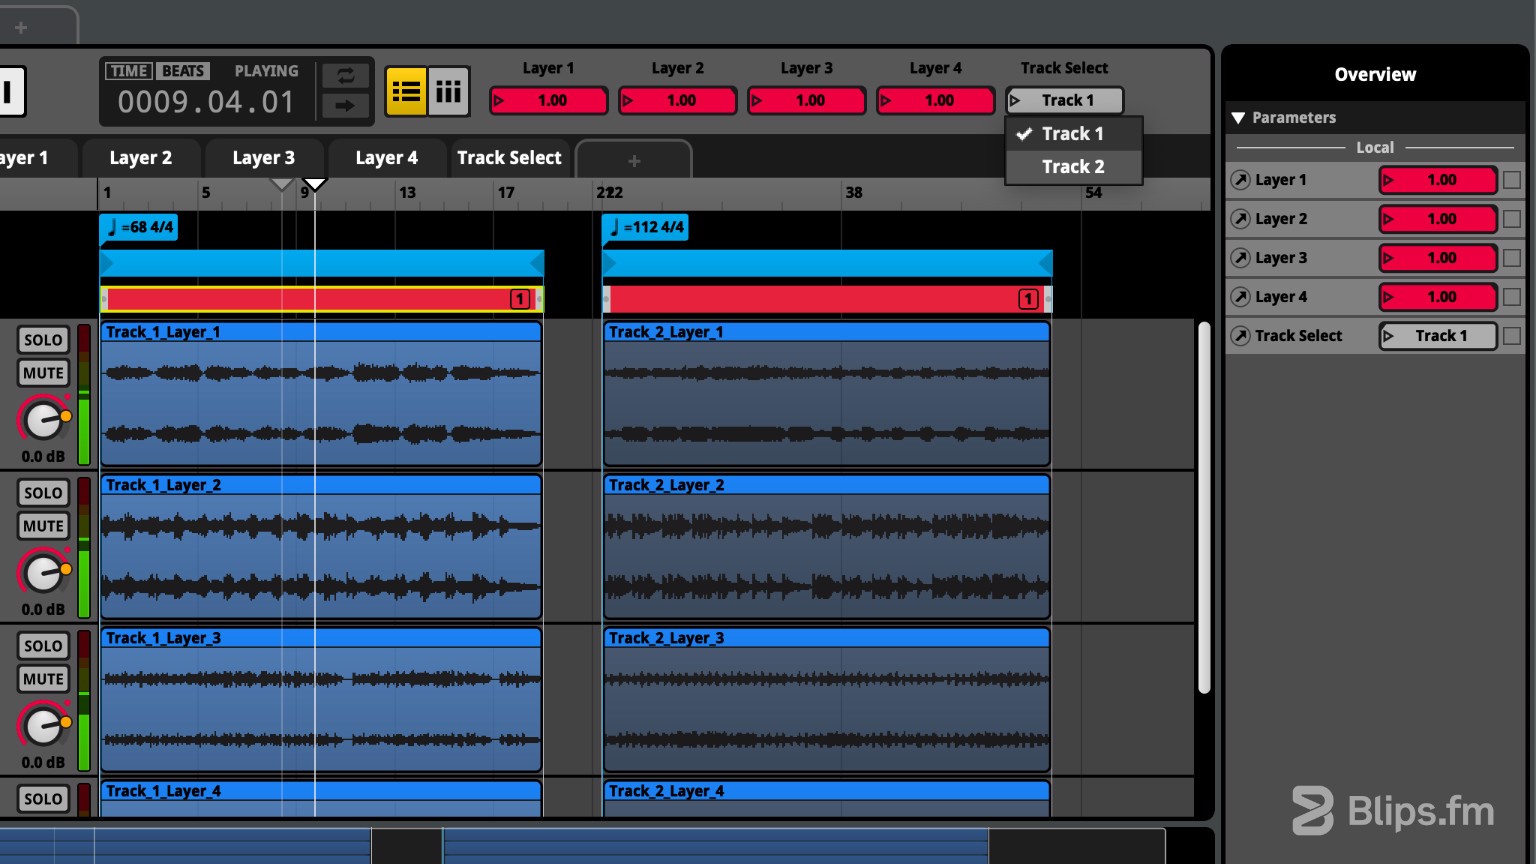
- If you now press play, you'll be able to switch to the different tracks by changing the “Track Select” parameter value (next to the Layer parameters we've created before on the transport bar). You can get a track selection dropdown by clicking the parameter's left arrow. You'll be able to see that the “jump” to the other track is not immediate. This is because we have set a quantization of one musical bar before the jump, making for a more musical transition.
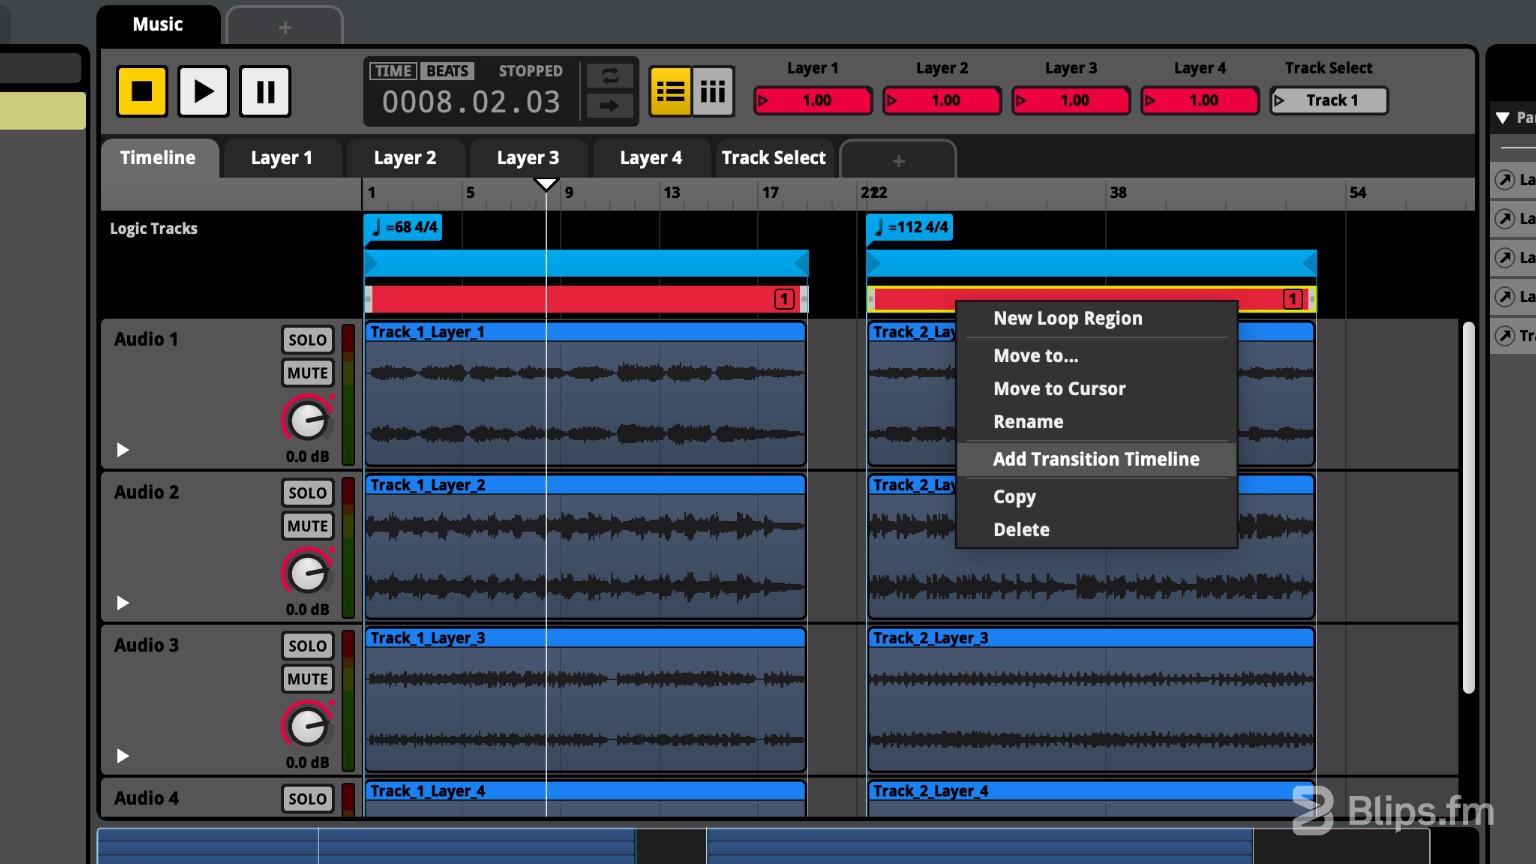
- To make the transition smoother we can add a crossfade between tracks by making use of a “Transition Timeline.” We can do this by right-clicking one of the magnet regions (red bar) and selecting “Add Transition Timeline.” You'll see the timeline expanding to the left of the selected region with a new blank section. This blank section appears before the tracks.
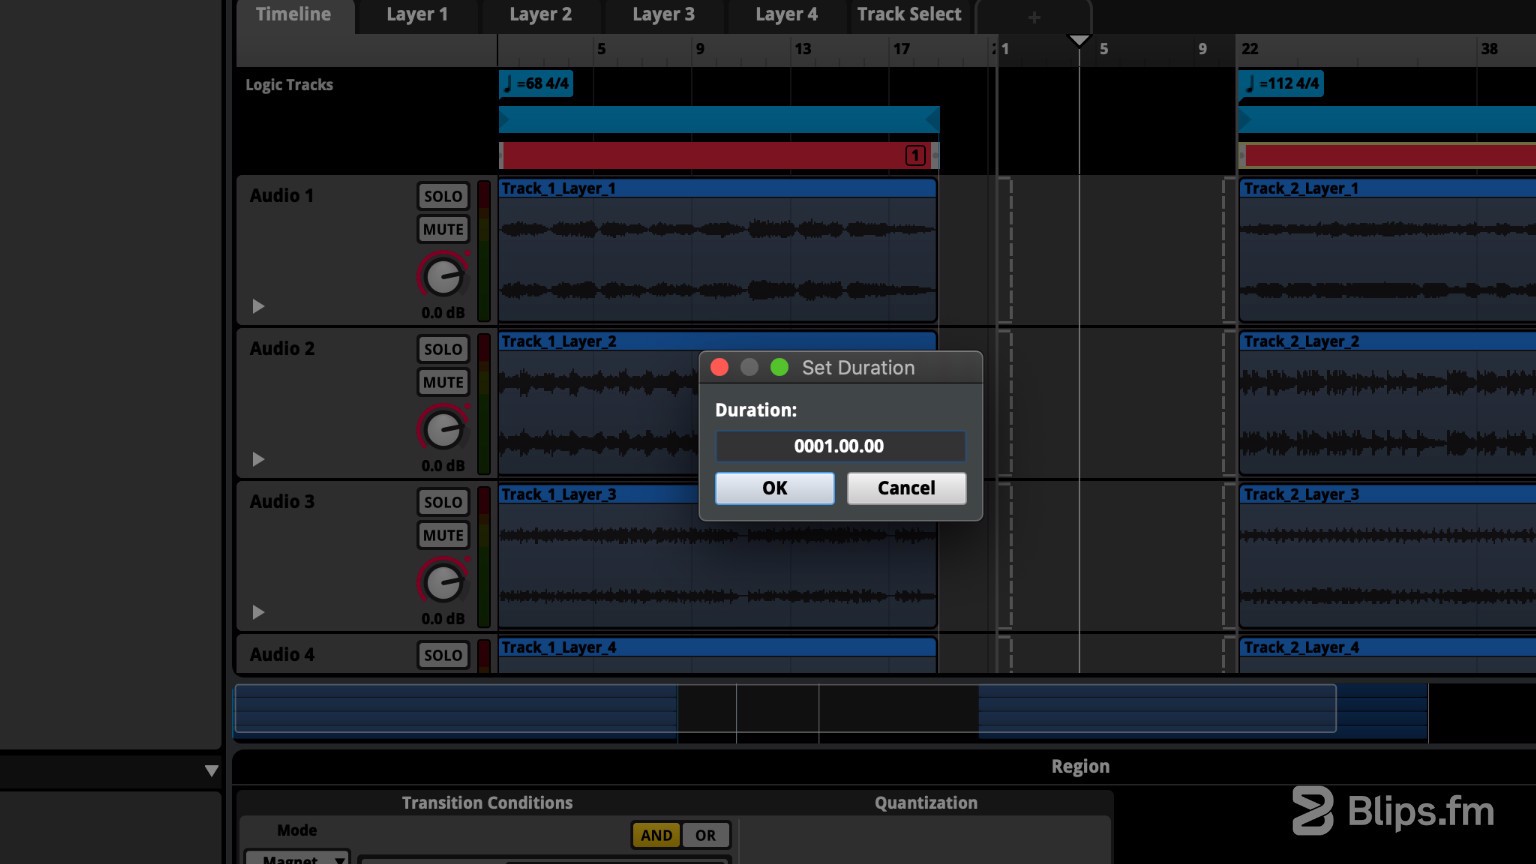
- Before working on this transition timeline make sure you have “Beats” selected on the transport bar counter. Right-click the magnet region again and click “Set Transition Timeline Duration.” Set the duration to “0001.00.00” and click “OK.” This will set a crossfade duration of 1 bar.
- This new section has dotted handles on each side. Zoom in on the transition handles (dotted lines). For each layer drag the left handle totally over to the right side. Do the same for the right side handle and drag it totally to the left side. You'll now see the transition timeline filled with two boxes that represent a fade-in/fade-out of the source/destination layers. Repeat these steps for the other magnet regions (add transition timeline/set transition duration/drag of source and destination).
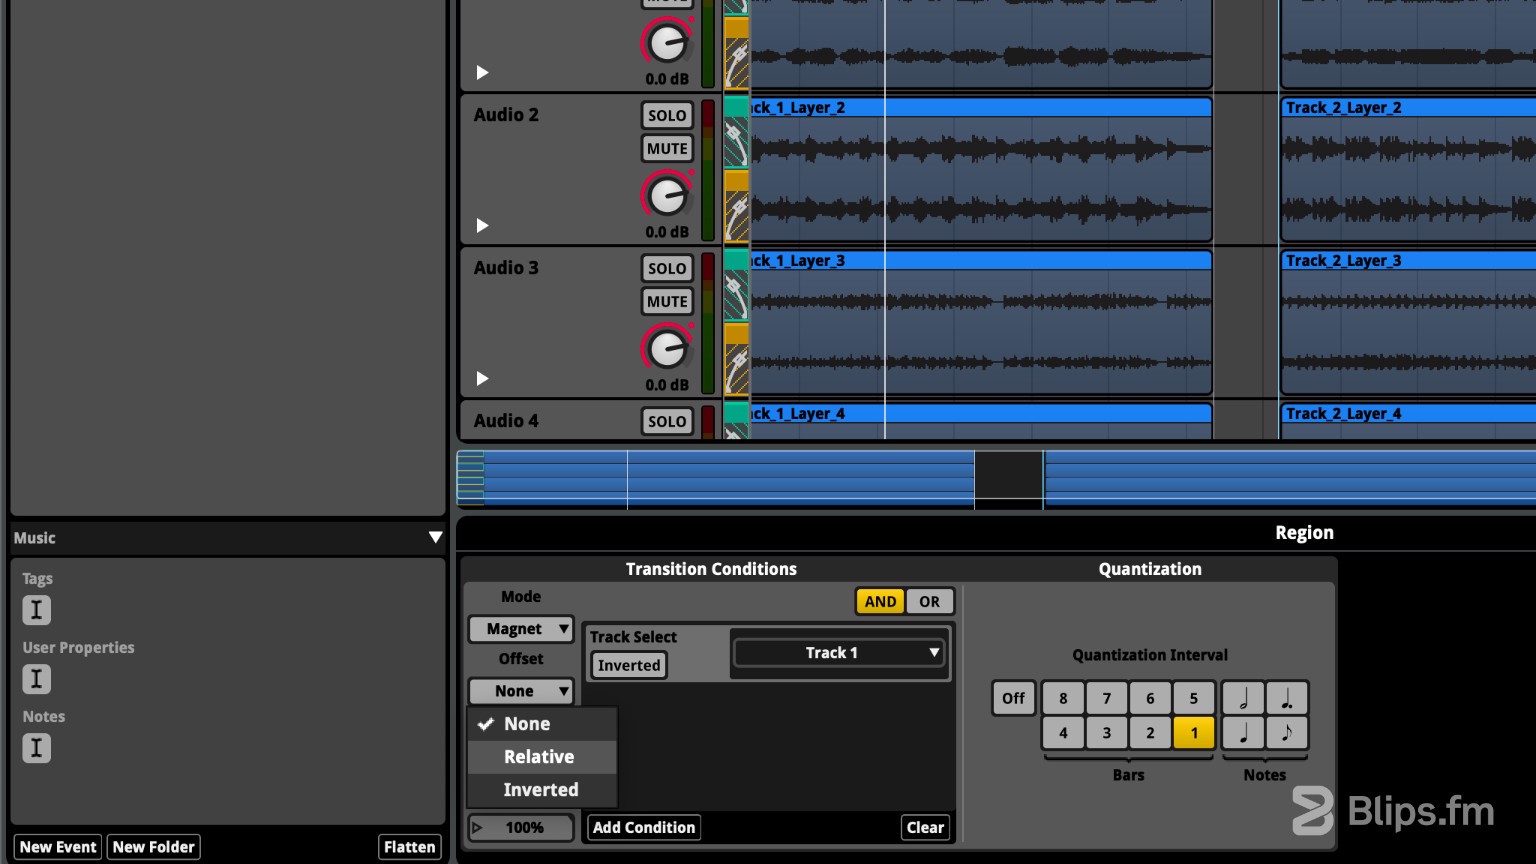
If you now play your project and use the "Track Select" parameter you'll notice the currently playing track softly fading out while the next one fades in. To better experience the effect enable all layers by changing the layer parameters. You may also notice that when the next track starts to play it will always play from its beginning, this can be undesirable, especially if during gameplay the player can trigger this change multiple times (like entering or leaving a determined place). To solve this problem, we can make the transition offset relative, this will make the next track in cue start to play at the same position the current one left. For example, if we trigger the track change at 0:32, the next track will start playing at 0:32, which will make the transition sound different on multiple triggers and thus less noticeable and repetitive for the player.
- Click one of the magnet regions (red bar). On the “Deck” below, you'll see the "Transition Conditions" box we used before. If the "Deck" isn't visible press the "D" key. Change the "Offset" field to "Relative." Repeat this step for the other magnet regions.
That's all you need to do. You can now try to change the track parameter again while the track is playing to observe the effect.
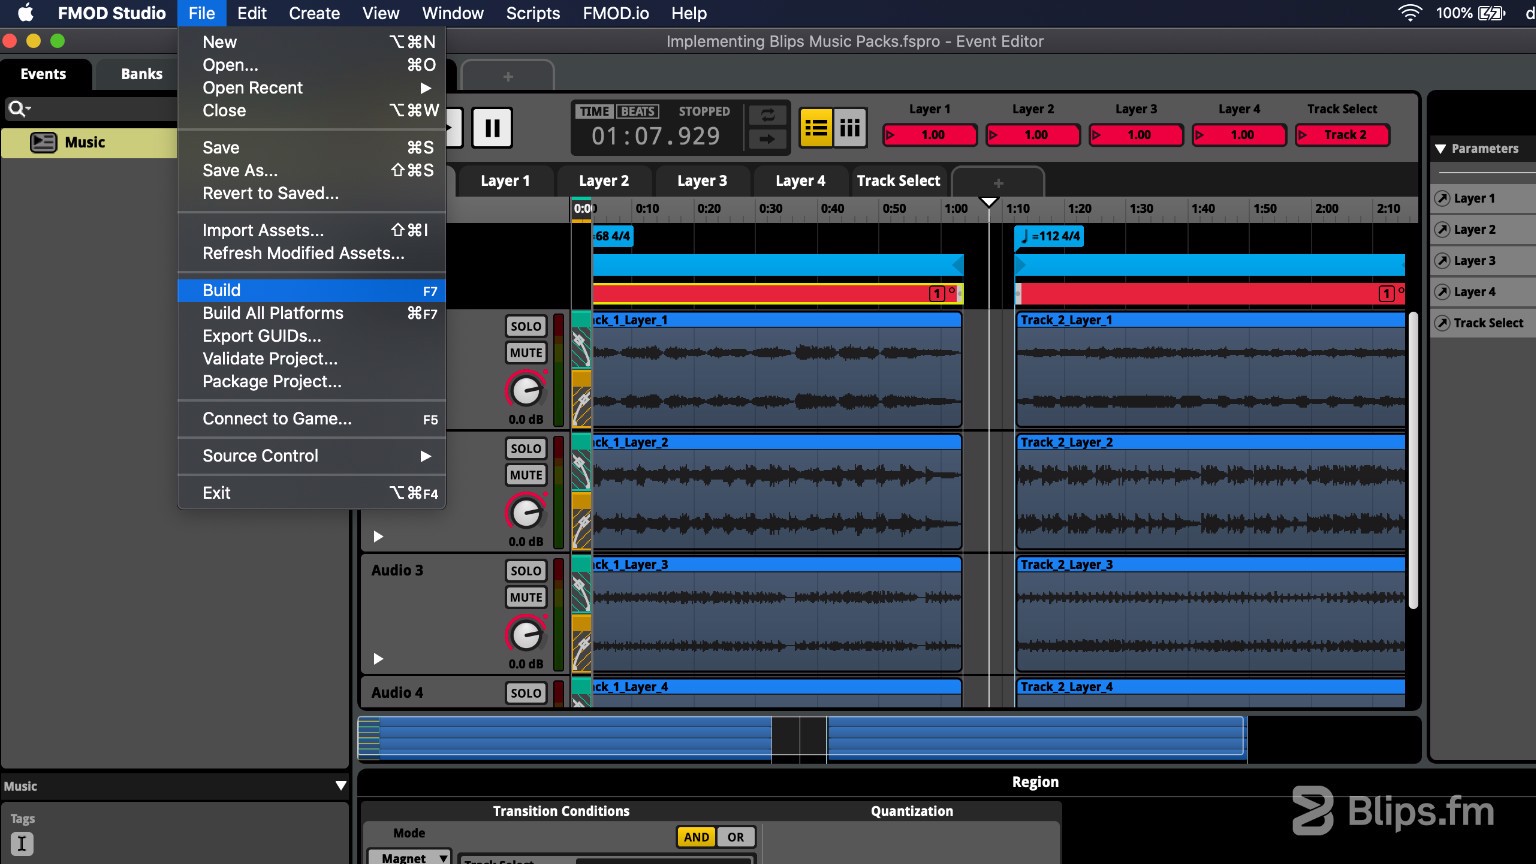
- Next we need to build the project by going to the “File” top menu and clicking “Build.”
By following all the steps since part one of this article, you have ended up with a complete adaptive music system. We can add and remove layers from the currently playing track, change between tracks, and do all this without drawing too much attention to the moment the changes occur.
In part three of this article, we'll explore how to control this FMOD project through code, we'll use the Unity game engine and C# as an example.
How to implement Blips music packs in FMOD (Part 3).
If you have any question or problem while following this tutorial feel free to leave a comment below and we'll try to help however we can! Feel free to share your own techniques if you have them as well, as we would love to hear them!