In parts one & two of this tutorial you've learned to implement a complete adaptive music system using FMOD Studio. In this last part you'll learn how to control the FMOD middleware through code using the Unity game engine and C# as the programming language.
There are many ways in which you can structure your audio code. For the purposes of this tutorial, I'll create a sort of an “Audio Manager” that will be used to call methods and change parameters on FMOD. For this "Audio Manager" class, I will use the singleton design pattern. As a “singleton”, the single instance of this class will persist on scene reload and when changing scenes. I will also use static methods to make it easier to control the music from every other script throughout the project without first needing to set references. You can follow the next steps to better understand the code I created and to take note of the important methods that control the FMOD Engine. As a reminder you can find the complete project and scripts in our GitHub account.
Note: Before continuing, make sure that your Unity project is set up to use FMOD, if not you can find instructions on how to intall and configure FMOD for your project here.
The Unity version used to write this tutorial was the 2021.3.15f1. If you end up having a compatibility problem with newer versions let us know so we can update this tutorial or release a new one!
These are the steps I took to create our “Audio Manager”:
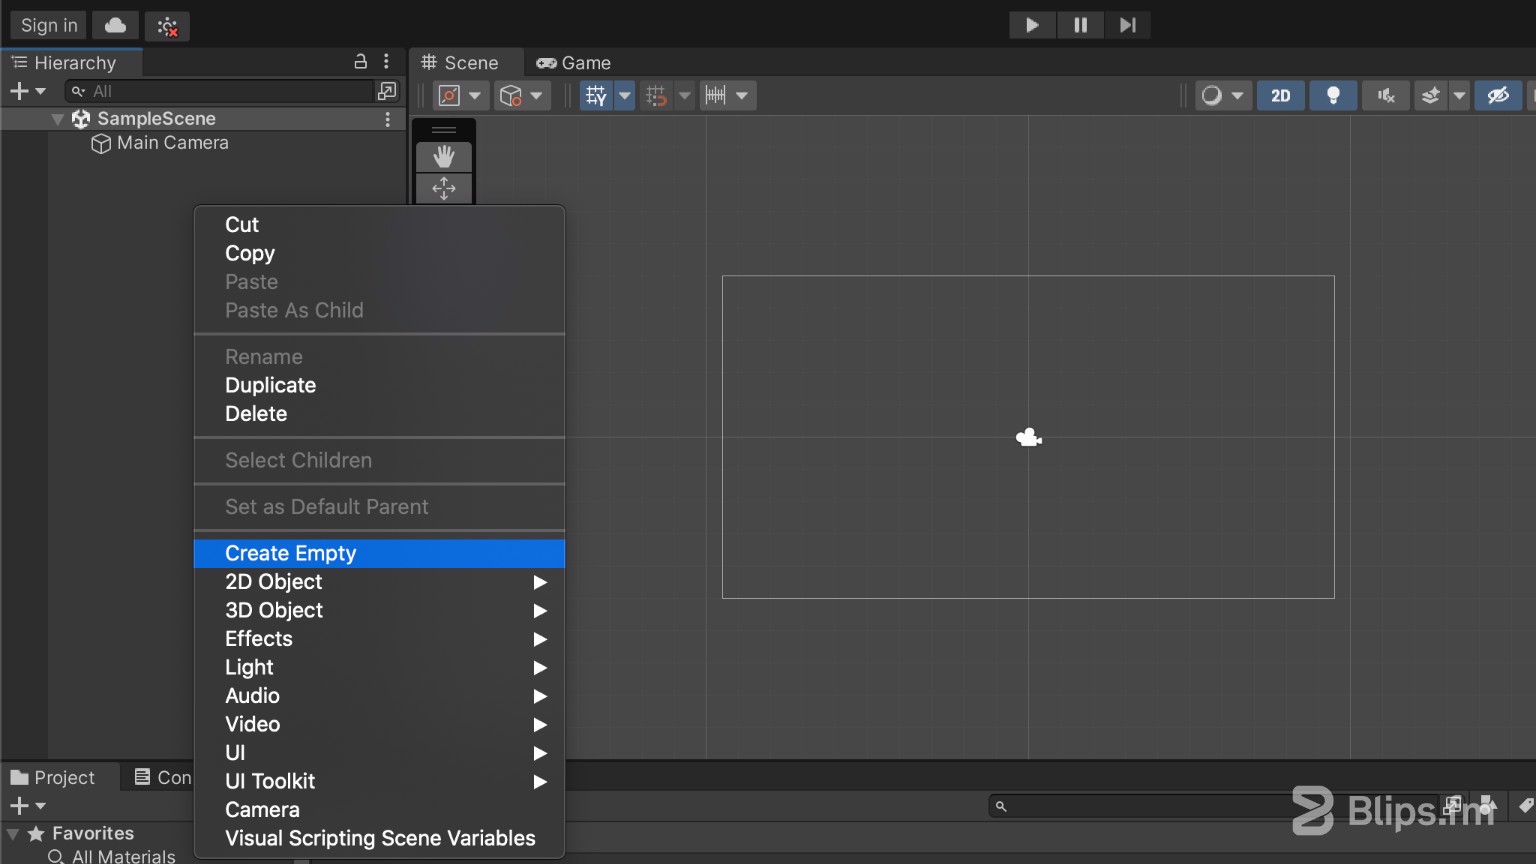
- In your Unity project's “Hierarchy” right-click to create an empty object. We'll use this new game object to hold the C# script that will contain our “Audio Manager” code. Name this object “AudioManager.”
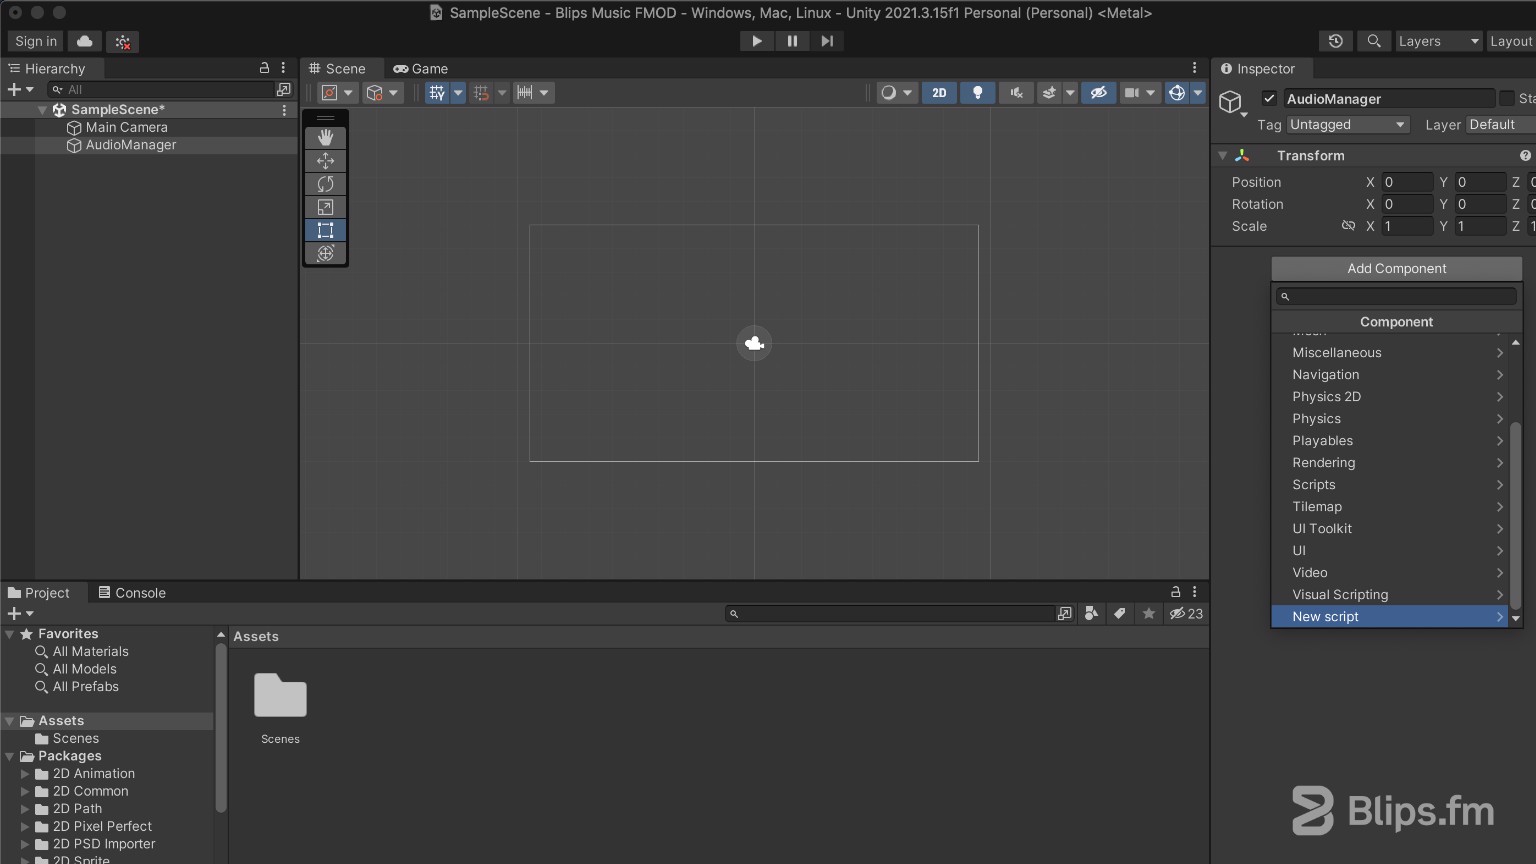
- Using the “Project” browser, right-click to create a new C# script in your preferred assets location and name it “AudioManager” as well, then drag this newly created script to the “AudioManager” game object in the “Hierarchy.” If you prefer, you can also select the “AudioManager” object in the “Hierarchy”, then on the “Inspector” click “Add Component” and then “New script.”
- With the “AudioManager” game object selected, go to the inspector panel and double-click the script's name. This will open the C# script in your predefined code editor. Alternatively you can also double-click the script on the "Project" Browser.
- Let's write some code. We'll first turn this class into a singleton. We'll add a class field that will contain its own instance:
AudioManager instance;
- We'll add the built in Unity API method
Awakewith the following code:
void Awake () // Singleton
{
    if (!instance)
    {
        instance = this;
        DontDestroyOnLoad(gameObject);
    }
    else{
        Destroy(gameObject);
    }
}
This will make our AudioManager persist between scenes.
- To reference our FMOD “Music” event, we'll need to create a new class field of type
FMOD.Studio.EventInstance:
static FMOD.Studio.EventInstance music;
- Next we need to initialize this EventInstance. We'll do it on the
Awakemethod as well, below the existing singleton code:
music = FMODUnity.RuntimeManager.CreateInstance("event:/Music");
- We'll now create methods to both initiate and stop our music event:
public static void PlayMusic()
{
    music.start();
}

public static void StopMusic()
{
    music.stop(FMOD.Studio.STOP_MODE.IMMEDIATE);
}
- To be able to change the playing track create an
enumwith our selectable tracks:
public enum Track
{
    TRACK1,
    TRACK2
}
- We'll create a method to which we can pass our selected track as an argument:
public static void SelectTrack(Track track)
{
    music.setParameterByName("Track Select", (float)track);
}
This method will be responsible for changing the FMOD parameter we created on FMOD Studio (Track Select).
- We'll also need to control our track's layers, by enabling or disabling them. For that we will create a nested helper class to register the desired layer states:
public class LayersState
{
    public Layer Layer1;
    public Layer Layer2;
    public Layer Layer3;
    public Layer Layer4;
}
- Also create an
enumwith our possible layer states (Enabled/Disabled):
public enum Layer
{
    DISABLED,
    ENABLED
}
- Now we'll create a method to update the playing state of our layers:
public static void UpdateLayersState(LayersState layersState)
{
    music.setParameterByName("Layer 1", (float)layersState.Layer1);
    music.setParameterByName("Layer 2", (float)layersState.Layer2);
    music.setParameterByName("Layer 3", (float)layersState.Layer3);
    music.setParameterByName("Layer 4", (float)layersState.Layer4);
}
That's it! This is all the code you need to be able to start and stop the music, change tracks, and set layer combinations. You'll now be able to reference the AudioManager from any other script and call the methods we've created to control the playback.
To check our AudioManager code above in action I've created another script named “MusicController” that will enable you to explore all of this functionality by pressing your keyboard keys. You just need to create a new empty game object on the “Hierarchy” and attach this script to it. You can find this script in our GitHub repository inside the same folder the AudioManager script resides in (Unity Scripts).
This is a very simple self-documenting script, but here's a quick summary of what each key controls:
“P” - Starts the music and plays it from the beginning
“S” - immediately stops the music
“1” - Enable/Disable the first layer
“2” - Enable/Disable the second layer
“3” - Enable/Disable the third layer
“4” - Enable/Disable the fourth layer
“C” - Change between tracks.
If everything works as expected when entering play mode you'll hear the first layer of the first track playing. Use the keys above to explore your adaptive game music system.
This tutorial was created based on the Blips Pack M that features two multi-layered tracks. For the Blips Pack L (three tracks) the process would be almost the same we did for the second track, starting from part 2 of this tutorial, the only difference would be to create the "Track Select" parameter with "Track 3" as an additional state and set the conditions on the magnet regions accordingly. The "AudioManager" code above would also need to be updated to reflect the added third track. The scripts provided with the project are ready for a third track, you just need to uncomment the commented lines. The "MusicController" test script would need to be updated, though, as it only cycles between the first two tracks as an example.
This wraps our three part tutorial. You are now ready to creatively use adaptive music within your game project!
If you have any question or problem while following this tutorial feel free to leave a comment below and we'll try to help however we can! Feel free to share your own techniques if you have them as well, as we would love to hear them!