The Unity game engine has some great built-in import options that can help you better optimise your audio assets for your specific kind of game. These options can however be confusing for developers who are not experts in audio. That's why I created this article. To help you understand the options available to you and when to use them.
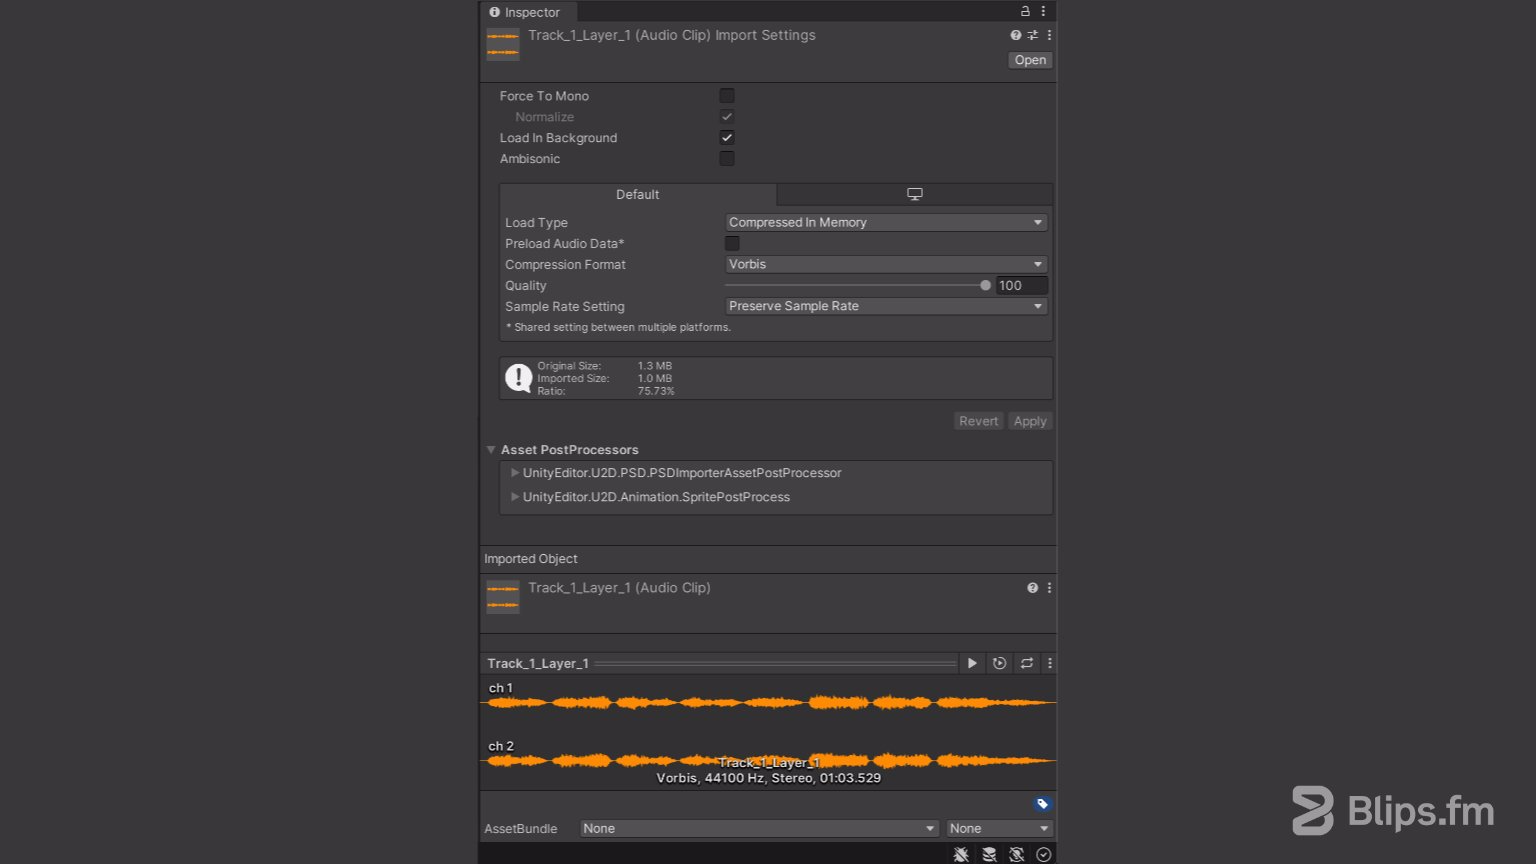
Unity's Inspector showing the "Audio Clip Import Settings"
In Unity, the audio import options are named “Audio Clip Import Settings". They are shown in the Unity's inspector after selecting an audio file in the “Assets” folder.
Force To Mono
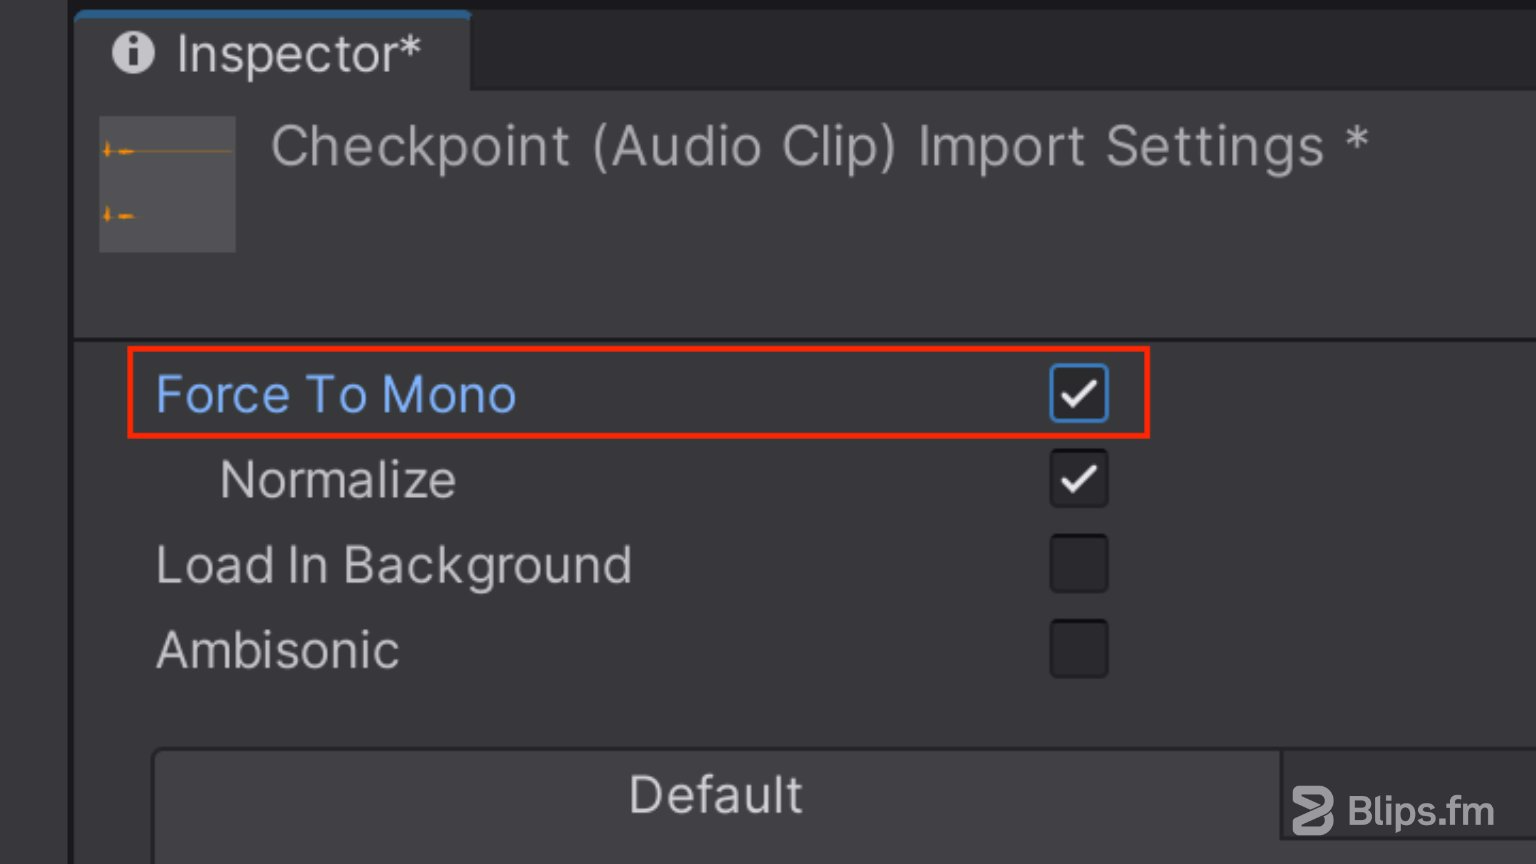
The “Force To Mono” option downmixes stereo audio files to mono. This means that instead of two distinct audio channels (one for the left and other for the right ear) we end up with just one audio channel.
This does not mean that only the left or the right side of the audio clip will be heard on a stereo system. It just means that the sound will be exactly the same in both the left and right channels. This allows you to reduce the file size by 50% as the two channels will be merged into one.
When should I use it?
Stereo audio files can have a sense of dimensionality to them that may not be immediately noticeable until the moment we play them back in mono. Depending on how wide the stereo image is, this spatial effect can be barely noticeable or it can make sounds loose impact, sound thin, or just make them sound completely different, in a bad way.
Ideally we evaluate if the trade-off is worth it for each file. You can experiment and carefully listen to differences in perceived quality and dimensionality. If there isn't much difference then you can take advantage of this option to save up on resources.
As a general guideline you should consider using this option for short sounds such as footsteps, gunfire and UI sound effects for example. This option can also be considered for dialogue and sounds that will be positioned in either 2D or 3D space. I wouldn't recommend using this option for music or longer sound effects in most situations.
Again, this is just a general guideline. For the most informed decision make sure you try hearing the sounds with and without this option enabled.
Note: Usually sound designers working for a video game project create their audio files with intent, making them mono or stereo files depending on the aesthetics of the sound and how they'll be used. If you have a sound designer in your team, it's probably best to leave this option unchecked.
Normalize
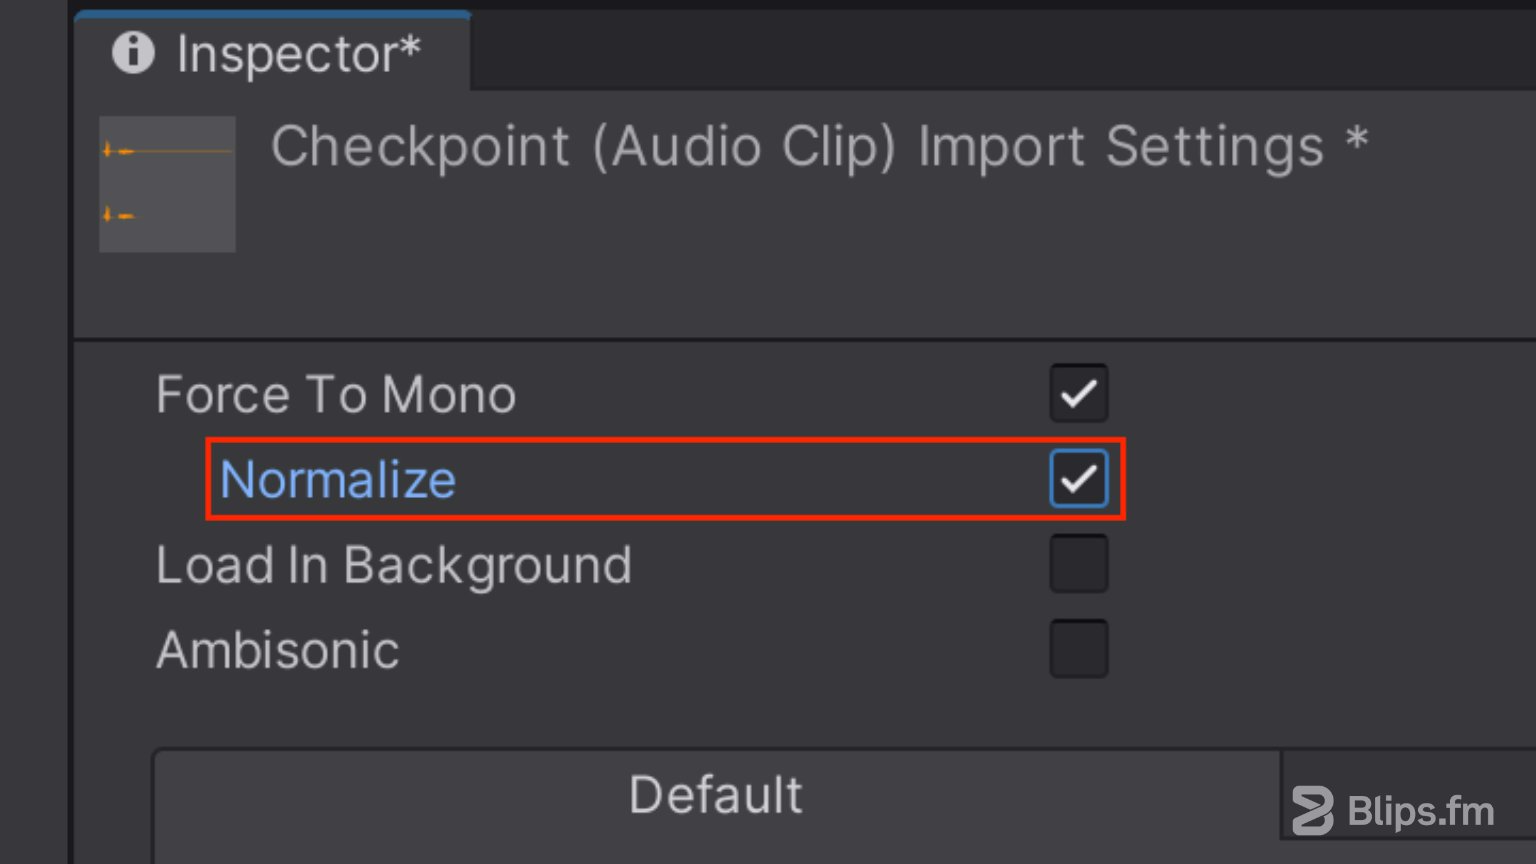
This option is tied to the “Force to Mono” option above. The downmixing process typically creates a result that sounds quieter than the original stereo version. The Normalize option makes an adjustment to the amplitude of the audio clip so that its loudest point reaches the maximum possible level without clipping or distorting the signal.
It is therefore recommend to enable this option when using “Force to Mono” in order to get additional headroom for volume adjustments. Notice that the volume of the audio file will be altered independently of using the “Normalize” option or not, so differences in volume will always need to be compensated through the volume property of an “AudioSource” component.
Load In Background
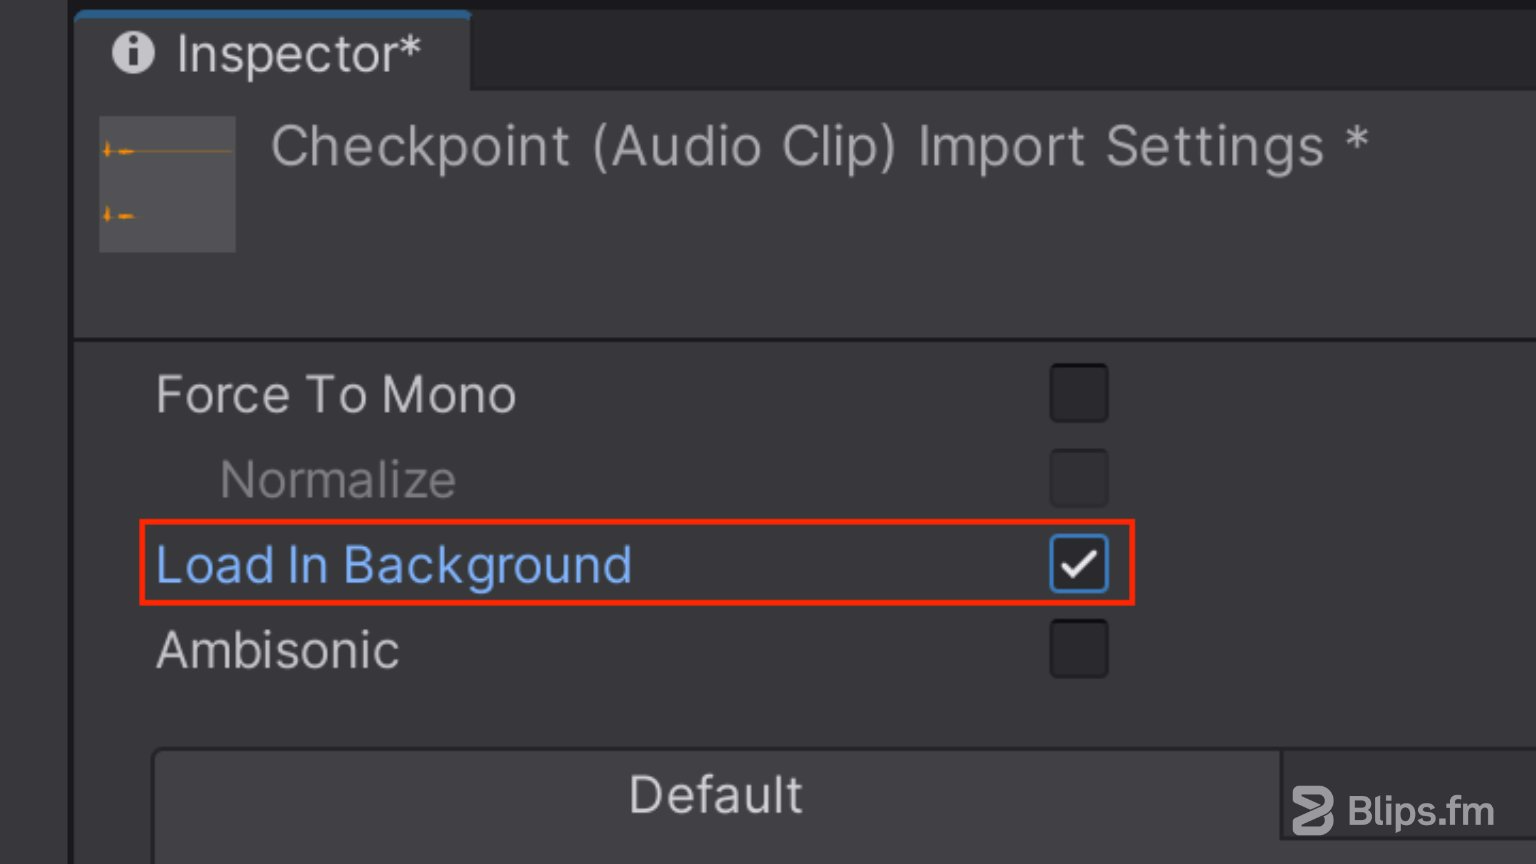
When this option is enabled, Unity will load the audio clip at a delayed time on a separate thread, which allows the game to continue running without being blocked by the loading process. This can make for a seamless experience with no hiccups at the moment audio assets need to be loaded.
Play requests on audio clips that are still loading in the background are deferred until the loading is complete. You can query the load state through the Unity API. By default this option is disabled. This ensures that all audio clips complete loading as soon as the scene starts playing.
Ambisonic
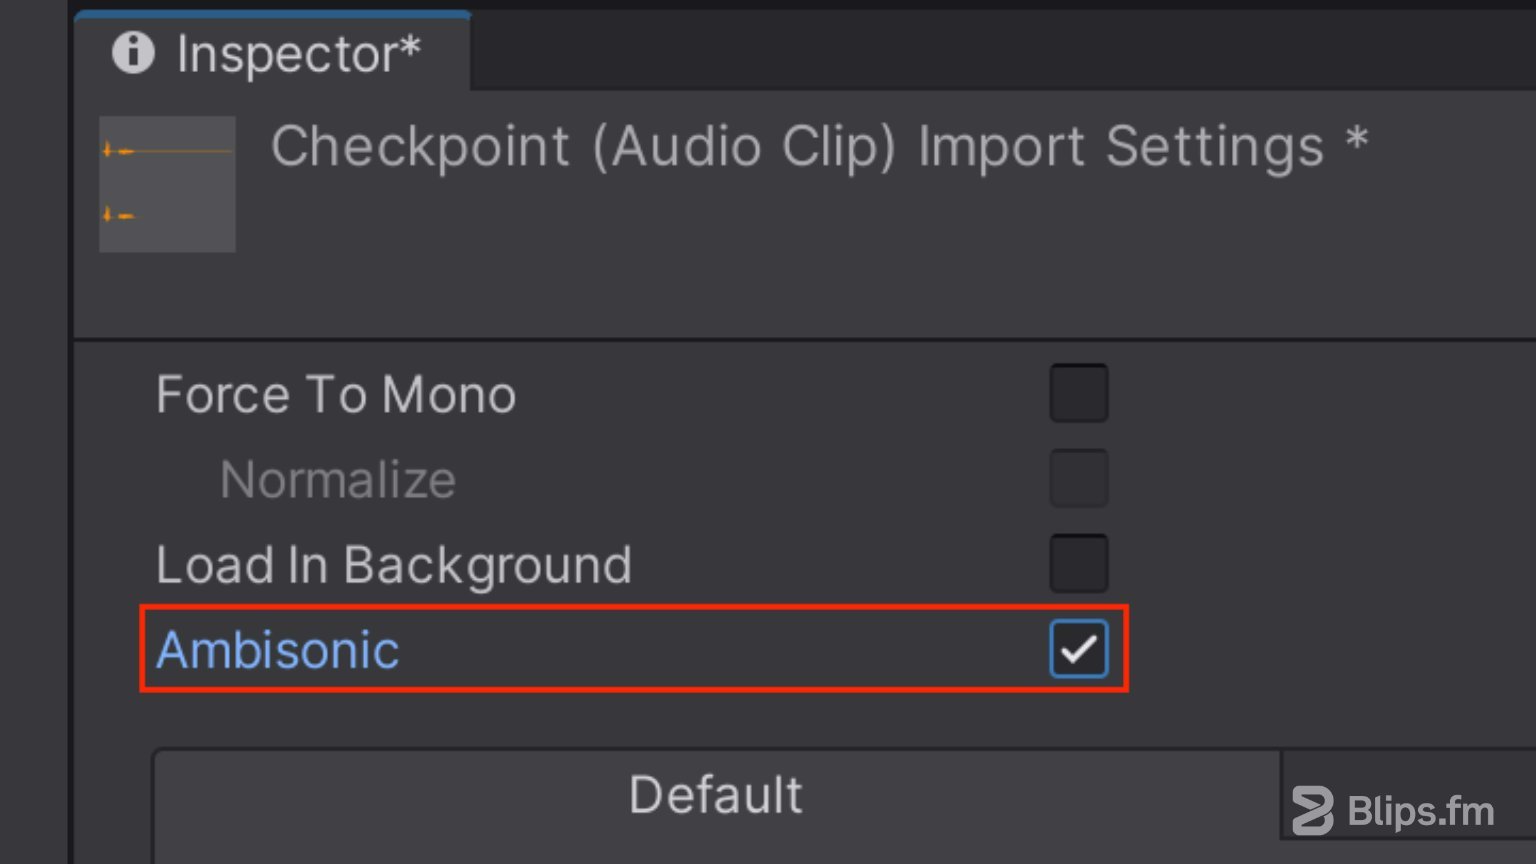
This option marks an audio file to be decoded as ambisonic.
Ambisonic audio is a surround sound technique that allows for the creation and reproduction of 360-degree immersive audio experiences. It's useful for 360-degree videos and XR applications.
To use ambisonic audio in your project, you'll need Ambisonic-encoded audio files (multi-channel B-format WAV files) and an ambisonic audio decoder. There are no built-in decoders included with Unity, but some VR hardware manufacturers provide them in their audio SDKs for Unity. Some examples include: Google Resonance Audio, Steam Audio and Oculus Spatializer.
Load Type
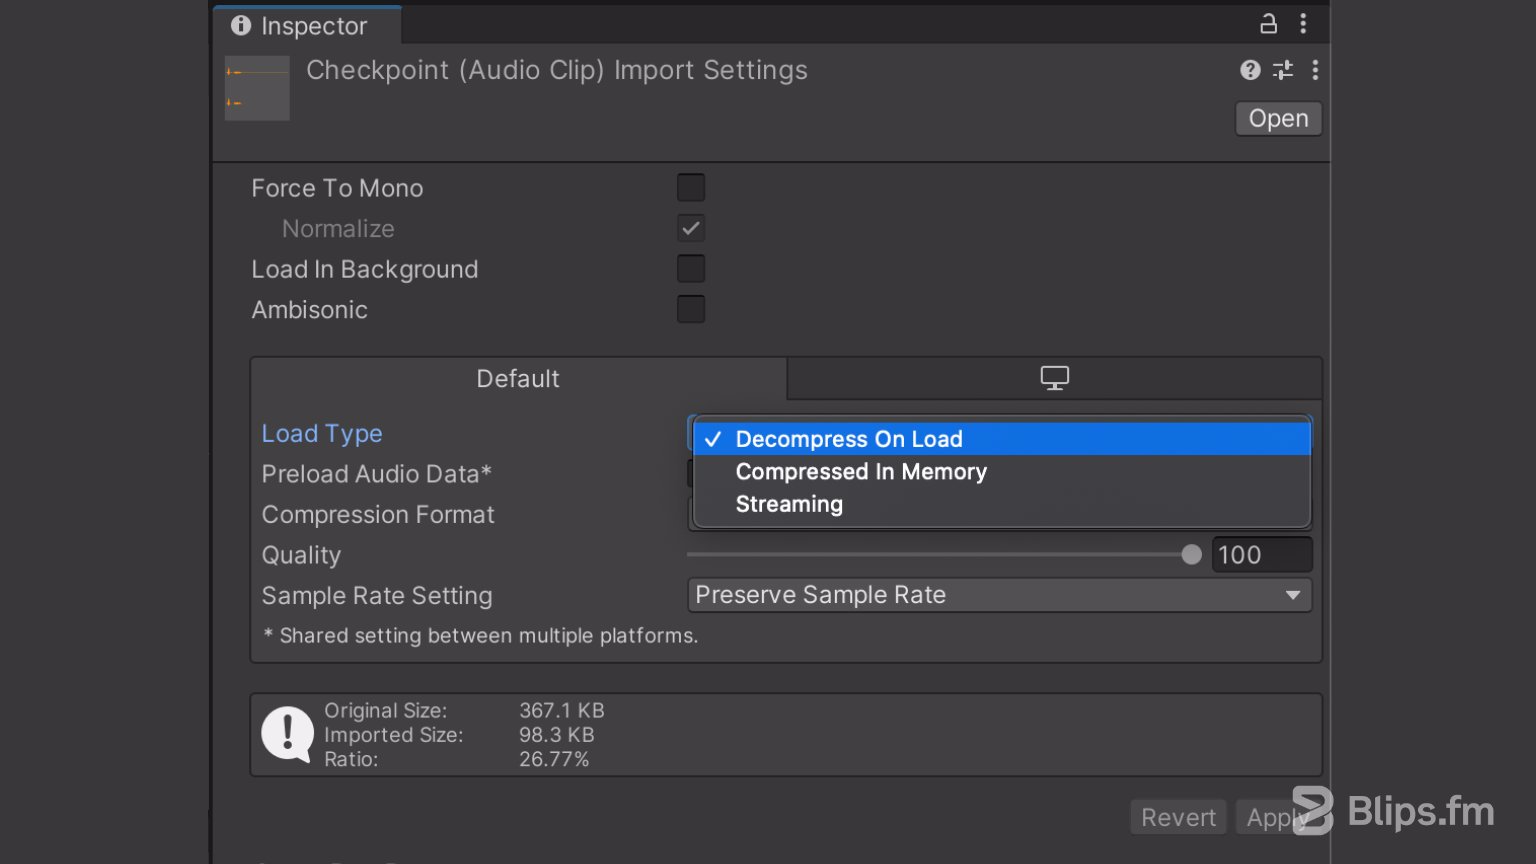
This is the method Unity uses to load the audio assets at runtime. There are three available options to choose from: Decompress On Load, Compressed In Memory and Streaming. With the first two, the audio files are loaded into memory either in a compressed or uncompressed state. The latter reads the files directly from the disk. Let's have a look at each of these options in more detail:
Decompress On Load
With this option the audio files are decompressed as soon as they are loaded into memory. Because files will be kept in memory in an uncompressed state, this option is not recommended for large files.
Compressed In Memory
With this option, audio files are loaded and kept compressed in memory. It is therefore better suitable for larger files. Because sounds are decompressed on the fly while playing though, this option has a slight performance overhead. With this “Compressed in Memory” option, the decompression happens on the mixer thread.
Streaming
When Streaming is selected sounds are loaded from the disk instead of memory. The Streaming method uses just a minimal amount of memory to buffer compressed data that's incrementally read from the disk and decoded spontaneously. Streaming has an overhead of approximately 200KB, even if none of the audio data is loaded. The Streaming method is also better suitable for longer audio files. The decompression happens on a separate streaming thread.
How do I choose the load type method?
Assuming we won't be needing to perfectly fine-tune all the sounds for hardware with limited capabilities and as a general guideline:
Use “Decompress On Load” for small files that are used frequently throughout the game such as short sound effects. For longer sounds such as music or ambiences use “Streaming”.
Preload Audio Data
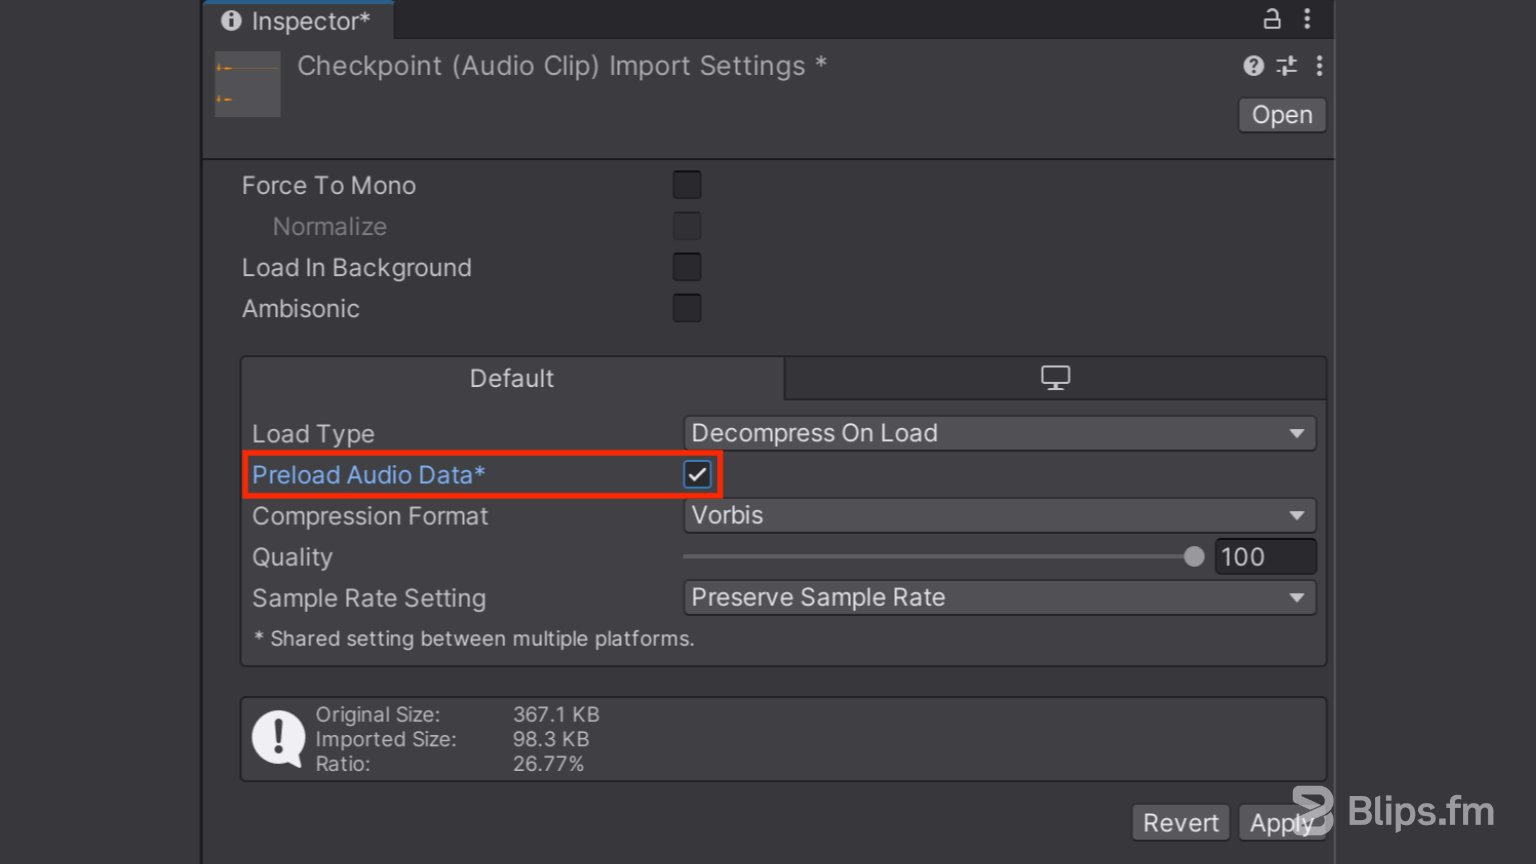
When enabled, the audio clip is pre-loaded before the scene is loaded. If you leave this option off you can manually load and unload the audio data through code using the Unity API. This makes it possible to better optimize memory usage. Notice though that a call to Play() or PlayOneShot() on an AudioSource component will also force the data load.
This option doesn't apply for the “Streaming” load type option as streamed audio assets cannot be preloaded.
How does this setting differ from “Load In Background”?
These two options are indeed closely related. The ”Load in Background” setting determines if the audio files should be loaded using the main thread or a separate thread. If “Load in Background” is unchecked, Unity won't be able to perform any other operations when audio assets are being loaded which can lead to frame hitches if the loading is done during gameplay.
The "Preload Audio Data" setting determines if the audio data should be loaded before the scene starts playing which can be important for audio that must be ready as soon as the scene loads.
Notice though that when both of these options are enabled, sounds may still be loading after the scene is ready to be played. This can work well for cases where sounds won't be needed right away but a little later in the scene.
Compression Format
As discussed in the article Game audio files: A quick developer’s guide, in Unity there isn't much of a need to select the most appropriate audio file format for each use case. Unity features a built-in transcoder that can handle audio compression duties. Because of this it can be practical to just import uncompressed audio file formats such as WAV and AIF and let Unity handle the compression when needed.
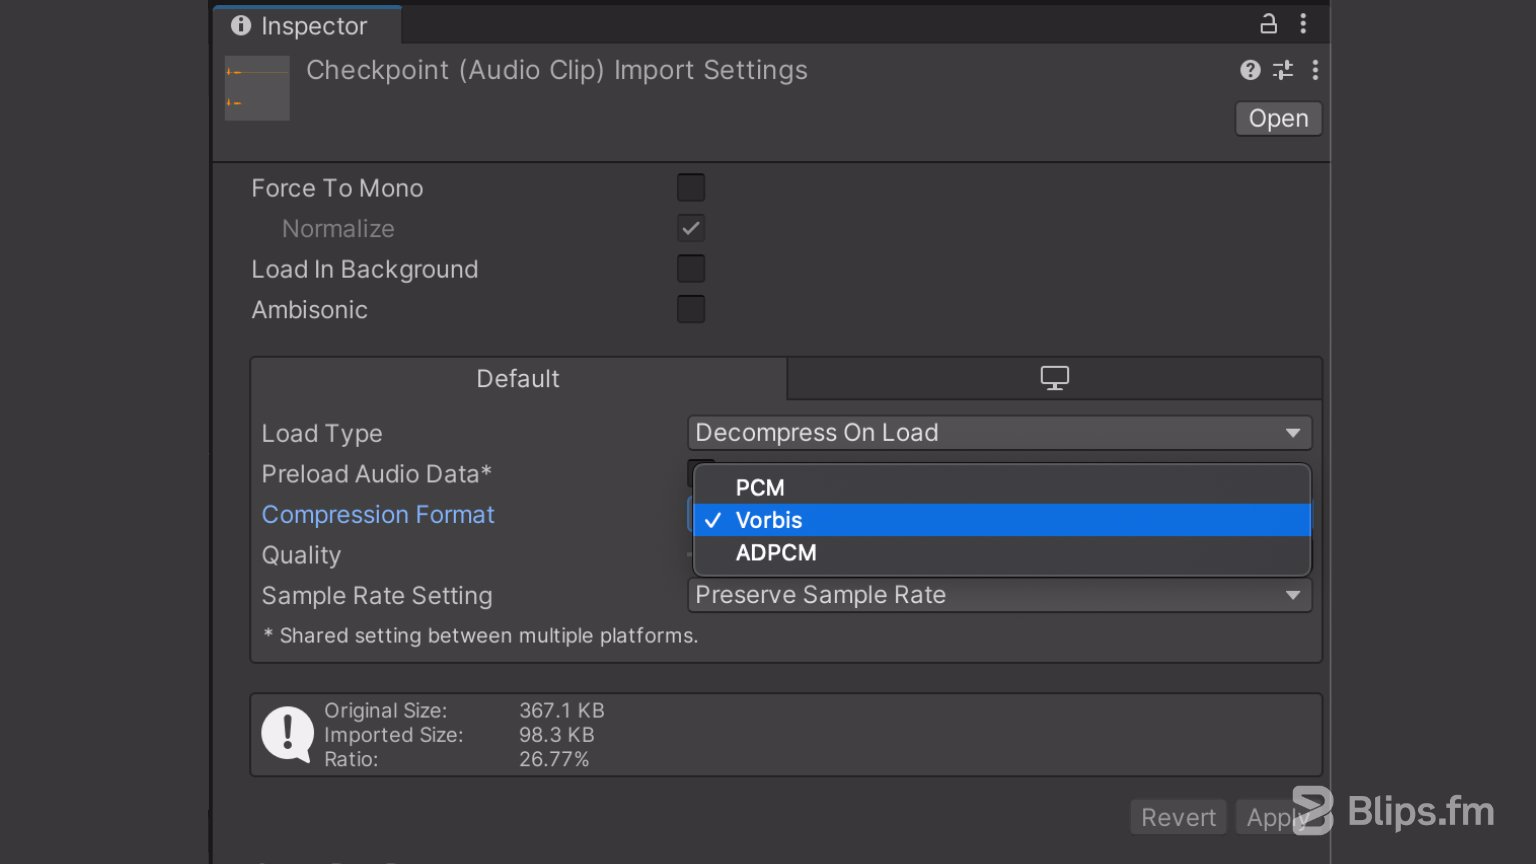
The type of compression is defined by the "Compression Format" option.
This option has three available choices: PCM, ADPCM and Vorbis. Let's check what each of these options means:
PCM
This option means that the audio will be uncompressed which provides for the best quality at the expense of a larger file size.
Vorbis
The compression results in smaller files but with a loss of quality when compared to PCM audio. The amount of compression is configurable via the "Quality" slider.
ADPCM
This format can be useful for sounds that contain a fair bit of noise and need to be played in bulk, such as footsteps, impacts and weapons. The compression ratio makes the files 3.5x smaller than PCM and the CPU usage is much lower than with the Vorbis format. This makes it the preferrable choice for these categories of sounds.
When to use which?
Again, as a general guideline and without taking into account hardware with limited capabilities:
The PCM option is great for short sounds in which we don't want to loose any definition, specially if they sound very clean and noiseless.
Vorbis is generally the most appropriate option for longer sounds like background music, dialog and longer sound effects.
ADPCM is useful for sounds that contain a fair bit of noise and need to be played in large quantities, such as footsteps, impacts and weapons.
Sample Rate Setting
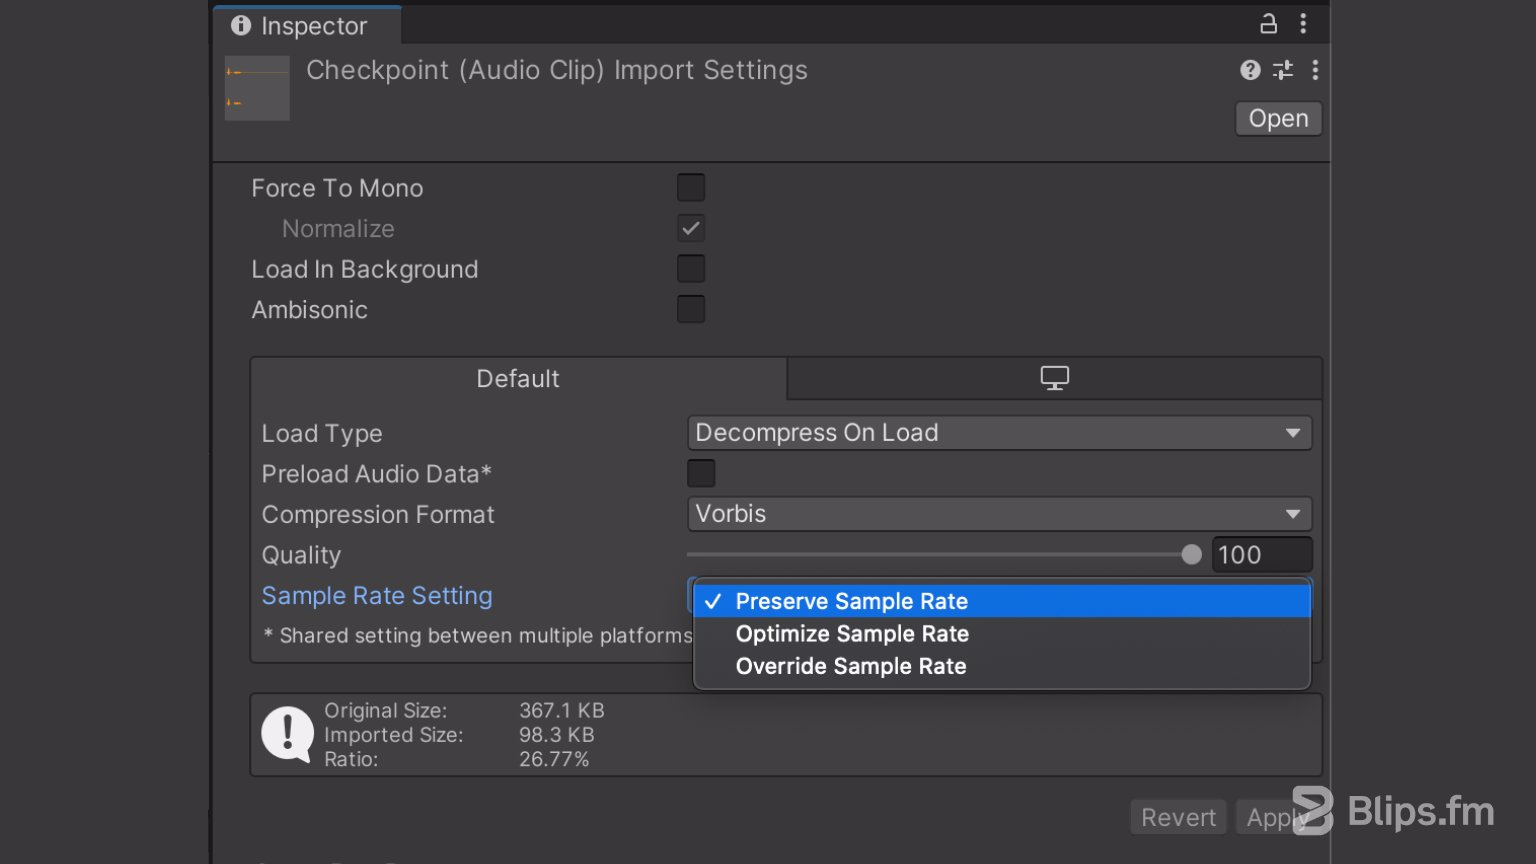
This option presents us with three available choices: Preserve Sample Rate, Optimize Sample Rate and Override Sample Rate. With this option and unless you're an audio expert, I recommend using either the Preserve or Optimise Sample Rate settings. The former being the safest option to avoid potential further quality loss, specially after compression.
Conclusion
Unity's audio import settings can be intimidating for developers who are not familiar with all the audio terms, what they mean and how to make the best choice. I hope that with this article I was able to make it clearer for you. Because there is a lot to be aware of, you can use this article as a quick cheat sheet when dealing with audio tasks during development. By properly choosing the audio import settings, you can optimize your game bundle size, memory usage, and ensure that your audio sounds the way it was intended without any performance loss.
Have any questions or want to share your thoughts about this subject? Leave a comment below!